How to Care for a Tulip: Complete Guide for Healthy Blooms All Year
Wondering how to care for a tulip to keep its blooms healthy? Start by planting the bulbs at the right depth, about 6 to 8 inches deep. Tulips need cool soil, ideally below 55°F, to establish roots before winter hits.
Next, plant tulip bulbs in the fall. Do this 6 to 8 weeks before the first hard frost. This timing helps the bulbs prepare for winter.
Choosing the right location with good drainage and plenty of sunlight is essential for strong growth. Avoid soggy soil, which can rot the bulbs before they sprout.
After flowering, deadhead spent blooms to help the plant save energy. Keep watering the leaves until they turn yellow. This shows they are dying back naturally.
Then, the tulips get ready to rest for next year’s blooms. This stops the bulb from weakening.
Key Takeaways
- Plant tulip bulbs in fall, 6 to 8 weeks before the first hard frost.
- Dig holes 6 to 8 inches deep to protect bulbs from frost.
- Choose a sunny location with well-drained soil for best growth.
- Space bulbs about 4 to 6 inches apart to give roots room to grow.
- Water tulips regularly but avoid waterlogged soil that causes rot.
- Remove faded blooms to prevent seed production and encourage bulb health.
Essential Steps to Care for Tulips for Vibrant Blooms

Start by watering tulips deeply right after planting to settle the soil. Avoid making the soil soggy, as too much water can cause bulb rot. Water when the top inch of soil feels dry.
This usually means watering once a week. This works well in moderate climates.
Fertilize tulips with a balanced, slow-release bulb fertilizer as soon as shoots appear. Use about 1 tablespoon of fertilizer per square foot and mix it into the soil carefully. Feeding once when leaves first emerge helps build strong stems and vibrant blooms.
Keep the soil loose and well-drained around the tulips. This stops water from pooling. It also helps roots spread out easily.
Remove weeds regularly to reduce competition for nutrients and water. Adding a layer of mulch can help hold moisture without keeping the soil too wet.
Look for signs of healthy tulip growth: bright green leaves standing upright and firm flower stems. Yellow or wilted leaves can mean too much water or poor nutrients. This may harm the bulb early in growth.
Watch for these signs closely. Healthy blooms will open fully and show vibrant colors, lasting up to two weeks.
Shriveling leaves or spots on petals often mean pests or disease. Check your plants quickly. Acting fast helps prevent more damage.
Removing unhealthy foliage prevents problems from spreading. Keep an eye on plant growth through the season to catch stress signs early. So you can adjust watering or fertilizing routines.
During blooming, give tulips morning sun with some afternoon shade to protect flowers from heat stress. This balance helps the blooms last longer and keeps plants sturdy. Cooler spots reduce moisture loss, which helps your tulips stay healthy and more colorful.
When and How to Plant Tulip Bulbs for Best Growth
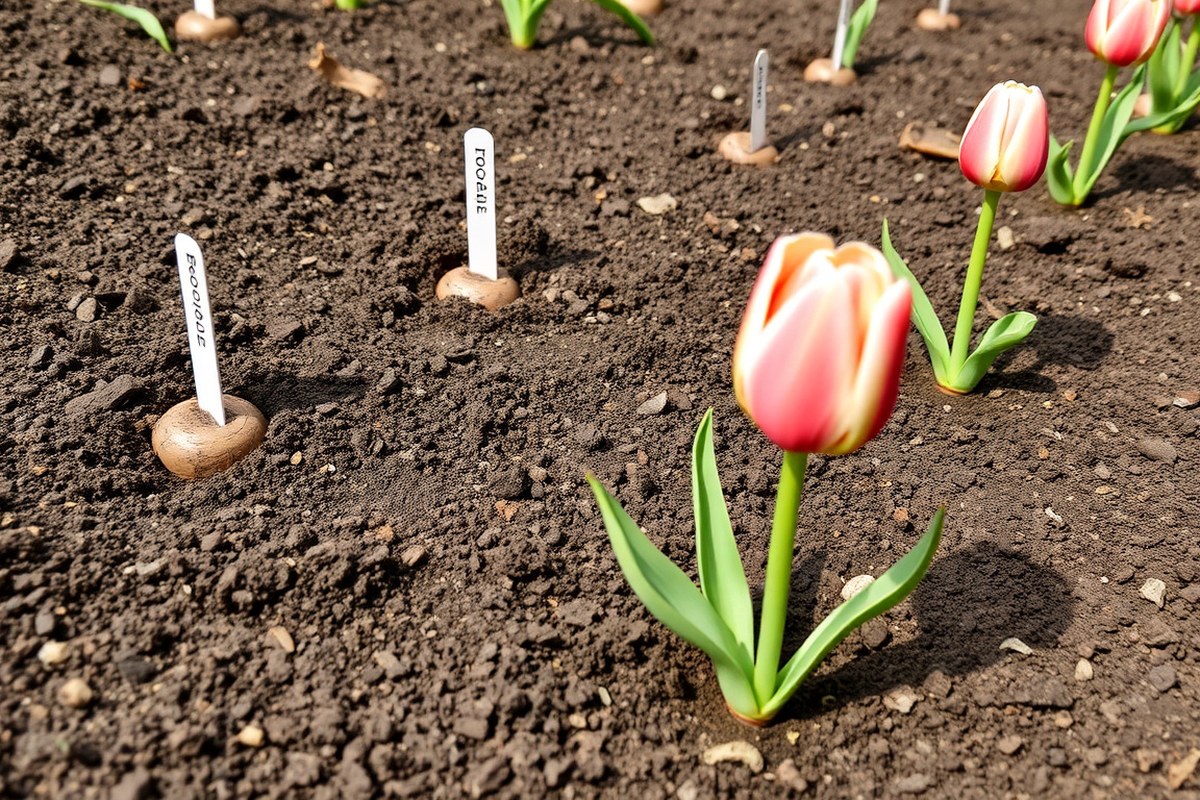
Plant tulip bulbs in fall, about 6 to 8 weeks before frost. Set bulbs 6 to 8 inches deep and space them 4 to 6 inches apart. This ensures bulbs get cold exposure and good soil to bloom well.
Best Time to Plant in Different USDA Zones
Gardeners in cold winter areas (USDA zones 3 to 8) should plant tulip bulbs in fall. Planting should happen after the first frost but before the ground freezes hard. This timing gives bulbs enough cold time to bloom in spring.
In warmer zones (9 and 10), tulip bulbs don’t get enough natural chill. Chill bulbs in the refrigerator for 6 to 8 weeks first. Plant them outdoors in late winter or early spring to match their cold needs.
Preparing Soil and Choosing the Planting Spot
Choose a sunny spot with well-draining soil for your tulip bulbs. Tulips need soil pH between 6.0 and 7.0 and good drainage to avoid bulb rot. Adding compost helps provide nutrients and improves soil texture.
Sketch out your planting area before you dig. Avoid places where water pools or where snow piles heavily. Proper soil prep reduces disease and gives bulbs the environment they need.
Correct Depth, Spacing, and Planting Orientation
Plant bulbs about 6 to 8 inches deep, or three times the height of each bulb. This depth protects bulbs from frost and helps root growth. Smaller bulbs can be planted a little shallower, around 4 to 5 inches.
Space bulbs 4 to 6 inches apart to allow room for leaf growth. Bulbs should be planted pointy side up to help shoots grow straight. Cover bulbs with 2 inches of soil after planting to finish.
Follow these steps for successful tulip bulb planting:
- Choose a sunny spot with well-draining soil and amend with compost.
- Dig holes 6 to 8 inches deep for standard bulbs, less for smaller bulbs.
- Space holes about 4 to 6 inches apart, more if planting in borders.
- Place each bulb pointy side up gently in its hole.
- Cover bulbs with soil, adding 2 extra inches for insulation.
- Water the planting area lightly to settle soil around the bulbs.
- Apply a balanced fertilizer designed for bulbs at planting time.
Don’t plant bulbs upside down; growth slows if they do not face upright.
Optimizing Soil, Light, and Water for Tulip Health
Tulips grow best in well-drained soil with a pH from 6.0 to 7.0. Soil that is clay-heavy or stays wet can cause bulb rot and weak flowers. Adding compost or peat moss to your soil helps drainage and adds nutrients.
These bulbs thrive in full sun for at least six hours daily. Morning sun suits hot areas the most. Afternoon heat can stress tulips.
This timing helps keep plants healthy. Plant tulips where they get morning sun if your garden is partly shaded.
Water tulips right after planting with about an inch deep soaking. During the growing season, keep soil moist but never soggy. Water tulips deeply once weekly starting February during dry weather, unless it rains.
Adjust watering if your soil drains slowly or after heavy rain. Overwatering leads to mushy bulbs and poor flowering. Underwatering causes smaller flowers and shortens the bloom period.
Adding a two-inch layer of mulch around tulips helps retain moisture and keeps soil temperature steady. Mulch also reduces weeds that compete for water and nutrients. Remove mulch after foliage dies back to avoid trapping moisture around bulbs.
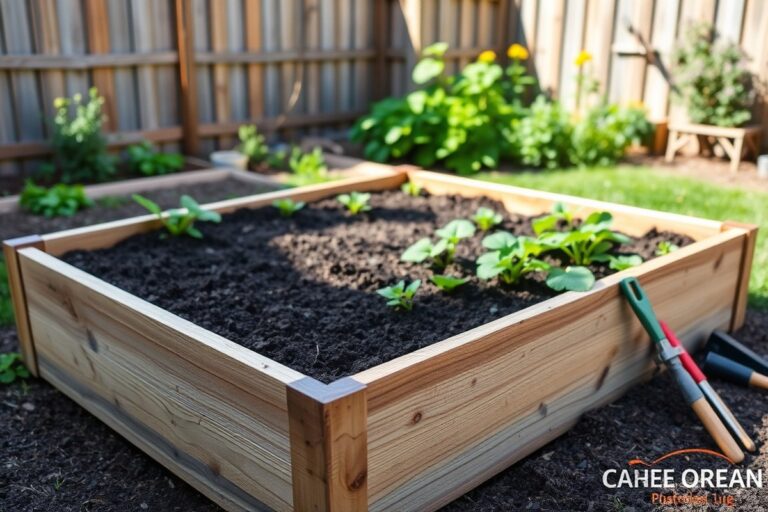
Plant tulips in raised beds or containers with potting soil and compost on clay soil. This improves drainage and prevents soggy conditions. Raised beds may cost about $20 to $50 for materials but save headaches later.
Caring for Tulips After Blooming to Encourage Return Growth
After tulips bloom, don’t cut their leaves right away. The leaves keep feeding the bulb by making food. This food helps the bulb come back strong next year.
Leave or Remove Tulip Leaves After Bloom
Keep the leaves on until they turn yellow and die on their own. Green leaves do photosynthesis, which stores energy in the bulb.
Don’t cut the leaves early. The bulb needs them for energy next year.
Watch for the leaves to wilt and yellow, then you can safely remove them. This process usually takes 6 to 8 weeks after flowering. Clear away dead leaves to prevent pests and diseases.
Fertilizing for Next Season’s Blooms
Fertilizing your tulips after they bloom helps bulbs gather nutrients for the following spring. Use a balanced fertilizer with equal parts nitrogen, phosphorus, and potassium, like 10-10-10. Apply fertilizer once the leaves start turning yellow but before they die completely.
Scatter fertilizer around the plants but avoid direct contact with leaves or stems. Water the soil lightly after fertilizing to help the nutrients soak in. This feeding step encourages strong root and bulb growth, improving next season’s flowers.
When to Lift and How to Store Bulbs
You should lift tulip bulbs every 3 to 5 years to keep blooms healthy and strong. Lift bulbs after the leaves turn yellow. Wait until leaves fully die back.
This happens in late spring or early summer. You need to lift bulbs in warm areas without a cold dormant time. This helps the bulbs bloom again.
Store bulbs where it’s cool and dry. Keep them dark with good airflow. The temperature should be 65 to 68°F (18 to 20°C).
Place them in open containers like mesh bags or paper bags to prevent rot. Before storing, remove excess soil and avoid washing the bulbs to keep them dry.
Here is a checklist for post-bloom tulip care to encourage return growth:
- Keep leaves on until they naturally yellow and die back.
- Apply a balanced fertilizer once leaves start yellowing.
- Remove dead leaves after they die completely to avoid pests.
- When lifting bulbs, wait for the leaves to dry completely and turn yellow.
- Carefully dig up bulbs without damaging them.
- Brush off soil, but do not wash bulbs.
- Store bulbs in a cool, dry, dark, well-ventilated area.
- Replant bulbs in the fall or next planting season.
Choosing and Caring for Tulip Varieties Based on Bloom Time
Tulips come in several main types, each with unique bloom times and care needs. Early, mid, and late-blooming varieties cover spring from March through May in most US zones. Knowing these types helps you plan a garden with continuous color for weeks.
Here is a table showing common tulip groups and their bloom seasons. It also notes typical care points.
These include planting depth and soil needs. Plus, whether the variety often comes back.
| Tulip Type | Bloom Time | Planting Depth | Soil Adaptability | Perennial or Annual |
|---|---|---|---|---|
| Single Early | March to early April | 6 to 8 inches | Prefers well-drained soil | Often perennial with care |
| Darwin Hybrid | Mid to late April | 6 to 8 inches | Adapts to most soils, likes drainage | Generally perennial |
| Triumph | Mid April | 6 to 8 inches | Well-drained soil required | Sometimes annual |
| Parrot | Late April to May | 7 to 9 inches | Needs rich, loose soil | Usually annual |
| Rembrandt | Late April to May | 6 to 8 inches | Prefers sandy, well-drained soil | Annual |
| Botanical (species) | Early to mid March | 4 to 6 inches | Tolerates heavier soil better | Perennial |
Choosing tulips for your garden style depends on bloom time and appearance. Early types like botanical tulips fit naturalized or rock gardens.
Darwin Hybrids offer tall stems and large flowers for formal beds. Parrot tulips suit bold, colorful accents but need richer soil and more care.
Adapt your care by tulip type. Tulips that bloom later usually need deeper planting and steadier moisture to develop buds fully.
Species tulips often return more reliably if left undisturbed in well-drained soil. Annual types may give you stronger first-year blooms but rarely come back.
Plant bulbs at least 6 inches deep. Use rich, well-drained soil for planting. This helps prevent rot and improves bloom quality.
Your garden’s soil plays a big role in which tulip varieties will thrive. Clay or heavy soil works better with species tulips that tolerate these conditions.
Improve drainage by mixing compost or coarse sand when planting hybrids or parrot types. This reduces bulb rot and encourages stronger root growth.
Mixing tulip types gives you flowers on your bed for months. This approach also spreads out care needs, as early bulbs often require less water once mature.
Late types need steady watering to avoid dry buds. You can enjoy a more vibrant garden with planned spacing and timing for each variety’s bloom.
How to Protect Tulips from Pests and Environmental Damage
Tulips can suffer from pests like squirrels, voles, deer, and rodents that dig up bulbs. Aphids and slugs also damage the leaves and flowers. Fungal diseases like tulip fire, caused by Botrytis, can kill leaves and buds fast.
Animals dig or eat tulip bulbs and shoots, especially in fall and spring. Deer tend to nibble on leaves and buds once tulips sprout.
Squirrels and voles dig bulbs out for winter snacks. Without protection, damage lowers your blooms or kills bulbs.
You can block pests and weather threats with physical and natural tools. Use these methods to keep tulips safe and healthy:
- Build a 3-foot-tall wire fence around tulip beds before shoots appear.
- Put wire cages around bulbs to stop digging animals like squirrels and voles.
- Plant tulips with daffodils, which deer and rodents avoid.
- Apply natural repellents like blood meal or garlic sprays near the plants.
- Water in the morning to reduce fungus risk from overnight moisture.
- Plant bulbs 6 to 8 inches deep in cold regions to prevent frost damage.
- Provide afternoon shade in hot areas to stop leaves from wilting.
Planting at the right depth slows frosts that kill bulbs in winter. Morning watering avoids wet leaves overnight, so tulip fire is less likely.
Deer fences may cost $50 to $100 but protect whole spring blooms. Natural sprays need reapplication after rain but keep pests away safely.
Be on the lookout for wilted leaves or holes in petals. That might mean pests or disease.
Catch problems early by checking your tulips twice weekly in spring. These steps help your tulips grow strong and bloom bright year after year.
Steps to Successfully Force Tulips Indoors for Early Blooms
To force tulips indoors for early blooms, chill the bulbs first. Keep them at 35°F to 48°F for 12 to 16 weeks. This chilling period helps the bulbs prepare to bloom inside.
Plant the bulbs in pots filled with good soil. Keep the pots in cool places at the start.
Then move them slowly to brighter spots over time. Controlling temperature and humidity helps the blooms last about two to three weeks indoors.
Pre-Chilling Requirements and Techniques
Tulip bulbs need a cold period to start growing indoors. That chilling simulates winter, triggering the bulb to break dormancy and bloom early.
Put the bulbs in a paper or mesh bag. Store the bags in the fridge at 35°F to 48°F. This keeps the bulbs chilled and ready to grow indoors. Avoid storing near fresh fruits or vegetables because they release gases that can damage bulbs.
Planting Tulips in Containers Indoors
Choose containers with drainage holes and fill them with well-draining potting mix. Tulips prefer slightly acidic to neutral soil with a pH of 6.0 to 7.0 to help roots absorb nutrients.
Plant bulbs with the pointed end up. Cover them with 1 to 2 inches of soil. After planting, water the soil lightly to keep it damp but not soggy.
- Pick a pot at least 6 inches deep with drainage holes.
- Fill pots with quality potting soil mixed with perlite or sand for drainage.
- Plant each bulb 1 to 2 inches deep, pointed side up.
- Lightly water each pot to moisten the soil evenly.
- Place pots in a cool, dark spot at 35°F to 48°F for 12 to 16 weeks.
- After chilling, bring pots indoors to a cooler room between 55°F and 65°F.
- Move pots gradually to a brighter area once shoots appear.
Caring for Forced Tulips for Longer Bloom
Keep indoor temperatures between 55°F and 68°F to extend bloom life. Avoid putting pots near heat vents or direct hot sunlight, which dries out bulbs quickly.
Maintain indoor humidity around 50% to 60% using a humidifier or water tray. Deadhead spent flowers to prevent energy waste and help the plant focus on strong blooms.
Water as needed to keep soil moist but not soggy. Overwatering causes bulbs to rot. So check the top inch of soil before watering again.
Caring for Cut Tulips to Maximize Vase Life and Appearance
Cut tulips last longer when you prepare them right before putting them in a vase. Use sharp, clean scissors to cut each stem at a 45-degree angle.
Cut about 1 to 2 inches longer than your vase requires. This helps the tulips absorb water better and stay fresh longer.
After cutting tulips, wrap them loosely in paper and set in cool water. This helps hydrate them and stops drooping.
Don’t put tulips and daffodils in the same vase. Daffodil sap blocks tulip stems and shortens their vase life.
- Use cool water at room temperature or slightly colder, never hot
- Change the water completely every two days
- Wash the vase with soap before refilling to remove bacteria
- Keep tulips away from direct sunlight and heat sources
- Support the stems with a tall vase to keep flowers upright
- Remove any leaves that fall below the water line to prevent rot
- Check water level daily and add fresh water to keep stems submerged
Replacing the water every 48 hours stops bacterial growth, which causes stem blockage. Use clean water and a clean vase to keep tulips fresh. This can make them last up to 10 days.
Change the water every two days for best results. Keep your flowers in a cool room away from vents or direct sunlight for best results.
Never let tulip stems sit in dirty water; it causes them to wilt faster.
Handling cut tulips gently keeps their petals and leaves intact. Avoid crushing petals when arranging and place the vase where people won’t knock it over. You’ll notice tulips stay upright and vibrant when given daily care and fresh water.
Step-by-Step Action Plan for Tulip Care
Follow this plan to get your tulips growing strong and blooming beautifully. Each step tells you when and what to do.
- Before planting: Choose well-drained soil and a sunny spot. The soil should feel loose and crumble easily.
- Planting time (fall): Dig holes 6 to 8 inches deep and plant bulbs pointy side up. Cover with soil and water lightly; the soil should stay moist but not soggy.
- Early spring: Check soil moisture and water if the top 1 inch feels dry. Tulips need steady moisture to grow strong stems and leaves.
- During bloom: Deadhead faded flowers by pinching off the stem below the bloom. This stops seed production and helps bulbs store energy.
- After bloom: Let foliage die back naturally for 6 weeks before cutting it. Leaves turn yellow and brittle when bulbs have stored enough energy.
- Late summer: Lift bulbs in hot, humid areas if needed. Store tulip bulbs in a cool place. Keep them dry too. Plant them in fall for better blooms next year.
- Early fall: Plant bulbs again or prepare fresh soil to start the cycle. Healthy bulbs with firm skins grow the best tulips.
Frequently Asked Questions
How Often Should You Water Tulips During Their Growing Season?
Water tulips about once a week, keeping soil moist but not soggy. Overwatering or letting soil dry out can harm the bulbs and reduce blooms.
Can Tulip Bulbs Be Left in the Ground over Summer?
Yes, tulip bulbs can stay in the ground after blooming if you don’t cut the leaves. The green leaves feed the bulb for next year’s flowers.
Is It Safe to Move Tulip Bulbs After They Bloom?
It’s best to wait until leaves die back before digging up bulbs. Uprooting bulbs too soon can damage them and reduce next year’s bloom.
What Should You Do If Tulips Have Weak or No Blooms?
Weak or no blooms often mean the bulbs need more sun or nutrients. Avoid cutting leaves early and fertilize after blooming for stronger growth next season.
Can Tulips Grow Well in Pots or Containers?
Tulips do well in pots if bulbs get enough sunlight and soil drains well. Choose deep containers to plant bulbs 6-8 inches deep for healthy roots.
What Is the Best Way to Handle Tulip Bulbs to Avoid Damage?
Handle bulbs gently without dropping or squeezing to prevent bruises or rot. Plant them quickly after buying or chilling to keep them fresh and viable.
Key Points to Remember
Healthy tulip care turns bulbs into strong, colorful flowers year after year. Take the time to care for your bulbs after they bloom. Start by letting leaves die back on their own, it makes a big difference.