How to Create Your Own Compost: Simple Steps for Fast, Rich Soil
How to create your own compost is easier than you might think. Start by gathering yard waste and kitchen scraps like fruit and vegetable peels.
Mix green materials with dry brown items like leaves or shredded paper. This balance helps your compost break down properly.
Pick a spot for your compost that is 3 to 5 feet square. This size helps the compost break down well over time.
The pile needs air to decompose, so turning it regularly will speed the process. Watch for a warm center, that means your compost is working right.
Keep moisture like a damp sponge, not soaked or dry, to help bacteria thrive. Avoid adding meat, dairy, or oily foods as they cause odors and pests. In a few months, your compost turns dark and crumbly, ready for your garden beds.
Key Takeaways
- Use a mix of green (nitrogen) and brown (carbon) materials for balance.
- Keep your compost pile about 3 to 5 feet wide for effective heat build-up.
- Turn the compost when the pile’s center feels warm or 130°F to 150°F.
- Keep moisture similar to a wrung-out sponge to encourage decomposition.
- Do not add meat, dairy, or oily scraps to avoid bad smells and pests.
- Drill small holes in your compost bin for good airflow and faster composting.
How to Create Your Own Compost at Home in Easy Steps

Starting compost at home is simple and fits any space you have. A small pile about 3 feet wide, long, and deep works well if space is tight. You can use bins or tumblers indoors or outdoors.
They help keep your compost neat. This way, your compost stays contained and tidy.
To get going, layering and turning the pile are key. Good compost needs air, moisture, and a mix of materials to break down well. Turning your compost every week or two helps it heat up and speeds up the process.
Follow these easy steps to create and maintain compost that will enrich your garden soil:
- Choose your spot or bin. Pick a sunny or partly shaded spot outdoors or a compost bin for indoor use. Make sure it fits your available space, like a small patio or garden corner.
- Build the base layer. Start with coarse materials like small branches or straw. This helps air circulate and keeps the pile from getting soggy.
- Add compostable materials in layers. Alternate between “browns” like dry leaves and “greens” like food scraps. Aim for a layer 2 to 4 inches thick of each.
- Moisten the pile. Sprinkle water so materials are damp but not soaking. Compost needs moisture to break down well.
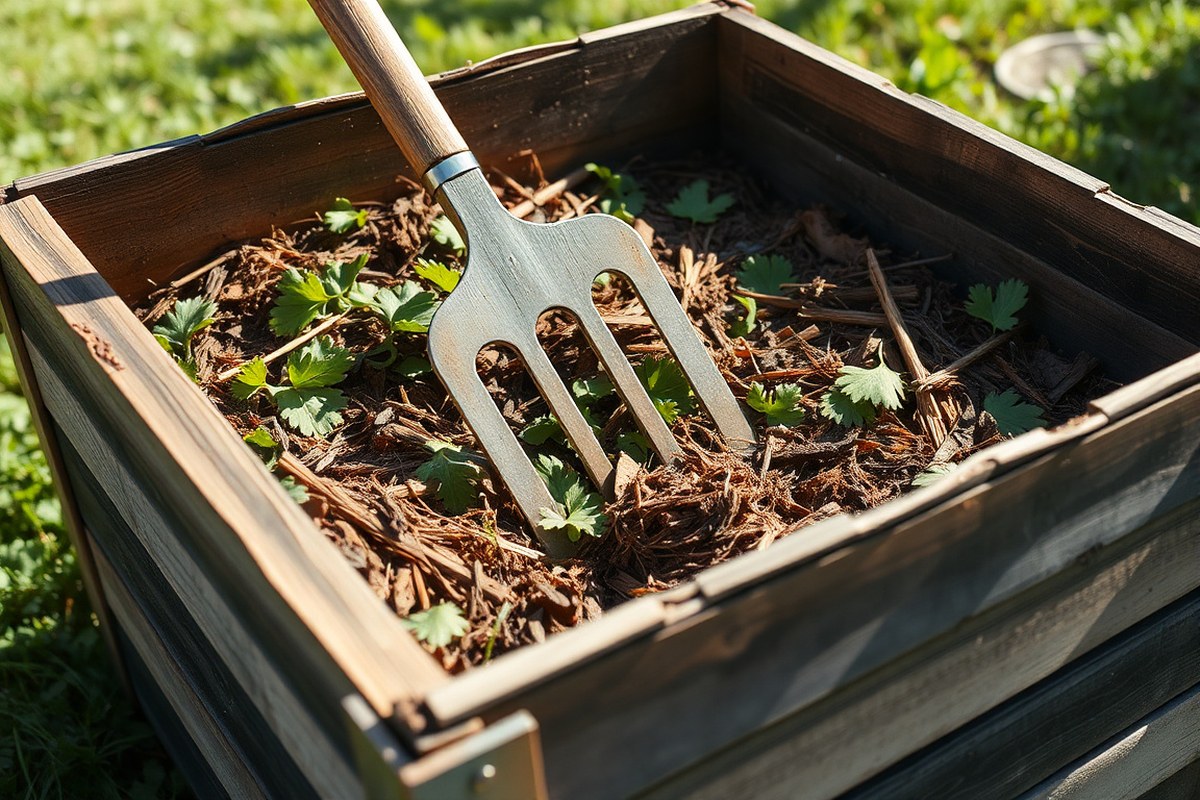
- Turn the pile regularly. Use a garden fork or compost aerator. Turn when the center feels warm or when temperature hits 130°F to 150°F. This happens in about a week or two after starting.
- Keep adding waste gradually. Add new food scraps and yard waste on top of the pile. Cover new layers with “browns” to reduce smell and pests.
- Wait for compost to mature. It takes about four months to over a year depending on conditions. Finished compost looks dark, crumbly, and smells earthy.
- Set up multiple piles if possible.Having two or three piles side by side is helpful. You can fill one pile at a time. The other piles keep breaking down meanwhile. This keeps a steady supply of compost for your garden.
What Materials Can You Compost and What to Avoid

Good compost needs a mix of green and brown materials. Green materials add nitrogen, and brown materials add carbon. Avoid non-compostable items to keep the process healthy and fast.
Green Materials Rich in Nitrogen
Nitrogen-rich materials boost your compost’s temperature quickly. Use fruit and vegetable peels, coffee grounds, and fresh grass clippings from your kitchen scraps. Herbivore manure, such as from rabbits or cows, also supplies essential nitrogen.
Use about one part green to three parts brown material by volume. This mix keeps microbes active and speeds decomposition.
Avoid adding too many greens. Too much moisture can cause a bad smell and slow the process.
Brown Materials Rich in Carbon
Brown materials are the carbon source your compost needs. Dry leaves, straw, shredded newspaper, and sawdust are good examples. These materials help absorb moisture and balance the green nitrogen sources.
Shredding brown materials breaks them down faster and improves airflow in the pile. Layer your compost with about three parts brown to one part green for the best results. This balance prevents your pile from getting too wet or smelly.
- Dry leaves
- Straw or hay
- Shredded newspaper or cardboard
- Sawdust or wood chips
- Twigs and small branches
Too wet and smelly compost means you need more brown materials.
Materials to Exclude from Compost
Some materials cause problems or attract pests, so keep them out of your compost. Avoid meat, dairy, oily foods, and pet waste. These can create odors and attract rodents to your pile.
Also skip diseased plants and invasive weeds. They might survive composting and spread later. Avoid glossy paper and plastics, which don’t break down and harm the soil.
Stay clear of chemically treated wood or plants, as chemicals can harm soil life. Keeping these items out keeps your compost safe and healthy for your garden.
Choosing the Right Composting Method for Your Needs
Hot, cold, and worm composting each offer different speeds, space needs, and care levels. Hot composting acts fast but needs more attention and a bigger pile.
Cold composting takes longer but is hands-off. Worm composting suits small or indoor spaces with gentle maintenance.
Hot Composting for Fast Results
Hot composting heats your pile between 130°F and 160°F. This kills weed seeds and breaks down materials quickly. You need at least a 3-foot pile and regular turning to keep air flowing.
It takes about one to three months to get rich compost this way. You add kitchen scraps and yard waste in layers.
Mixing wet and dry materials avoids bad smells. When the pile cools or becomes too wet, the decay slows.
Cold Composting for Low Effort
Cold composting involves piling scraps and leaves without much stirring. It works well for gardeners who don’t mind waiting.
Compost can take a year or even longer to form. The pile stays cooler because microbes work slowly without extra heat.
You just add scraps over time, letting nature decompose them. It’s low maintenance and easy for beginners.
However, it won’t kill weed seeds or break down tougher materials fast. Location and seasons affect the speed, with faster results in warmer months.
Worm Composting for Indoor Spaces
Worm composting uses red wigglers inside a bin to eat scraps fast. This method is great if you lack outdoor space or want to compost year-round indoors. Worms keep the pile aerated by tunneling and make nutrient-rich castings.
Your bin should have drainage and a tray to catch spills. Keep temperatures between 55°F and 77°F to keep worms happy.
Avoid overfeeding or letting the bin get too wet or hot, or worms may leave. You can add scraps regularly and harvest finished compost in a few months.
How Long Does Composting Take and What Affects the Speed?
Compost usually takes about three to six months to be ready. The exact time depends on how you manage your pile and what materials you use.
Hotter piles break down faster. Cool piles can take longer, sometimes up to a year.
The speed changes based on moisture, temperature, and airflow. Too wet or dry slows decomposition.
So keep the pile damp like a wrung-out sponge. Turning the compost every few weeks lets air in and keeps microbes working well.
Shredding or chopping scraps helps speed things up by increasing surface area. Adding green materials like kitchen scraps gives nitrogen. Brown materials like dried leaves add carbon.
This balance helps compost heat up and break down faster. Heat shows that decomposition is working well. Good compost piles can reach 130°F to 160°F. This heat kills germs and speeds up the process.
Worms and bugs inside help break down materials too, especially if your compost touches the soil. Compost piles on the ground tend to work slower.
Soil organisms help break things down naturally. Even slow piles still make good compost over time.
You’ll know compost is finished when it looks dark, crumbly, and smells like rich earth. It shouldn’t smell rotten or sour. Large pieces should be broken down, though small bits of twigs are okay.
Check for temperature drops. When the pile cools and stops heating after turning, it usually means composting is nearly done. You can also sift the compost; fine texture means it’s ready.
Faster composting needs some effort and attention, but it gives you good soil quicker. Slow composting works too if you prefer low maintenance. The key is balancing moisture, turning for air, and mixing materials well.
How to Maintain and Troubleshoot Your Compost Pile
Bad smells happen when your compost pile is too wet or lacks enough air. This causes the pile to rot and smell sour instead of earthy. Turn the pile often to add fresh air inside it.
Sprinkle in some dry leaves or shredded paper. This helps fix common compost problems.
The compost might slow down if it’s too dry or missing the right mix of materials. Aim for a balance of green scraps like vegetable peels and brown materials like dry leaves.
Add water to keep it as damp as a wrung-out sponge. Turn it every week to speed up breakdown.
Pests and rodents visit compost piles that offer easy food or shelter. Keep food scraps buried under leaves or finished compost. Use a bin with a lid to keep pests away.
You can also wrap wire mesh around the pile. These methods protect your compost from animals.
Too much water makes compost soggy and smelly, while too little stops decomposition. After rain, cover your compost pile with a tarp. Move the pile to a well-drained spot if needed.
This keeps the compost from getting too wet. When dry, add water slowly to your compost.
Mix it well to spread moisture evenly. This keeps the pile active and healthy.
- Turn the pile weekly to add air and speed up composting
- Keep moisture like a damp sponge, add water or dry materials as needed
- Bury food scraps beneath dry leaves or existing compost to deter pests
- Use a cover or enclosed bin to protect your pile from rain and animals
- Avoid adding too many wet scraps without enough brown materials
- Check your compost temperature with a compost thermometer, keeping it between 100° and 140°F if possible
Sprinkle dry leaves or shredded paper on top to reduce bad odors and discourage pests.
Add a thin layer of leaves on top of the pile. Include some wet shredded paper in this layer too. This helps balance moisture and airflow inside.
Watch for any strong foul smells. That’s a sign to turn the pile and add more browns. Regularly checking moisture and stirring will keep your compost healthy and working.
Setting Up Indoor and Outdoor Compost Bins: What You Need
You can set up compost bins indoors or outdoors based on your space and needs. Choose containers that fit well in your area and offer good airflow. Making your own bin from wood pallets helps control your compost.
You can also use a ready-made bin instead of building one. Both options work well for managing composting.
Selecting a Compost Bin or Container
Indoors, pick a container that fits your counter or closet space and has a lid. Plastic bins, metal containers, or buckets work well if they vent air to avoid bad smells. Outdoor compost bins come in plastic or metal forms.
You can also pile compost material directly on the ground. Choose the option that fits your space and needs.
Look for bins that keep pests out but allow air in. Covered compost helps keep moisture balanced. Some bags or buckets with lids and holes also suit small spaces well.
DIY Compost Bin Building Tips
You can build an outdoor compost bin by reusing old pallets or scrap wood. Leave gaps between the boards to let air flow and speed up decomposition. Avoid tightly sealing the bin, or the compost won’t get enough oxygen.
Adding a bottom frame with legs helps keep bugs and rodents away. A simple three-sided box works if you want easy compost access. It lets you turn the compost without trouble.
This design is simple to build and use. This style lets you check and mix materials easily during the process.
Follow these steps to build a basic wooden bin:
- Measure a square area, about 3 feet wide by 3 feet deep, for the base.
- Gather four wooden pallets or 12 slats of scrap wood for walls.
- Stand the pallets or slats upright and attach them to form a box.
- Leave 0.5 to 1 inch gaps between slats for airflow.
- Secure the corners with nails or screws for stability.
- Add a hinged lid or loose cover to keep rain off.
- Place your bin on bare soil to encourage microbes.
Best Locations and Space Considerations
Keep your indoor compost container in a cool spot. Good places are under the sink or inside a pantry. This helps control smell and moisture.
It should be easy to reach but away from heat or direct sunlight. A large container can take up a lot of room. So pick a size that matches the kitchen waste you produce.
Outdoors, choose a level, shady, and well-drained spot for your compost bin or pile. Don’t place your compost bin too close to your house. Keep it away from wooden structures too.
This helps reduce bad smells and keeps pests away. Allow about 3 feet by 3 feet minimum space for your compost.
This size helps the pile turn properly and hold moisture. It supports good composting activity.
The Role of Worms and Microbes in Healthy Compost
Worms are key players in healthy compost. They eat organic scraps and break them down into smaller pieces. This speeds up decomposition and makes the compost richer in nutrients for your garden soil.
Microbes like bacteria and fungi work alongside worms. They chemically break down materials by releasing enzymes. This process turns scraps into humus, the dark, crumbly stuff that plants love.
Adding a little garden soil when you start your compost can help introduce these helpful microbes. You don’t usually need to buy special compost starters or worms. Native worms and microbes will naturally find their way if conditions are right.
Keep the compost moist, about as wet as a wrung-out sponge. This favors worms and microbes, encouraging faster decomposition.
Too little water slows breakdown. Too much can cause smells and kill beneficial life.
Good compost looks dark and smells earthy, not sour or rotten. Stir the pile and add water when it seems dry or slow.
When it gets too wet, add dry leaves or shredded paper. This helps keep moisture balanced for microbes and worms.
For outdoor piles, worms will arrive on their own within days or weeks. Indoor compost bins may need extra worms.
You can buy them cheaply at garden stores. Add them once the pile has some warmth and moisture to keep them comfy.
The activity of worms and microbes varies with temperature. Compost heats up to 100°F as microbes break down materials quickly.
Worms prefer cooler spots. So turning your pile or moving worms around helps them stay active and healthy.
Using Finished Compost Effectively in Your Garden
You know compost is ready when it is dark, crumbly, and smells earthy. No bits of food or leaves should be visible. It should feel cool or just slightly warm, not hot, which shows decomposition is done.
Applying mature compost at the right time helps plants grow strong and healthy. Use it in spring before planting, or in fall to enrich soil over winter. You can add compost right to your garden beds.
It also works well mixed into potting soil. You can spread it as mulch to protect soil.
Using compost as a soil amendment improves texture and nutrient content. It helps sandy soil hold moisture and loosens clay soil for better root growth. As mulch, compost prevents weeds and keeps soil temperatures steady, which protects plants.
- Check that compost is fully decomposed with no recognizable scraps.
- Remove any large clumps or sticks by breaking them up or sifting.
- Spread 1 to 3 inches of compost evenly over garden beds or around plants.
- Mix compost into the soil’s top 6 to 8 inches. Use a garden fork or a tiller to do this. This helps the compost blend well with your soil.
- Water the soil lightly after spreading to help nutrients absorb.
- For potted plants, mix one part compost with two parts potting soil before planting.
- Add compost as mulch by layering about 2 inches around plants, keeping it away from stems.
Use compost within a few months of finishing to keep nutrients fresh and active.
Step-by-Step Action Plan
Follow these steps to start your compost and keep it healthy. Check each phase to see if it’s working well.
- Before you start: Choose your composting method and pick a spot. Make sure your bin has good airflow and drainage.
- Day 1: Add your first layer of brown materials like dry leaves. This helps start the pile with good air pockets.
- Day 2-3: Add a mix of green materials like vegetable scraps and a little water. It should feel like a damp sponge, not soaking wet.
- Week 1: Turn your compost with a garden fork or compost aerator. Check the smell, it should be earthy, not sour or rotten.
- Week 2-3: Keep adding balanced green and brown materials. Turn the pile every few days to keep it aerated and warm.
- After 4 weeks: Look for dark, crumbly compost and worms working inside. This means your pile is breaking down well.
- Week 6-8: Harvest finished compost from the bottom if it’s ready. Use it in your garden beds or pots for healthy plants.
- Ongoing: Keep adding your kitchen scraps and yard waste. Adjust moisture and turning if the pile smells or slows down.
Frequently Asked Questions
How Large Should My Compost Pile Be for a Small Garden?
Aim for a compost pile about 3 to 5 feet square. That size holds enough materials to break down efficiently without taking up too much space.
Can I Use Pet Hair in My Compost?
Yes, pet hair is compostable because it’s rich in nitrogen. Add it in small amounts to keep your pile balanced.
How Does Weather Affect Composting Speed?
Cold weather slows composting because microbes work slower. Turning your pile more often can help speed it up in winter.
Is It Okay to Add Weeds to My Compost?
Only add weeds if they haven’t gone to seed. Otherwise, the seeds might sprout later in your garden.
How Often Should I Water My Compost Pile?
Keep your compost moist like a wrung-out sponge. Too wet or too dry slows the breakdown process.
Can I Compost Meat Scraps Safely at Home?
Meat scraps aren’t recommended for most home composts. They attract pests and require special systems to decompose safely.
Final Thoughts
Making your own compost takes a bit of attention but really pays off. Start with fresh materials and keep turning the pile regularly. Grab some kitchen scraps today and begin your compost journey for healthier soil and plants.