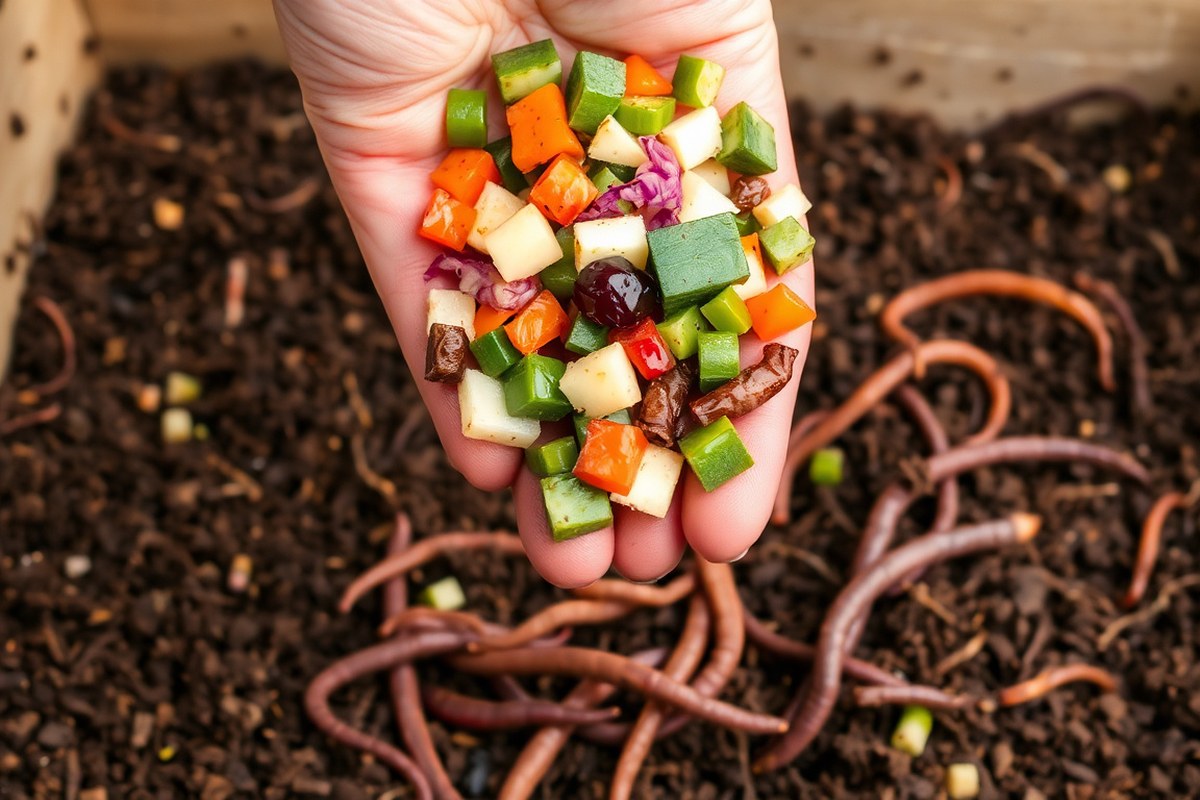
What to Feed Earthworms: Safe Foods, Feeding Tips, and Troubleshooting Guide
Wondering what to feed earthworms? The easiest answer is kitchen scraps. Worms love vegetable peels, coffee grounds, and crushed eggshells.
These foods provide nutrients and break down quickly for the worms to eat. Avoid adding meat, dairy, or oily foods because they attract pests and can harm the worms.
Keep citrus peels to less than 10% of feed. D-limonene in citrus can stress worms and drop the bin’s pH.
Dry citrus peels on a tray for a day before adding them. Also, avoid spicy or salty foods, as these can irritate the worms.
Give your worms small food amounts every 7 to 14 days. Begin new setups with roughly one ounce of chopped scraps for every 100 grams of worms.
This helps avoid overfeeding and maintains a healthy bin environment. Monitor moisture levels to prevent mold or odors, feeding less if the bin feels too wet.
Key Takeaways
- Feed earthworms every 1 to 2 weeks for best results.
- Start new worm bins with small amounts of food every 5, 7 days.
- Use kitchen scraps like vegetable peels and coffee grounds.
- Limit citrus peel to under 10% of total food scraps.
- Bake and crush eggshells before feeding to provide calcium.
- Freeze kitchen scraps overnight to reduce pests before feeding.
What Foods Are Safe and Beneficial for Earthworms?
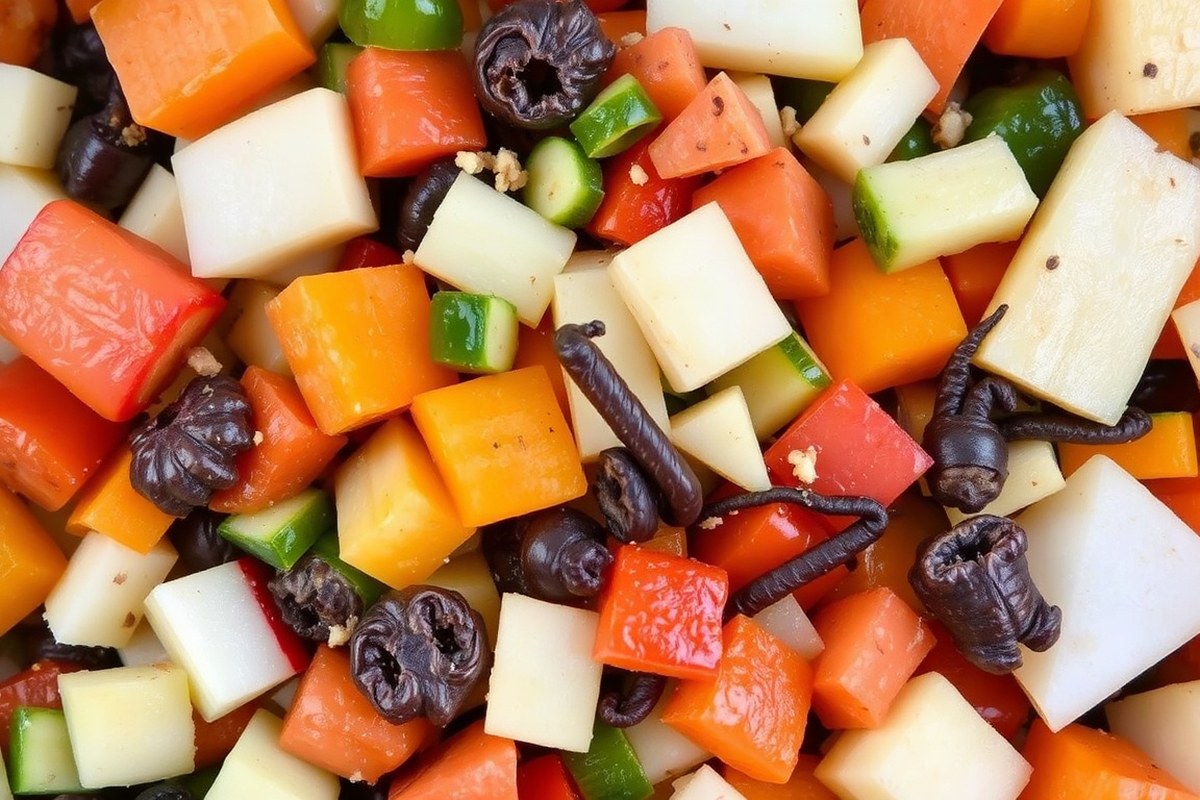
Earthworms eat many kinds of fruit and vegetable scraps. They love banana peels, apple cores, lettuce, carrots, and melon rinds. Chop these into small pieces to help worms break them down faster.
Used coffee grounds and tea leaves are great for worms. Make sure tea bags don’t have plastic or staples before adding them. Keep coffee grounds at less than 12% of the total bedding to avoid any problems.
Worms need calcium for healthy growth and pH balance. Crushed and rinsed eggshells make an easy calcium source. You can also use other natural grit like azomite if you have it.
Grains like plain rice, pasta, or bread are safe in small amounts. Avoid grains with sauces or butter to prevent mold and pests. Paper products like shredded cardboard, newspaper, or egg cartons work well.
They give good bedding for the worms. These products also help balance the worm bin.
| Feed Generously | Feed in Moderation | Notes |
|---|---|---|
| Fruit peels and cores, vegetable scraps, melon rinds, pumpkin | Potato peels (some sprout) | Chop or freeze to speed decomposition |
| Spent coffee grounds and paper filters | Keep coffee <12% of total bedding | Not acidic once brewed, a common myth |
| Crushed eggshells | , | Calcium and natural pH buffer |
| Shredded corrugated cardboard | , | Great for bedding and balance |
Citrus peels can stress worms if you add too many. Keep citrus under 10% of what you feed. Dry citrus peels on a tray for a day before adding them to the bin.
Worms thrive on a mix of green scraps and brown bedding. Adding a variety of these foods creates a balanced diet. It also helps keep your worm bin healthy and free from odor.
How Much and How Often Should You Feed Earthworms?

Feed your earthworms every one to two weeks for best results. Start with about half their combined weight in food per day. If your worms weigh one pound, feed them half a pound of scraps.
Feed every week or every two weeks depending on your worm activity. Change the amount if food stays uneaten.
As your worm population grows, increase food amounts to match their weight. Check the bin regularly for leftover food after two weeks. Uneaten scraps mean you’re feeding too much, so cut back a bit next time.
Bury scraps in small pockets around the bin. This helps worms find food more easily. It also cuts down on bad smells.
New worm bins need smaller, less frequent feedings because the population is small. Feed one-quarter pound of food for each pound of worms. Do this every two weeks during the first month or so.
Adjust feeding as worms grow and eat more. Once your bin matures and worms multiply, speed up to weekly feedings and increase quantities. Watch your bin’s conditions and worm activity to adjust the schedule as needed.
Worms near the lid or quick rotting food means less feeding is needed. Cut back on food amounts to keep the bin healthy.
Begin by giving scraps weighing half as much as your worms every week or two. Watch your worms and leftovers to adjust feeding. Too much waste means reduce food amounts.
How to Prepare Worm Food for Best Results
Preparing worm food properly helps earthworms digest scraps faster and stay healthy. Chopping, drying, freezing, and covering food with bedding all make a big difference. These steps reduce odors, pests, and harmful substances while speeding up composting.
Chopping and Size Recommendations
Earthworms swallow whole scraps, so smaller pieces work better. Chopping food into pieces about 1/4 to 1/2 inch speeds decomposition. Tiny bits expose more surface area for microbes, which break down foods faster.
Large chunks slow down digestion and can attract pests. Soft foods like banana peel break down easily when chopped finely. Tougher items like carrot or potato skins need smaller cuts to soften quickly.
Try blending or pulsing scraps in a food processor for very fast composting. The smaller the pieces, the quicker your worms will enjoy their meal.
Drying and Pre-Treating Citrus Peels
Citrus peels can harm worms because of toxic oils like d-limonene. Letting peels dry for one to two days reduces this risk. Drying on a tray allows some oils to evaporate before feeding.
Keep citrus scraps under 10% of the total feed to avoid acidity problems. Using dried, crumbled citrus also lets worms handle them better. Avoid feeding fresh, wet citrus peel directly.
Freezing Scraps to Kill Pests
Freezing scraps for at least 24 hours kills fruit fly eggs and other pests. It also helps break down cell walls in food, speeding microbial activity. Thaw scraps before feeding so worms don’t get cold shock.
Freeze when you have leftovers to store or suspect pests in your scraps. Frozen-thawed food gets softer and easier for worms to digest quickly. This method can cut down on unwanted bin visitors.
Mixing Feed with Bedding Material
Cover fresh scraps with 1 to 2 inches of bedding. It hides food from flies. This also helps reduce smells in your worm bin.
Pull back bedding in one section before adding scraps, then cover them again. Bedding doubles as carbon-rich food and keeps moisture balanced.
Mix food well with moist bedding to keep a healthy environment. Avoid leaving scraps uncovered to prevent pests and anaerobic spots. Regularly add bedding after feeding to maintain good airflow and worm comfort.
- Chop food scraps into 1/4 to 1/2 inch pieces using a knife or food processor.
- Use citrus peels by spreading them on a tray. Let them dry at room temperature for 1 or 2 days.
- Freeze meatless kitchen scraps for at least 24 hours to kill pests and soften food.
- Thaw frozen scraps before adding them to your worm bin.
- Pull back bedding in a single quadrant to create a feeding spot.
- Add chopped, dried, or thawed scraps into the feeding area.
- Cover scraps immediately with 1 to 2 inches of moist bedding material.
- Repeat weekly, rotating feeding spots to avoid souring the bin.
How Feeding Differs by Worm Species and Setup
Earthworm feeding depends on the species and your setup. Composting worms like red wigglers eat different things than garden earthworms do. Your feeding style also shifts if you’re using a worm bin, outdoor bed, or stacking trays.
Composting Worms (Red Wigglers)
Red wigglers eat decaying food scraps and organic matter on the surface. They do not actually eat the food itself but the microbes breaking it down. These worms prefer shredded vegetable scraps, coffee grounds, and crushed eggshells.
They can consume about half their weight daily. But start slow with one or two ounces of food per pound of worms each week. Wait to add more until the previous food mostly disappears to avoid bad smells or pests.
Garden Earthworms and Nightcrawlers
Garden earthworms and nightcrawlers burrow through soil eating organic matter mixed with soil particles. They don’t rely much on fresh scraps but digest leaf litter and composted material underground. Their diet is less about kitchen scraps and more about soil health and natural debris.
They thrive on a steady supply of natural materials like fallen leaves and decomposed plants. Feeding scraps outside isn’t needed for them.
It may attract pests or animals. Better to feed them indoors or in controlled beds.
Feeding in Different Worm Systems
Worm bins with red wigglers need controlled feeding to avoid overloading. Add food once the last batch is mostly gone, roughly weekly. Keep moisture and temperature steady for best results.
Outdoor worm beds get natural food sometimes. They still need chopped leaves or composted scraps added sometimes.
This helps keep food supply steady. Feeding here is less hands-on and more about supporting the soil ecosystem.
Stacking tray systems like the Worm Factory 360 let you rotate trays as worms move up. Feed in the bottom tray and move it up when it’s mostly finished. This natural rotation helps prevent overfeeding and keeps worms active.
Here is a comparison of worm species and setups. It helps you match feeding to your system. Use it to find what works best for you.
| Worm/Setup Type | Diet Focus | Feeding Frequency | Typical Food |
|---|---|---|---|
| Red Wigglers (Eisenia fetida) | Microbe-rich decaying kitchen scraps | Every 5-7 days | Shredded veggies, coffee grounds, eggshells |
| Garden Earthworms/Nightcrawlers | Soil mixed with leaf litter and decomposed matter | Occasional, natural soil input | Leaves, compost, natural debris |
| Worm Bin | Food scraps in small manageable amounts | Weekly, scaled to population | Kitchen scraps shredded and moist |
| Outdoor Worm Bed | Natural organic matter with supplemental feeding | As needed, less frequent | Leaves, compost, occasional scraps |
| Stacking Tray System | Layered feeding with tray rotation | Feed bottom tray, move trays every 1-2 months | Balanced kitchen scraps placed in bottom tray |
Choosing your worm species and setup first makes feeding easier. Matching the food type and schedule improves worm health and compost quality.
Overfeeding or wrong food can cause pests and smells. So always adjust by observation and worm activity.
Environmental Factors That Affect Feeding Success
Earthworms eat best between 55°F and 77°F (13°C to 25°C). Their activity drops when it gets colder, so they eat less in winter. Keep your worm bin where it won’t get too cold.
Good spots are indoors or a sheltered garage. Worms need steady warmth to stay active.
Moisture is key because worms breathe through their skin. They need the bedding to be moist like a wrung-out sponge, not soaking wet or dry. Too much water suffocates them; too little slows their feeding and digestion.
Worms like the bedding pH slightly acidic to neutral, around 6.0 to 7.0. Worms get stressed and eat less if pH is wrong. Both acidic and alkaline extremes cause trouble for them.
You can control pH by adding crushed eggshells. Shredded cardboard also works and helps trap moisture. Both improve conditions for your worms.
Cooler temps and dry bedding slow worm metabolism and eating. Warm, moist conditions speed it up.
That’s why you’ll see more feeding when temperatures are stable and moisture is balanced. In winter, feed less often because they’re less active.
Check your bin regularly for dark, crumbly castings left from old food. When most food is gone, it’s time to feed again. Don’t feed your worms too much, especially when starting.
Leftover food can cause bad smells and pests. Feed small amounts and watch how fast they eat.
Keep the worm bin bedding damp but not soggy, too much water can drown earthworms fast.
Signs You Are Feeding Earthworms Correctly or Wrongly
Active earthworms wriggle through the bedding and consume food quickly. You’ll see few leftover scraps after a day or two.
The bin should smell earthy, not sour or rotten. Worms climb the walls mainly when the bin is too wet, too dry, or overcrowded.
Bad smells like sour or ammonia odors mean feeding problems. An unpleasant smell usually signals overfeeding or poor airflow.
Uneaten food piling up for several days is a warning. Scraps left for over 3 days mean you should feed less now.
Look for mold on leftover food as a sign food isn’t breaking down well. Mold can harm worms if allowed to spread widely.
Spotting mold means stop feeding worm scraps for one or two weeks. Let worms finish existing scraps before adding more.
- Worms active and bedding moist with no sour odor means good feeding
- Leftover food visible more than 2-3 days means reduce feeding
- Strong sour or ammonia smells require immediate feeding pause
- Worms climbing walls in the daytime indicates stress or poor bin conditions
- Mold growth on scraps signals feeding halt and bin aeration needed
- Ideal temperature for activity is 55, 77°F (13, 25°C); adjust feeding if cooler
- Start fresh bins with small food amounts; increase feeding slowly over weeks
You can test feeding by watching leftover scraps. Disappearing scraps within 48 hours shows your worms eat just right.
Stop feeding for a week if scraps pile up or smell bad. When worms climb bin sides, adjust moisture and feeding.
Say you have one pound of worms in your bin. Feed up to half a pound of scraps each day. Feeding should reduce or stop when temperatures fall below 55°F. These signs keep your worms healthy and compost moving.
How to Fix Overfeeding and Worm Bin Issues
Overfeeding stresses worm bins by causing leftover food buildup and bad odors. Worms may try to escape or die when food rots.
Pest issues can rise. The fix involves stopping all feedings, improving air flow, and letting worms clean up.
Pause feeding for 3 to 7 days after spotting leftovers or mold. This rest helps microbes break down excess food and reduces harmful bacteria. Meanwhile, keep the bin moist but not wet to avoid oxygen loss and worm suffocation.
Good airflow prevents foul smells and mold growth. Stir the material gently or add dry bedding like shredded paper. This helps dry out soggy spots and brings oxygen back, which worms need to recover.
- Remove any large uneaten food pieces by hand to reduce rot.
- Check moisture levels; the bin should feel like a damp sponge, not soaking wet.
- Fluff or gently mix the bedding to boost air circulation inside the bin.
- Add dry, carbon-rich materials such as shredded newspaper or dry leaves if the bin is wet.
- Stop feeding completely and cover the bin loosely to keep light out but allow airflow.
- Wait 3 to 7 days before feeding a small amount again, watching worm behavior closely.
- If worms still try to escape or die, move them to a fresh, clean bin with proper moisture and bedding.
Mold and pests thrive when food sits too long. Don’t add new food until leftovers disappear. Clean bins or replace bedding if pests appear.
Worm escapes usually mean poor conditions. Checking moisture and stirring bedding often avoids this. Fresh bedding shrinks problem spots and comforts the worms.
Commercial and Homemade Worm Food Options
Commercial worm foods and homemade recipes both work well for feeding earthworms. Commercial feeds offer convenience and balanced nutrition. Homemade worm food gives you control over both ingredients and cost.
This makes it a smart choice for regular use. You can also tweak the recipe to suit your needs.
Types of Commercial Worm Food
Commercial worm foods usually come as pellets or crumbles. They combine dried plant matter, minerals, and sometimes beneficial microbes. These feeds cost about $10 to $15 per pound.
They can last several months. How long depends on your worm population size.
They provide consistent nutrition, especially when your usual fruit and vegetable scraps are scarce. These feeds help maintain worm health, support growth, and boost reproduction rates. Many brands include added calcium, like crushed eggshell, which worms need for good development.
Easy Homemade Worm Food Recipes
You can make simple worm chow by mixing dry ingredients. Use crushed oats, powdered cornmeal, and ground eggshells. These ingredients are easy to find.
A basic recipe uses 1 cup oats, ½ cup cornmeal, and 2 tablespoons crushed eggshells. Mix these together well. This mix feeds your worms effectively.
For extra fiber and nutrition, add small bits of cotton or wool scraps. But make sure they’re 100% natural fibers with no blends. Store this mixture in an airtight container.
Sprinkle 2 to 3 tablespoons over your bin each week or two. Use it as a supplement to regular food.
This recipe stays fresh for months and costs less than commercial feeds. Making your own feed lets you adjust ingredients based on what your worms prefer. You can also use what you have on hand.
Change it anytime for best results. Introducing crushed eggshells helps worms grow and reproduce better by adding calcium.
Benefits of Supplementing Worm Diets
Natural food scraps alone don’t always meet every worm nutrient need. Commercial or homemade feeds fill nutrition gaps. This is especially true in winter or dry spells.
Those are times when kitchen scraps run low. They keep worm populations stable and active during these lean times.
Supplementing feeds helps balance moisture and acidity in the bin. This prevents mold growth and foul odors. Your worms stay healthy and happy this way.
Adding worm chow gradually helps worms adapt without shocking their environment. It supports faster composting and larger worm batches for your garden.
Only supplement when scraps are scarce. Too much feed can cause bin problems like odor or pests.
Step-by-Step Action Plan for Feeding Your Earthworms
Feed your worms right to keep them healthy and your bin thriving. Follow these quick steps to start strong and avoid common feeding mistakes.
- Before you start: Set up your worm bin with bedding like shredded paper or coconut coir. This keeps worms comfy and ready to eat.
- Day 1: Add a small handful of chopped vegetable scraps. Check if worms quickly move toward the food, showing interest.
- Week 1: Feed once or twice, keeping scraps below one-third of bin size. Watch for smells or waste piling up, signs of overfeeding.
- Week 2: Mix in crushed eggshells to balance food acidity. Worms that are active and have moist bedding mean you feed correctly.
- Week 3: Try adding a small portion of coffee grounds. Worms eating well without bad smell means you can feed that often.
- Week 4: Reduce feeding if you see leftover scraps or strong odors. Adjust the amount to smaller portions until the bin clears faster.
- After 1 month: Harvest worm castings while feeding fresh scraps. Healthy worms and no bad smells mean your routine works.
Frequently Asked Questions
Can You Feed Earthworms Cooked Food?
Avoid cooked foods for earthworms because they can attract pests. Cooked food also breaks down too quickly and may harm worms in your bin.
Is It Okay to Feed Earthworms Dairy Products?
Do not feed earthworms dairy, as it can cause odor and harmful bacteria. Dairy products can upset the worm bin environment and discourage worms from staying.
Do Earthworms Eat Grains Like Rice or Bread?
Avoid feeding earthworms grains like bread or rice often, as they mold fast. Small amounts might be okay. But they can mess up bin moisture and attract pests.
Can You Feed Earthworms Shredded Paper or Cardboard?
Shredded paper and cardboard work well as bedding and help worms digest food. Use corrugated cardboard pieces in moderation and avoid glossy or colored ink paper.
Is Feeding Earthworms Only Fruit Scraps Enough?
Feeding worms only fruit scraps isn’t ideal because they need a mix of food types. Include vegetable scraps and paper to balance nutrition and bin health.
Will Adding Worm Food Supplements Improve Worm Growth?
Worm food supplements can help if your scraps lack nutrients but aren’t required. Focus on varied kitchen waste first; supplements are extra support if needed.
Wrapping Up
Feeding earthworms carefully keeps them happy and your compost healthy. Start with small, safe food amounts and watch how your worms respond. Try feeding today and see how your worm bin improves in a week.