

What Should You Put in a Compost Pile? A Complete Guide for Balanced, Fast Composting
Start your compost pile with a good mix of brown and green materials. Browns include dry leaves, straw, shredded cardboard, and paper towels. Greens cover kitchen scraps like fruit and vegetable peels, fresh grass clippings, and coffee grounds.
This balance provides carbon from browns and nitrogen from greens, helping microbes break down waste efficiently. Aim for a pile about 3 feet wide, deep, and tall. This size keeps enough heat to speed decomposition.
Keep your compost moist but not soaked. Water it lightly if it feels dry, like a damp sponge. Turn the pile every one to two weeks with a pitchfork to add oxygen and avoid bad smells.
Turning spreads heat evenly, killing weed seeds and harmful bacteria. Over time, the pile shrinks, turns dark and crumbly, and smells earthy. This means your compost is ready to enrich garden soil.
Key Takeaways
- Layer brown and green materials to keep your compost balanced.
- Make your pile at least 3 feet by 3 feet by 3 feet.
- Keep the pile damp, like a wrung-out sponge, not soaking.
- Turn the compost every 1 to 2 weeks to add oxygen.
- Use a pitchfork for easy, effective turning.
- Keep the pile temperature between 130°F and 160°F for fast compost.
Which Materials Are Safe and Effective in Compost Piles?

You can safely put two main types of materials in your compost: greens and browns. Greens include nitrogen-rich items like food scraps, grass clippings, and fresh plant trimmings. Browns are carbon-rich materials such as dry leaves, shredded cardboard, and paper.
Avoid composting meat, dairy, and oils. These materials produce bad smells, attract pests, and slow down decomposition. Human and pet waste can carry harmful germs.
Avoid adding these to your home compost. They can contaminate the pile and cause health risks.
Paper and cardboard can be composted safely if you shred or tear them into small pieces. This helps them break down faster and prevents clumping. Make sure these are clean and free from shiny coatings or plastic.
Preparation is key to compost success. Layer 2 inches of brown materials first to add bulk and air. Then add green materials in smaller amounts to create balance.
Keep the pile damp but not soaking wet. Turn it every one or two weeks.
| Material Type | Why to Exclude | Examples |
|---|---|---|
| Animal byproducts | Create foul odors and invite pests | Dairy products, bones, meat, fish |
| Human and pet waste | Introduces harmful pathogens that survive most home compost | Cat or dog litter |
| Foods rich in fat and oil | Block oxygen, killing microbes and attract pests | Mayonnaise, peanut butter, salad dressing, vegetable oils |
Aim for about three parts brown materials to one part green by volume. Piles mixed this way get very hot, between 130°F and 160°F. Such heat helps break down the materials fast and kills many pathogens and weed seeds.
Watch your pile for signs of imbalance. Too much nitrogen causes ammonia smells and excess wetness. Add dry leaves or shredded cardboard to fix it.
Rotten or sulfur smells mean the pile needs air. Turn the compost and add more bulky brown materials to fix this.
How to Balance Greens and Browns for Optimal Composting
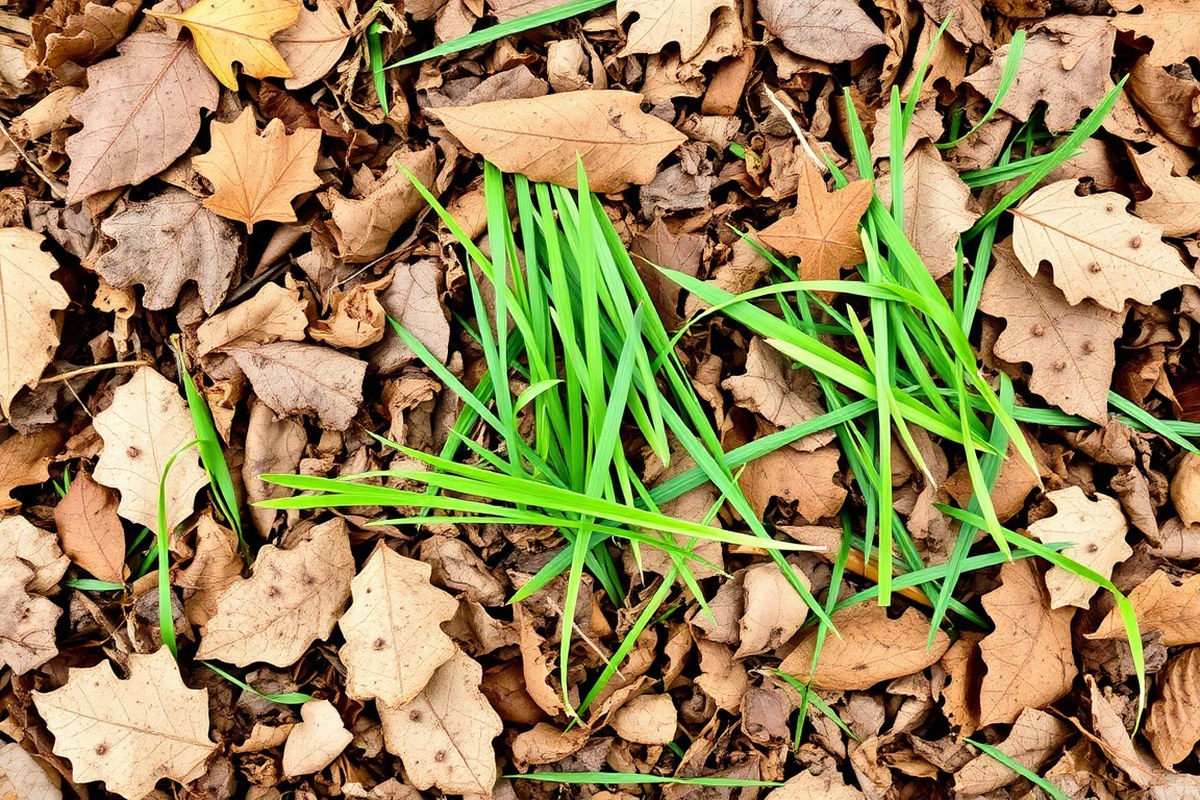
Balancing green and brown materials in your compost pile ensures strong microbial activity and fast breakdown. Use about two to three parts brown materials by volume for every one part green. Keep your pile at least 3 feet wide, deep, and high.
This size holds heat well and speeds composting. Expect it to finish in 2 to 3 months.
Understanding Carbon-to-Nitrogen Ratio
Carbon-rich browns provide energy to microbes, while nitrogen-rich greens support growth. Aim for a C:N ratio between 25:1 and 30:1 to create a healthy environment for microbes. Too many greens cause smell and sogginess; too many browns slow down decomposition.
For example, dried leaves have a high carbon ratio of 60:1. Fresh grass clippings have about 17:1. Mixing these helps get closer to the ideal balanced ratio.
Volume Counts More Than Weight
Use volume instead of weight when mixing greens and browns. Two to three parts by volume of browns to one part green works well. Browns are lighter and fluffier, so measuring by weight can give inaccurate results.
Layer your pile by adding greens first, then topping with browns. This helps reduce odour and keeps the pile balanced throughout the process.
Checklist for Mixing Compost Materials
Here’s a checklist to help you keep your compost balanced and effective:
- Start with a base layer of coarse browns like small twigs or shredded cardboard.
- Add green materials such as kitchen scraps and fresh grass clippings in moderation.
- After each green layer, add a 2 to 3 inch brown layer. Use dry leaves or sawdust for the brown layer. This helps keep the pile balanced.
- Ensure the pile is moist but not soaking wet before turning or adding new layers.
- Check the pile’s temperature; it should reach 130°F to 150°F within a few days.
- Turn the pile every 1 to 2 weeks to aerate and mix materials.
- Keep your pile at least 3 feet wide, deep, and tall. This size helps maintain good heat for composting.
Following these steps encourages microbes to break down your materials quickly and safely.
Ideal Compost Pile Size and Shape
Compost piles need the right size to stay warm and manageable. Aim for 3 feet wide, deep, and high. Smaller piles cool too fast; larger ones get hard to turn.
This size holds enough mass to reach and maintain temperatures above 130°F. High heat kills weed seeds and harmful bacteria. Space is limited?
Choose a compost bin that has good airflow. Manage smaller piles with care to keep things working.
Always cover fresh greens with browns to stop bad smells. This also keeps the carbon to nitrogen ratio balanced.
Step-by-Step Guide to Starting Your Compost Pile Correctly
Start your compost pile by layering different materials carefully. Pick the right spot for good air and sunlight. Add water, but only enough to keep it damp, not soaked.
You need layers that help air and moisture move through the pile. The location helps keep it moist and easy to turn, which speeds up decay.
Choosing the Right Outdoor Space
Pick a level, shady spot with good drainage. Avoid areas that get flooded or stay too dry. Keep your compost near your garden or kitchen.
This makes adding scraps easier. You can also turn the pile more often.
The pile should be at least 3 feet wide, deep, and tall. Smaller piles don’t keep heat well and break down slowly. Bigger piles trap heat that helps kill bad bacteria and speeds up decomposition.
Building a Coarse Base Layer
Start with an 8-inch layer of coarse browns like twigs, straw, or wood chips. This base keeps air flowing from the ground up. It stops your pile from getting soggy and smelly as it breaks down.
Make the layer loose and criss-cross sticks to create space for air. You can also use shredded paper, but avoid anything with heavy ink. This base forms the foundation for good compost structure.
Establishing the Layering Technique
Add materials in thin layers, about 2 to 4 inches thick. Alternate greens like vegetable scraps with browns like dry leaves or shredded cardboard. Each green layer releases moisture and nitrogen needed by microbes.
After every few green layers, add a thin sprinkle of garden soil or finished compost. This adds helpful bacteria that jumpstart decay. Keep layering until your pile reaches about 3 to 4 feet high.
Initial Watering and Moisture Check
Spray water on each layer until it feels like a wrung-out sponge. Avoid soaking it; too much water slows decomposition. Use a watering can or hose with a gentle spray.
Keep the layers moist but avoid making them wet. Check moisture often to get it right.
Check moisture by grabbing a handful and squeezing. Water dripping from your compost means it’s too wet.
When your compost crumbles right away, add water or fresh green scraps. Keep moisture steady to encourage fast breakdown without bad smells.
Follow these steps to get started quickly:
- Select a shady, level outdoor spot near your garden or kitchen.
- Build a base layer 8 inches deep with coarse browns, like twigs.
- Alternate 2-4 inch layers of greens and browns while adding soil.
- Spray the pile with water to keep it as damp as a wrung sponge.
- Keep the pile at least 3 feet wide and tall to maintain heat.
- Turn the pile every few weeks to add oxygen and prevent bad odors.
How Moisture, Aeration, and Particle Size Affect Composting
Moisture is key to keeping your compost pile active and healthy. Your compost should feel like a damp sponge, moist but not dripping wet.
Without enough water, microbes will slow down and decomposition stalls. When it’s too wet, air can’t enter, causing bad smells and slow breakdown.
Oxygen fuels the microbes breaking down your materials. That’s why aeration matters.
You need to mix or turn your pile regularly to bring fresh air inside. Without enough oxygen, the pile gets smelly and turns slimy instead of crumbly.
Particle size also affects how fast materials break down. Smaller pieces decay faster because microbes access more surface area.
Shredding leaves or chopping kitchen waste speeds things up. Big chunks waste time because microbes take longer to digest them.
- Keep compost as moist as a squeezed sponge, checking weekly.
- Turn or mix your pile every 1 to 2 weeks to add oxygen.
- Shred or chop materials into 1- to 3-inch pieces for faster decay.
- Add bulky brown materials like straw or twigs to improve airflow.
- Avoid waterlogging by ensuring your compost has good drainage.
Turning the pile also helps control temperature. When it gets hotter than 165°F, turn the pile to cool microbes.
Cold, wet piles show slow progress and can attract pests. Better airflow plus the right moisture means faster, cleaner compost ready in a few months.
Which Materials to Avoid or Use Cautiously in Your Compost
Never add meat, dairy, or oils to your compost. These materials attract pests like raccoons and rats, which cause unwanted problems. They also produce strong, unpleasant odors that can ruin your compost area.
Materials like large sticks, mature weed seeds, and diseased plants should be avoided or added cautiously. These materials slow down decomposition or risk spreading weeds and pathogens. Composting weeds with mature seeds often leads to them growing back in your garden.
Slow, cold composting methods do not kill most weed seeds or pathogens. Your pile needs to reach at least 140°F for 1 to 3 hours to destroy them. Avoid using tough weeds or diseased plants if your pile stays cool.
- Stay away from meat, dairy, oils, and bones to reduce pests and smells
- Avoid or limit woody sticks and branches that slow decomposition
- Do not compost mature weeds with seeds or tough roots like couch grass
- Skip diseased plants unless you hot compost at above 140°F
- Use a compost bin or wire cage to keep pests out if needed
- Turn the pile regularly to prevent odors and speed up breakdown
Persistent odors often mean your pile is too wet or lacks air. Turning the compost and mixing dry brown materials fixes this quickly. Pests that keep coming back need a closed bin or a fence.
Only add plants without seeds or disease. Keep your pile very hot. This helps avoid spreading problems.
Understanding Hot vs Cold Composting: Material and Time Differences
Hot composting uses specific materials and conditions to speed decomposition and kill pathogens. Cold composting relies on slower breakdown and gentler materials. The right method depends on your time, materials, and safety needs.
Typical Materials for Hot Composting
Hot composting favors fresh green materials high in nitrogen. Examples include kitchen scraps, fresh grass clippings, and green garden trimmings. These mix with brown stuff like dry leaves and straw.
Wood chips also count. This balances nitrogen and carbon in your compost.
Natural fabrics and even leather can be composted in hot piles due to the high heat. Pine needles break down slowly but are okay if included in small amounts. Keeping these materials well layered and regularly turned helps maintain the heat.
Materials Suitable for Cold Composting
Cold composting works best with slow-decomposing, dry materials like fallen leaves, shredded paper, and old straw. Less fresh greens or kitchen scraps are used because decomposition happens naturally over months or years. Pine needles, which are slightly acidic, fit this method well.
This method avoids materials needing high heat to break down safely. Natural fabric scraps can go in compost but take longer. Some materials might not break down if the pile doesn’t get hot.
This means risks may still be there. Cold compost piles need less attention and turning but more patience.
Timeline Expectations for Each Method
Hot composting produces usable compost generally within 2 to 4 months. This speed comes from frequent turning and maintained heat to speed decomposition. Cold composting takes much longer, anywhere from several months up to a year or more.
Cold piles break down gradually without frequent turning or added heat. The slower timeline suits gardeners with more time or less fresh material.
You won’t get quick pathogen kill in cold compost piles. So materials like meat or diseased plants should be avoided.
Temperature Guidelines for Hot Composting
Hot compost piles must reach at least 131°F (55°C) to kill most pathogens and seeds. Temperatures between 131°F and 160°F are ideal for rapid breakdown. You need to turn the pile every few days to keep it hot and oxygenated.
Hot piles that cool off or don’t get turned enough smell bad. This happens because some parts lack oxygen. Those areas become anaerobic spots.
Cold composting stays below 100°F and never gets hot enough to kill pathogens. This makes hot composting safer for things like kitchen scraps and natural fabric waste.
Here is a quick table to compare hot and cold composting methods.
| Aspect | Hot Composting | Cold Composting |
|---|---|---|
| Typical Materials | Fresh greens, kitchen scraps, dry leaves | Dry leaves, shredded paper, old straw |
| Breakdown Time | 2 to 4 months with regular turning | Several months to a year |
| Typical Temperature | 131°F to 160°F (55°C to 71°C) | Below 100°F (38°C) |
| Pathogen Kill Rate | High if hot and well turned | Low heat means no guaranteed kill of pathogens. |
| Handling Natural Fabrics | Possible, needs high heat (Berkeley method) | Discouraged, slow and riskier |
Hot composting demands more work but results in faster, safer compost. Cold composting works if you have little time or gear.
It takes longer than hot piles. It’s also less sure to kill pathogens well.
How to Recognize and Fix Common Compost Material Mistakes
Too many wet greens in your compost pile can cause bad smells and sliminess. This happens because excess moisture blocks airflow and slows breakdown. You want your pile to smell earthy, not sour or rotten.
Adding too much brown, dry material like leaves or straw helps fix moisture problems. Browns absorb water and let air circulate better. Turn your pile with a garden fork every week or two.
This adds oxygen. It also stops compacting.
Slow composting usually means the mix isn’t right or there isn’t enough heat. Nutrients from greens feed microorganisms, which generate warmth while breaking materials down.
Your pile is cold and slow? Add more green scraps like vegetable peels or grass clippings.
- Check moisture by squeezing a handful: it should feel like a damp sponge, not dripping.
- Add a few shovels of dry leaves or shredded paper when it’s too wet.
- Turn the pile to improve airflow every 7 to 14 days.
- Avoid adding cooked food or meat that causes odors and pests.
- Cut large chunks of branch or vegetable scraps into smaller pieces.
- Keep greens no more than half the pile volume for balance.
- Watch for dark brown, crumbly material as a sign of finished compost.
Your pile smells like ammonia or rotten? It has too many greens or no air. Loosen it up and add dry, brown items immediately.
Too much water often causes sliminess. So add coarse materials or dry up the pile by leaving it open on dry days.
Getting the balance right takes a few tries. Watch how fast the pile heats and how it smells. Healthy compost heats to 130-160°F within a week of starting.
Your pile stays cold for months. Check the greens and browns ratio.
Try adding a compost starter with microbes. Fixing these issues helps speed up decomposition and keeps pests away.
Safe Composting Tips for Special Materials and Urban Settings
Adding natural fibers like hair, wool, and cotton to your compost is possible but tricky. These materials break down very slowly. Your compost pile needs 130°F (54°C) heat.
Keep it hot for at least 18 days. Your pile staying cooler will break down fibers slowly.
Fibers might stay intact. Pests could be attracted by this.
Citrus peels and onion scraps can go into compost in small amounts. They contain acids and essential oils that hamper bacterial activity if you add too much. Spread thin layers of these materials.
Mix well with other “browns.” This stops slowing decay or harming microbes.
Pine needles fall apart very slowly and tend to make your compost more acidic. This acidity is helpful. Use compost on acid-loving plants.
Good for blueberries or azaleas. Add pine needles sparingly.
They raise acidity slightly. Don’t start your compost with them as main material.
Composting in urban or indoor spaces needs planning because of limited room and possible odours. Use a container with a lid. The lid should let air flow.
This controls moisture and stops smells. Keep the compost pile balanced.
Turn it every few days. This speeds up decay and stops pests.
Think about your compost style. Also consider your space. Decide before adding hair or citrus peels.
Hot composters can include more natural fibers, while cold composters should avoid them. For small spaces, add little citrus and pine needles.
Mix them well. This avoids stalling or bad smells.
Don’t dump a large pile of citrus peels at once. Spread them out to keep bacteria healthy.
Step-by-Step Action Plan to Build Your Compost Pile
Use this plan to get your compost pile going the right way. Follow each step and check for the signs that you’re on track.
- Before You Start: Get about equal parts of greens and browns. Greens include grass clippings. Browns mean dry leaves and other dry material. The pile should smell earthy, not sour.
- Day 1: Create a base layer of coarse browns to allow airflow. It should look fluffy and let air move through easily.
- Day 2-3: Add a layer of greens and water it lightly. The pile should feel like a damp sponge, not soggy or dry.
- Week 1: Turn your pile every 3-4 days to add air. After turning, the pile should warm up to around 120, 140°F if composting hot.
- Week 2: Watch moisture levels and add water or browns as needed. The pile should remain moist but not wet.
- Week 3-4: Start adding kitchen scraps like fruit peels if your pile is hot and active. Avoid meat or oily scraps to prevent pests.
- Month 2: Monitor your pile color and smell. It will darken and smell like rich soil when ready.
- After 2 Months: Sift and use the finished compost in your garden. Your plants will thank you for the boost.
Frequently Asked Questions
Can I Compost Cooked Food Scraps?
Cooked food scraps can cause odors and pests. Avoid adding them unless your pile is very hot. The pile needs to be above 130°F. Only then will it break them down safely.
What Is the Ideal Size for a Compost Pile?
The pile should be at least 3 feet wide, deep, and high. This size keeps heat inside for good decomposition.
How Often Should I Turn My Compost Pile?
Turn your pile every 1 to 2 weeks to add oxygen. This helps speed up decomposition and avoids bad smells.
Does Adding Soil Improve the Composting Process?
Adding a thin layer of soil introduces helpful microbes. It also helps speed up the breakdown of organic material.
Can Paper Towels Be Composted Safely?
Plain paper towels usually break down well in compost. Avoid towels with cleaning chemicals or heavy inks.
How Do I Know When Compost Is Ready to Use?
Compost looks dark, crumbly, and smells earthy when done. Do the squeeze test; it should feel like a damp sponge.
Key Points to Remember
Putting the right materials in your compost pile makes all the difference. Stick to simple, balanced layers and keep the pile moist and airy. Start small today by setting up your base layer with browns for good airflow.


