How to Cultivate Worms for Composting: A Complete Guide for Beginners
Learning how to cultivate worms starts with providing the right environment at home. Worms thrive best in shaded, moist spaces between 55°F and 77°F. You want a bin at least 12 inches deep.
Fill it with organic bedding. The worms will live and eat in it.
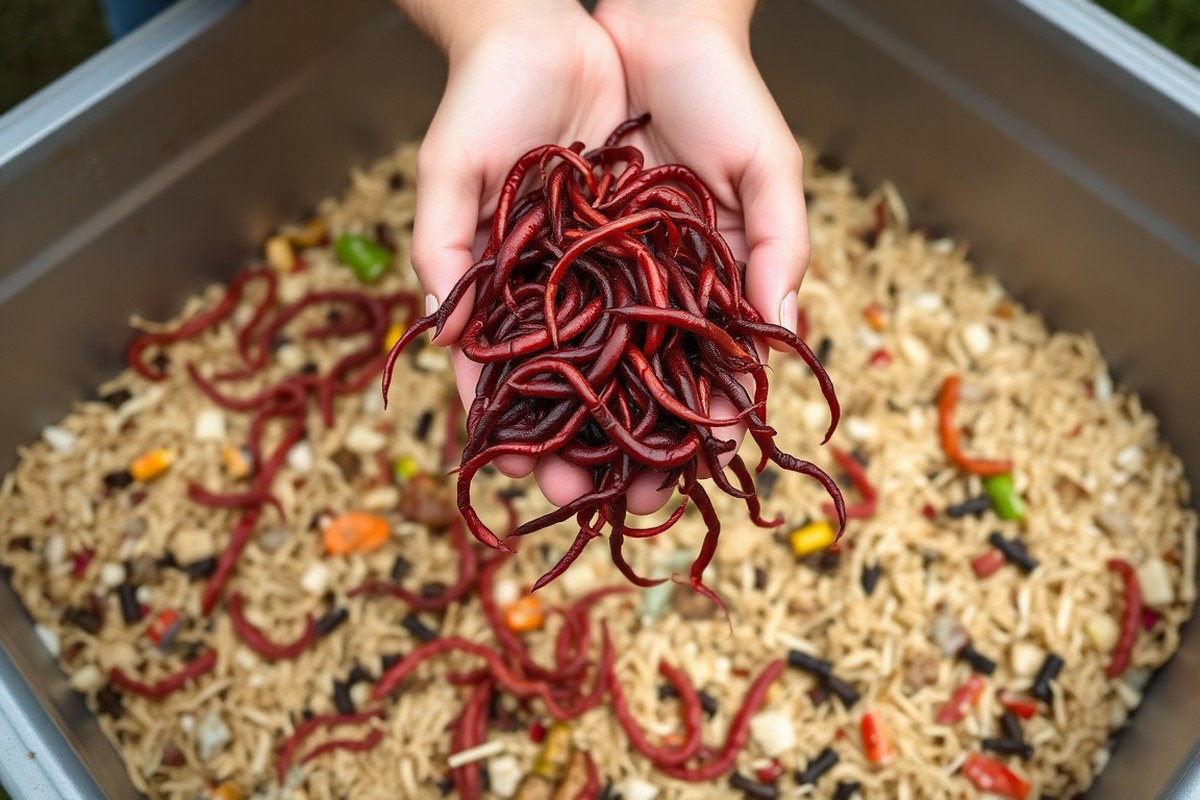
Next, choose the right worm type: red wigglers are perfect for composting. They adapt well to bin life and break down kitchen scraps quickly.
Avoid soil worms that burrow deep. They work better outdoors but not in small worm farms.
Feed your worms every one to two weeks. Use three pounds of food for each pound of worms.
Keep the food scraps chopped and avoid anything with wood that isn’t fully organic. This keeps your worms healthy and active so they multiply and produce rich compost.
Key Takeaways
- Keep your worm bin shaded and maintain temperatures between 55°F and 77°F.
- Use red wigglers (Eisenia fetida) for the best composting results.
- Feed worms every 1 to 2 weeks with food scraps three times their weight.
- Avoid non-organic wood, which can poison worms and harm your compost.
- Ensure the bedding is at least 12 inches deep to give worms enough space.
- Harvest worm compost every 3 to 6 months when it looks dark and crumbly.
What Is Worm Cultivation and Which Worms Are Best?

Worm cultivation means raising worms to help break down organic waste and enrich soil. You grow worms in a bin or garden spot you control. They eat scraps like fruit and veggie peels.
These scraps turn into rich soil over time. This process speeds up composting and creates nutrient-rich castings that improve plant health.
Picking the right worm species depends on your goals and local climate. Worms differ in how fast they reproduce. They also prefer different temperatures and eat varied amounts of food.
For instance, red wigglers thrive between 59°F and 77°F and break down kitchen scraps quickly. They suit beginners who want rich compost.
Nightcrawlers grow up to 7 inches long. They like warm weather from 70°F to 90°F. They do well in these climates. They’re great if you want worms for bait or deeper soil aeration.
African nightcrawlers like warm places too but grow fast and produce lots of castings. Alabama jumpers handle heat well.
They’re mostly bait worms. They do not compost as quickly as others.
Starting your farm requires about 1 pound of worms per square foot of bin surface. That’s roughly 1,000 to 2,000 worms for a typical home setup. Give worms damp bedding like shredded cardboard.
Feed them a cup of scraps every 3 to 4 days. This keeps them healthy. Keep the bin temperature comfortable, ideally between 60°F and 77°F, to keep worms healthy.
Red wigglers are small worms. They do best in cold to mild climates. They work great for composting.
Nightcrawlers are large, work in warm climates, and serve bait and soil improvement. African nightcrawlers thrive in hot areas and produce fast compost. Alabama jumpers suit hot climates but mainly for bait, not compost.
Grow your worm population steadily by balancing food and bedding. Avoid overfeeding, which can attract pests or rot.
Let worms multiply for about six weeks before harvesting castings. This way, you’ll have a consistent supply of worms and rich soil amendments for your garden.
How to Set Up an Effective Worm Farm at Home
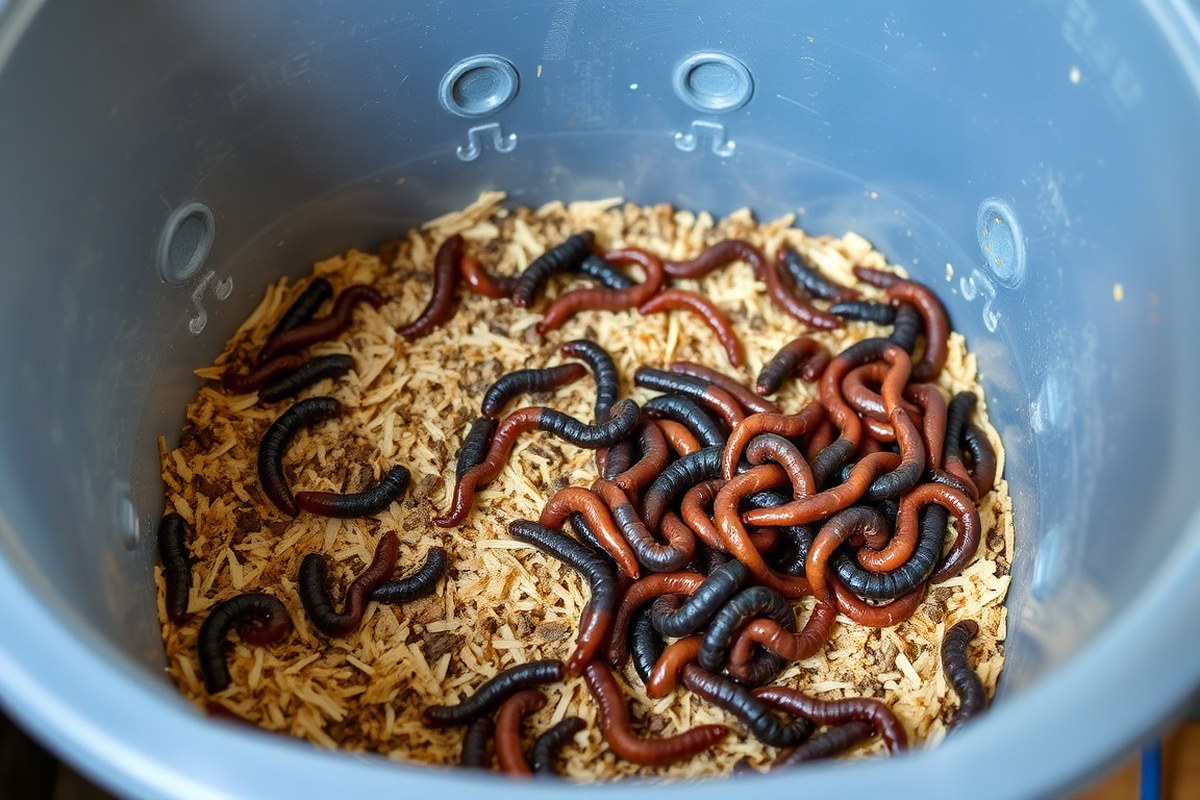
To start a worm farm, choose the right container. Make soft bedding for the worms. Put the bin somewhere cool and shaded.
Your worms need moisture, air, and darkness to thrive. Following these clear steps will get your farm ready quickly and keep the worms happy.
Choosing the Right Container Size and Material
Pick a container that holds enough space for your worms and food scraps. For most home gardeners, a plastic bin about 10 to 20 gallons works well. Avoid metal containers because they can rust and don’t keep moisture steady.
Look for containers with smooth sides to prevent worms from getting stuck. A loose-fitting lid or cover helps keep moisture without sealing in too much heat. Keep the size manageable so you can easily move it if needed.
Preparing Moist Bedding for Worm Comfort
Bedding should be fluffy and hold moisture but not be soggy. Shredded newspaper, cardboard, dry leaves, or coconut coir are great options. You’ll fill about one-third of the bin with this bedding.
Squeeze your moist bedding; if a few drops fall, that’s perfect. Too dry, and worms slow down.
Too wet, and worms might try to escape or die. Let the bedding sit for a few days to stabilize moisture and temperature.
Selecting Ideal Placement and Environmental Conditions
Choose a spot shaded and cool, around 55°F to 77°F. Extreme heat or cold can harm your worms. Garages, porches, or shaded corners suit worm bins well.
Make sure the spot has good air circulation and won’t get flooded during rain. Avoid direct sunlight since it overheats the bin and dries bedding quickly. Keep it accessible for feeding and harvesting worm castings.
Drilling Aeration and Drainage Holes
Ventilation holes prevent bad smells and help worms breathe oxygen-rich air. Drill small holes about ¼ inch wide evenly spaced 1 to 2 feet apart. Include holes on the lid, sides, and bottom for drainage.
Good drainage stops water from pooling at the bottom and drowning worms. Spot water standing in your worm bin? Add some dry bedding.
Tilt the bin a little for proper drainage. Proper airflow and drainage keep the farm healthy and pest-free.
Preventing Pests and Odors with Covers
Use a layer of damp newspaper or cardboard to cover the bedding before closing the lid. This keeps fruit flies and ants from invading. The cover also holds in moisture and smells.
Check the cover often to make sure it stays moist but not soaking wet. Leave the lid slightly ajar or use breathable materials to avoid trapping heat inside. Proper covers reduce odor and keep your worm farm neat.
- Choose a plastic container between 10 and 20 gallons with a loose lid.
- Shred newspaper or cardboard for bedding and moisten it until slightly damp.
- Add moist bedding until the bin is about one-third full. Leave it to settle for a few days before adding worms.
- Drill ¼ inch ventilation and drainage holes spaced 1 to 2 feet apart.
- Place the bin in a shady, well-ventilated spot with temperatures between 55°F and 77°F.
- Cover bedding with damp newspaper or cardboard to reduce pests and odors.
- Check moisture regularly and add water or dry bedding as needed.
Too much moisture causes worms to escape. So never let standing water build up in your bin.
Feeding Worms: What, How Much, and How Often
Worms thrive on certain kitchen scraps and yard waste. But not all scraps suit them. Feed your worms fruit and vegetable bits, coffee grounds, and crushed eggshells.
Don’t put meats, dairy, salty or oily foods in the worm bin. These can cause bad smells and harm your worms. Keep your bin fresh and healthy by avoiding these items.
Best Foods to Feed Worms
Worms enjoy a mix of fruit scraps like banana peels and apple cores. Vegetable scraps, such as carrot peelings and lettuce, make great food too. Coffee grounds and tea bags without staples are also perfect additions.
Adding crushed eggshells helps worms digest their meals better. You can toss in small amounts of cooked plain rice or pasta occasionally. Shredded paper mixed with food scraps gives worms extra bedding and food.
Foods to Avoid for Healthy Worms
Never feed your worms meat, fish scraps, or dairy products. These attract pests and cause bad odors quickly. Stay away from oily foods and salty snacks in the bin.
Salt can kill many worms and reduce their body weight. It’s best to feed them other scraps.
Citrus fruits are too acidic and can harm worms in larger amounts. Onions and garlic have strong compounds that worms dislike. Keep pet waste and bread out of the worm bin.
These items can create smells and attract pests. Avoid adding them to protect your worm bin.
Calculating Food Quantity by Worm Weight
One pound of worms has about 1,000 worms inside it. They eat half to three-quarters of a pound of scraps each day. This amount helps you plan your feedings.
Start by weighing your worms or estimating their weight by count. Feed them about 50-75% of their weight in fresh scraps every day or every few days.
Chop or mash scraps to help worms eat faster and reduce smell. Freeze food scraps for 24 hours before feeding. This stops pests and slows down decay.
It makes the scraps safer for your worms. Cover food with bedding to keep pests away and control moisture better.
How Often to Feed for Steady Growth
Feed worms once or twice a week, depending on how fast they finish their meals. Most food should vanish in a day or two. When no sour smell is present, add more scraps.
This shows your worms are eating well. Cut back or wait several days if uneaten food remains or starts to smell sour.
Check your worm bin regularly for leftover food and moisture levels. Avoid overfeeding, which causes wet, smelly scraps and harms worms. Always cover fresh scraps with dry bedding after feeding.
This keeps your worms’ home pleasant. It also reduces smells and helps moisture balance.
Maintaining Optimal Conditions for Worm Health
Keep your worm bin’s temperature between 55 and 75 degrees Fahrenheit. Worms are most active and productive in this range.
Use a soil thermometer to check the bin’s temperature often. Move the bin to a cooler place if it gets above 80°F. If the temperature drops below 50°F, find a warmer spot for it.
Moisture control is key for worm health. The bedding should feel like a damp sponge, not soaking wet or dry. Too much water can drown worms, while dry conditions slow their activity.
Spray water if the bin feels dry to keep it moist. Add dry bedding like shredded newspaper if it feels soggy. Keep the bin balanced to help worms stay healthy.
Aeration helps worms breathe and prevents bad odors. Every week, gently fluff or turn the bedding using a garden fork or small shovel.
Don’t mix too aggressively as this may harm the worms. Keeping the bedding loose also stops it from packing down, which can suffocate them.
- Check moisture weekly, adjusting to keep bedding damp but not wet
- Use a soil thermometer and keep temperature between 55-75°F
- Add fresh bedding every 2 to 3 months or when bedding starts to smell
- Fluff the bedding weekly for good aeration
- Keep the bin covered to maintain humidity and block light
- Remove any foul-smelling or moldy parts immediately
Adding fresh bedding every couple of months keeps the bin healthy. Use shredded cardboard, newspaper, or coconut coir to add fluff and absorb excess moisture. Look for signs like escaping worms or a strong ammonia smell.
These often mean the bedding is too wet, too dry, or food is rotting. Act fast to fix these problems by adjusting moisture, temperature, or adding fresh bedding.
Store your worm bin in a place that avoids temperature swings. Basements, garages, or kitchens under the sink often provide the right balance.
Keep the bin out of direct sunlight and drafts. A lid on your bin keeps moisture steady and worms safely inside, away from pests.
When and How to Harvest Worm Castings and Worms
Harvest worm castings every 3 to 6 months when most compost turns dark and crumbly. Use migration or screening methods to separate worms from the castings. Handle worms gently to reduce loss and keep your worm farm healthy.
Signs Your Vermicompost Is Ready for Harvest
Look for dark, crumbly material that smells earthy and not sour. This “black gold” shows worms have processed the food waste fully. You’ll see fewer worms in the material, meaning they’ve mostly moved to new food or bedding.
Also, avoid harvesting if you smell ammonia or notice damp, smelly spots. These signs mean the compost isn’t ready.
Typically, this takes about 3 to 6 months in a home worm bin. Temperature and how often you feed the worms affect the timing.
Using Migration Method to Separate Worms
The migration method uses worms’ natural habit to follow fresh food. They move away from the finished castings. The fresh bedding attracts them to a new area.
It’s great for small to medium worm bins. This method reduces worm loss since you don’t need to sift or handle worms much.
Give your worms about two weeks to migrate fully before harvesting. Delayed harvesting lets more worms move to fresh material. So fewer get scooped up with the castings.
- Push all worm castings and compost to one side of the bin.
- Add fresh bedding and food scraps on the empty side.
- Stop feeding the original side.
- Wait about 10 to 14 days to let worms migrate.
- Observe the compost side for mostly worm-free castings.
- Scoop out finished compost carefully.
- Keep worms in fresh bedding for continued composting.
Give worms enough time to migrate, or you’ll lose them in the castings.
Screen Sifting for Clear Castings
Use a screen sifter to quickly separate worms from large compost batches. Coarse mesh (about 1/4 inch) works well for home use. Sifting allows harvesting all castings at once but requires gentle shaking or stirring.
Choose a well-ventilated area for sifting to keep worms comfortable during this process. Screen sifting works well when your worm bin is full. It also helps if you want to change the bedding completely.
- Place a screen or sieve over a clean container.
- Add worm castings on top of the screen in small batches.
- Gently shake or tap the screen so smaller particles pass through.
- Collect castings underneath while worms stay on top.
- Pick out any leftover worms and large bits manually.
- Return worms and any large bedding pieces to the worm bin.
Handle worms gently to avoid injury during sifting.
Handling Excess Worms After Harvest
After you separate castings, you may have extra worms. Use extra worms to start a new bin or share with friends interested in vermicomposting. Avoid overpopulating your bin; worms need space to thrive.
Keep excess worms in moist bedding with some food. Store them out of direct sunlight and extreme temperatures until you move them. This prevents stress and keeps worms healthy for later use.
Benefits of Worm Cultivation and Using Worm Castings
Worm castings are packed with nutrients like nitrogen, phosphorus, and potassium. These nutrients help plants grow faster and healthier without using chemical fertilizers. Castings help soil hold water better and improve airflow.
This supports stronger roots. It also stops soil from getting too compacted.
Adding worm castings to your garden can replace or reduce chemical fertilizers. Castings release nutrients slowly, feeding plants steadily over time. Mix castings into your soil at 10-20% by volume.
You can also sprinkle a thin layer on top as mulch. Worm tea comes from soaking castings in water. It gives your plants a quick nutrient boost when you water them.
| Feature | Worm Castings | Traditional Compost |
|---|---|---|
| Nutrient Content | High in plant-available nutrients | Varies; often less nutrient dense |
| Soil Structure | Improves aeration and water retention | Improves organic matter but less aeration |
| Application | Can be applied directly without burning plants | May need composting period before use |
| Microbial Activity | Contains beneficial microbes that suppress disease | Supports microbes, but less concentrated |
Worms themselves boost garden health by aerating soil with their tunnels. Their burrowing mixes organic matter throughout and promotes beneficial microbes. These activities help suppress pests and plant diseases naturally, making your garden more resilient.
Use worm castings by mixing them into the top few inches of soil. Or spread a thin layer on the surface as mulch. Applying 1 to 2 cups per square foot works well for most plants.
For liquid feed, mix one cup of castings in 5 gallons of water. Water your plants with this once a month in the growing season.
Troubleshooting Common Worm Farming Issues
Worms try to escape if the bin feels too wet, dry, or overcrowded. They breathe through their skin.
So a dry bin makes them desperate to find moisture. Overfeeding or rotten food can create bad smells, which push worms away from their home.
Odors often mean your bin is too wet or has harmful food scraps. A waterlogged bin turns anaerobic, causing a foul smell that kills worms. Avoid feeding meats, dairy, oily foods, or citrus, as these spoil fast and attract pests.
Fruit flies and ants are the most common pests in worm bins. They thrive on exposed food scraps and moist conditions.
Cover fresh food with damp bedding to keep flies down. Check for tiny gaps or holes in the bin and seal them to block ants.
| Issue | Symptoms | How to Fix |
|---|---|---|
| Worm Escape Attempts | Worms climbing walls or leaving food | Check moisture; aim for damp, not wet. Reduce feeding. Avoid overcrowding. |
| Foul Odors | Smell like rotten eggs or sour ammonia | Stop feeding for a week. Add dry bedding. Remove spoiled food. |
| Fruit Flies | Small flying insects above bin surface | Cover food scraps. Use lids with small holes. Keep bin dry on top. |
| Ant Infestation | Small ants inside or around bin edges | Seal cracks. Place bin on a tray of water. Avoid sugary food scraps. |
| Unhealthy or Dying Worms | Worms look lethargic, color faded, or weak | Lower temperature if over 80°F. Fix moisture. Feed fresh scraps only. |
Keep the bin slightly moist like a wrung-out sponge. Use dry shredded paper or cardboard to soak up extra liquid. Trays with holes help worms move away from used food toward fresh scraps.
Cold harms worms too; avoid sudden freezes. At the first sign of mold or smell, remove spoiled parts quickly. If worm health declines, check temperature, moisture, and food quality before adding more scraps.
Seasonal and Environmental Adjustments for Wrangling Worm Farms
Worms slow down when it gets too cold or too hot. Their best temperature range is 55°F to 77°F (13°C to 25°C). If the bin hits above 80°F, worms burrow deeper to escape heat.
Below freezing, 32°F or less, worms go dormant and stop eating. Protecting your worm bin from extreme temperatures keeps worms healthy and active.
To keep your worm farm thriving all year, adjust care with the weather. Move your bin to shaded spots in summer to avoid overheating. In winter, bring bins indoors or insulate them with burlap sacks or straw.
Cover your bin to shield it from heavy rain, which can drown worms. During dry spells, moisten bedding lightly but avoid soaking them.
- Shift worm bins to shady locations when temperatures rise above 80°F.
- Bring worm bins inside or insulate them if temperatures drop below 40°F.
- Cover bins with a breathable lid or cloth to block heavy rain.
- Spray bedding with water during dry weather to maintain moisture.
- Stop feeding if worms seem inactive due to temperature stress.
- Use light-colored bin covers to reduce heat buildup in summer.
- Check moisture weekly and adjust feeding to avoid excess wetness.
Worms need moist bedding but can’t survive in soggy soil. Keeping moisture around 70% helps worms breathe and digest food. Add shredded newspaper or dry leaves if the bin feels too wet.
Slow feeding in winter helps since worms eat less when cold. Overfeeding can cause heat buildup and kill worms if decomposition speeds up too fast.
Never leave your worm bin in direct sun during hot months. It can kill your worms quickly.
Heavy rain can flood worm beds and wash away bedding and food scraps. A firm, breathable cover helps rain run off while letting air in. When moving a worm bin indoors, choose places cooler than 55°F or with a steady temperature.
A basement or garage that stays above freezing works well. Routine checks let you catch problems before worms slow down or die.
Step-by-Step Action Plan for Starting Your Worm Farm
Get your worm farm going quickly with these simple steps. Each step includes how to check your progress.
- Day 1: Set up your bin with moist bedding and add red wiggler worms. Look for worms spread comfortably, not curling up or escaping.
- Week 1: Feed a small amount of kitchen scraps every 3 days. Check if the worms are eating by the time you feed again.
- Week 2: Monitor moisture. Add water if bedding feels dry or add dry bedding if wet. Bedding should feel like a wrung-out sponge.
- Week 3: Stir the bin gently to aerate without harming worms. Worms should stay active and not clump in one corner.
- After 1 Month: Start harvesting castings from one side and move feeding to the other. Castings should be dark and crumbly.
- Month 2: Adjust feeding based on worm activity. More scraps if they eat fast, less if leftovers remain. Healthy worms grow and produce rich castings.
- Ongoing: Keep temperature between 55°F to 77°F (13°C to 25°C). Use a thermometer; worms slow down outside this range.
Frequently Asked Questions
How Long Do Worms Live in a Home Vermicompost Bin?
Worms live about 4 to 5 years in ideal home conditions. Keep the bin moist and cool to help them thrive longer.
Can I Use Chemical Pesticides Around My Worm Farm?
Avoid chemical pesticides near worms; they can harm or kill them. Use natural pest controls instead to protect your worm population.
Is It Safe to Add Meat or Dairy Scraps to Worm Bins?
No, meat and dairy attract pests and create bad smells in bins. Stick to vegetable and fruit scraps for healthier worm compost.
How Often Should I Clean or Replace Bedding in a Worm Bin?
Add fresh bedding every few months or when it looks soggy. Good bedding helps keep the bin aerobic and comfortable for worms.
Can Worms Survive Without Food for a Long Time?
Worms can survive a few weeks without food but prefer regular feeding. Try to feed them every one to two weeks for best health.
What Signs Show My Worm Farm Is Overfed?
Overfeeding causes bad smells, leftover food, and fruit flies. Reduce scraps and bury food deeper to fix this.
Wrapping Up
Cultivating worms is simple when you stick to steady care. Watch your worms respond to feeding and bedding changes closely. Start by setting up your bin today and enjoy richer soil soon.