How to Set Up a Compost Pile: Step-by-Step Guide for Fast, Healthy Compost
Set up a compost pile by mixing the right materials and conditions. Start with layers of brown materials like dry leaves. Use two parts brown to one part green, such as food scraps.
This mix helps the pile break down efficiently. Keep the pile damp and place it on bare soil to attract microbes and worms.
Make the pile about 3 feet wide, deep, and tall to trap heat. Heat speeds up decomposition. Turn the pile every week or two with a pitchfork to add oxygen.
Oxygen helps materials break down faster. Keep the pile’s moisture like a wrung-out sponge, neither wet nor dry.
Hot composting works best between 130 and 160 degrees Fahrenheit. The pile heats quickly in a few days to break down waste fast.
This heat also kills weed seeds. With the right size, materials, moisture, and turning, you’ll get rich compost within months.
Key Takeaways
- Build your pile at least 3 feet tall, wide, and deep for best heat retention.
- Use a ratio of roughly 2 parts brown materials to 1 part green materials.
- Place the pile on bare soil to attract helpful decomposers.
- Keep the compost moist like a wrung-out sponge, not too wet or dry.
- Turn the pile every 1 to 2 weeks to add oxygen and speed breakdown.
- Monitor the pile’s temperature to reach 130-160°F for fast, healthy compost.
How to Start a Compost Pile Step by Step
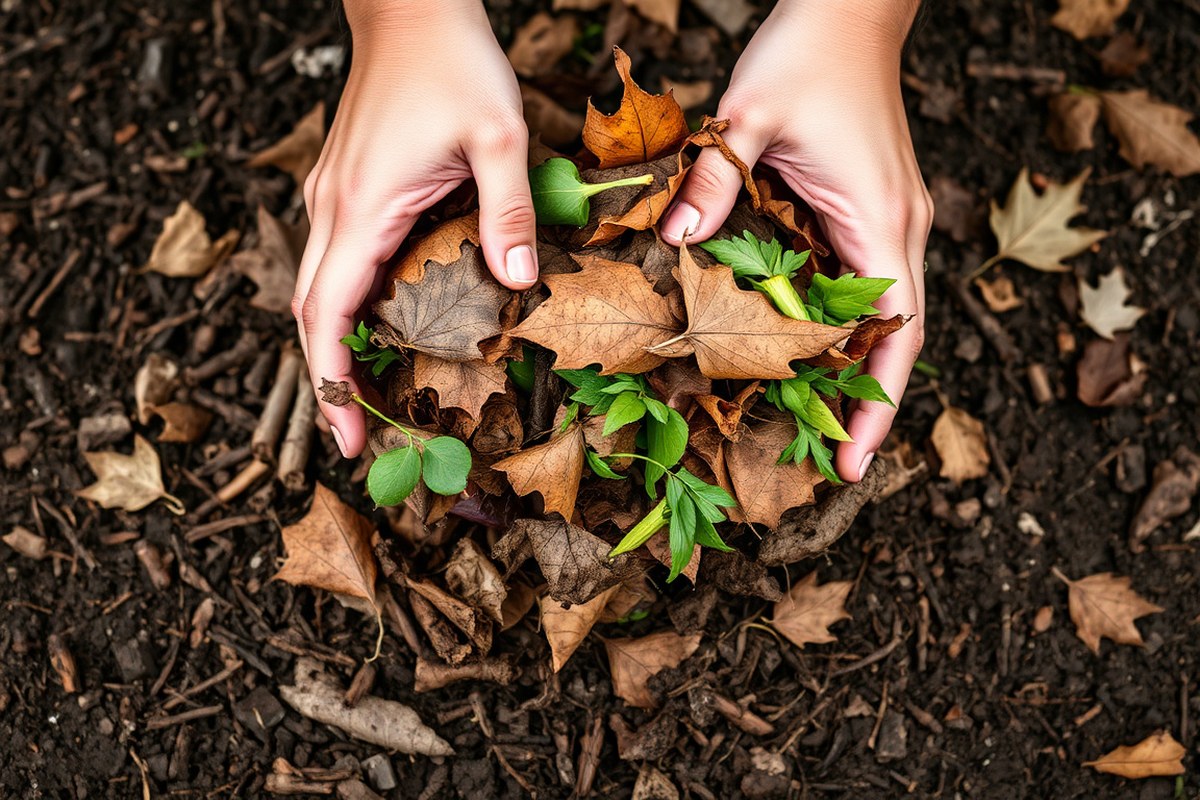
To start a compost pile from scratch, you need the right size, materials, and layering. Pick a spot on bare soil for your compost pile. Make it at least 3 feet wide, tall, and deep.
This size helps break down materials efficiently. Start layering brown stuff like dry leaves.
Add green things like food scraps. Keep a 2:1 ratio of brown to green materials.
Choosing the Ideal Spot
Pick a spot on bare soil to help worms and microbes reach your compost. Avoid paved or cement areas because they limit airflow and drainage. Put your compost in a shady or partly shady spot.
This stops it from drying out too fast. It still gets warm enough to compost well.
Leave enough room for a pile about 3 feet wide, tall, and deep. This size keeps the pile warm and speeds up breaking down.
Choose a smaller bin if your space is small. Turn the compost more often to keep it active.
Building the Base Layer
Start with a base layer of coarse brown materials like small sticks and branches. Make this layer about 4 to 6 inches deep. It will create good air flow and drainage at the bottom of the pile.
This base helps prevent sogginess and lets air travel up through the pile. Start your heap directly on soil to encourage helpful soil bugs to join in. Avoid placing the pile on grass or mulch to keep it stable and aerated.
Alternating Green and Brown Layers
Layering is key. Alternate between brown and green layers to balance carbon and nitrogen.
Add 5 to 7 inches of brown material first. Then add 2 to 4 inches of green material on top.
Keep a ratio close to two parts brown to one part green by volume. This ratio cuts down bad smells and speeds composting. Always cover fresh food scraps with a brown layer to prevent pests and odors.
Moistening the Pile
Keep the pile damp like a wrung-out sponge, not soaking. Water each layer lightly after adding it or wait and spray water to keep moisture steady. Dry piles slow down or stop decomposing, while soggy ones smell bad and rot.
Check moisture by grabbing a handful; it should hold together without dripping water. Adjust by adding browns if wet or greens and water if dry. Pay close attention during hot or dry weather, as moisture can evaporate fast.
Here is a step-by-step checklist to build your compost pile:
- Clear a 3-foot square spot on bare ground for airflow and drainage.
- Lay down 4 to 6 inches of coarse brown materials, like twigs.
- Add 5 to 7 inches of brown materials such as dry leaves.
- Spread 2 to 4 inches of green materials like kitchen scraps on top.
- Repeat the brown and green layers until the pile reaches 3 feet high.
- Spray water lightly after each layer to keep the right moisture.
- Cover new green layers with brown material to keep pests out.
- Turn the pile every 1 to 2 weeks for better breakdown and airflow.
What Materials to Compost — What to Add and Avoid
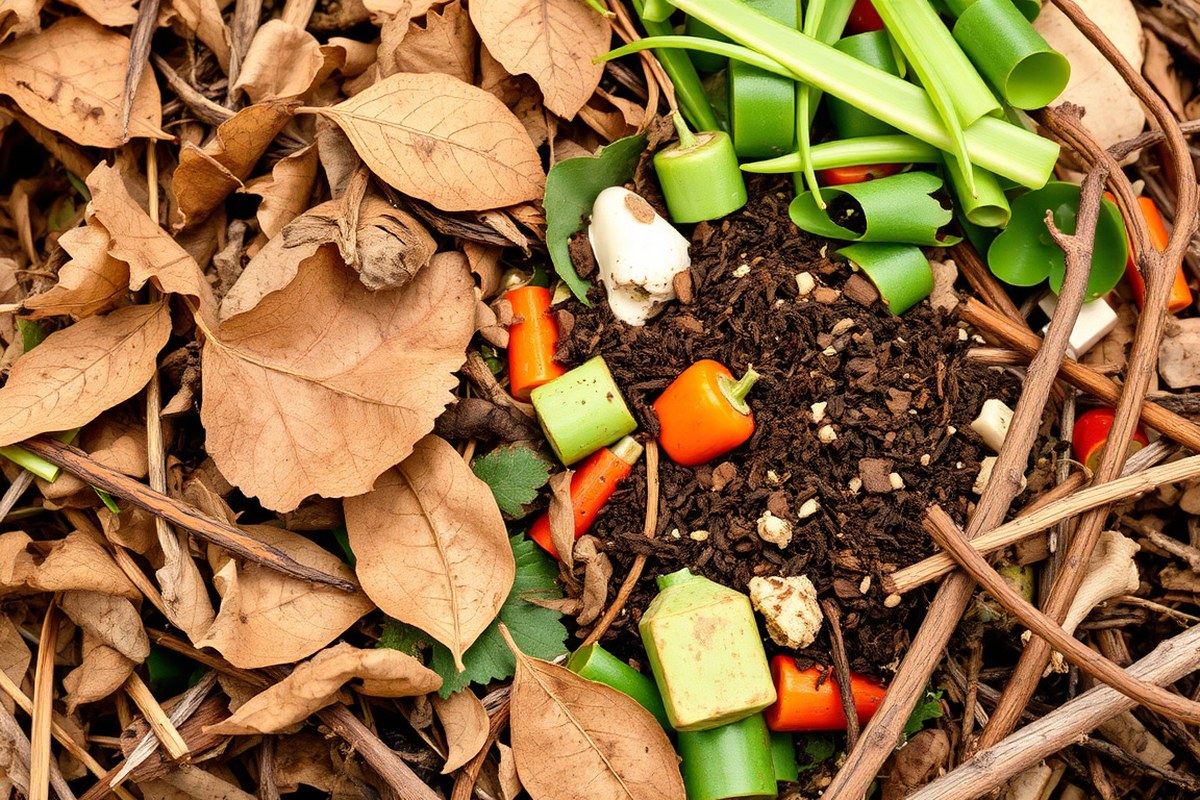
Composting needs a mix of green and brown materials to work well. Greens provide nitrogen, and browns offer carbon.
The ideal mix has about 30 parts carbon to one part nitrogen by weight. This balance fuels the microbes that break down your pile quickly.
Good green materials include kitchen scraps like fruit and vegetable peels. Coffee grounds, fresh grass clippings, and garden trimmings also work well. Browns come from dry leaves, straw, paper, cardboard, and small branches.
Avoid adding meat, dairy, oily foods, pet waste, or diseased plants. These can smell bad, attract pests, or harm your compost.
- Greens: vegetable scraps, coffee grounds, fresh grass clippings
- Browns: dry leaves, shredded paper, straw, cardboard, small twigs
- Avoid: meat, dairy, oils, pet waste, diseased plants, treated wood
- Add fresh green waste near the bottom for better breakdown
- Mix layers of brown and green to keep air flowing
- Sprinkle garden soil or finished compost on top to add microbes
- Keep pile size at least 3×3×3 feet for heat retention
Keeping the right carbon-to-nitrogen ratio means layering these materials. Start with a three-inch layer of browns. Add two inches of greens on top.
Then add a thin layer of soil or old compost. Water lightly to keep the pile as damp as a wrung-out sponge without soaking it. Turn the pile every one to two weeks to give it oxygen.
Too many greens cause a smelly pile. Fix this by adding dry browns and turning it well.
Maintaining this balance avoids problems such as slow composting or bad odors. Add fresh green scraps or grass clippings when the pile lacks nitrogen. Mix in more dry browns if it’s too wet or smelly.
This improves airflow and absorbs moisture. Careful mixing helps your compost heat up.
It breaks down materials fast. You’ll have rich soil ready in weeks.
Best Compost Pile Location and Setup Tips
Pick a dry spot with partial shade for your compost pile. Too much sun can dry it out, slowing down the process. Pick a spot that gets some sunlight to warm the pile.
Avoid dense tree shade and areas with fast-growing vines. These conditions can slow your compost process.
Place your compost pile directly on soil, never on concrete or wood decks. This helps microbes and worms reach your pile faster. Start with a layer of straw, twigs, or small sticks to drain rainwater well.
Good drainage matters because standing water can drown microbes and cause bad smells. Make sure the site slopes slightly or is naturally well-drained.
Avoid low-lying areas or spots where rainwater pools or runs in freely. You want moisture, but not a swamp.
Airflow is key to healthy compost. Leave enough space around your pile to turn it easily with a pitchfork or shovel. A pile about 3 feet wide and tall works well.
For big compost piles, make walking paths every 8 feet to use a wheelbarrow. This keeps you from stepping on the compost and damaging it.
Protect your pile from pests by using a cover like an old tarp or wooden frame. It helps keep heat and moisture consistent and keeps animals from digging into it. Avoid placing the pile near food scraps that attract rodents, or consider a secure compost bin.
Keep the pile convenient to your kitchen and garden. Having it close helps you add scraps regularly and turn the compost often. At the same time, pick a spot that won’t smell up your outdoor living areas.
Turning and Aerating: When and How to Do It Right
Turn your compost pile every one to two weeks using a pitchfork or shovel. Turning adds oxygen, which helps break down materials faster and stops bad smells. You can turn it less often, but decomposition will slow and odors may develop.
Tools Needed for Turning
A sturdy pitchfork or shovel is the best tool for turning your compost pile. These let you lift and mix the material without much hassle. Choose a tool with a handle long enough to reach the middle of the pile safely.
Wear gloves to protect your hands and a mask if the dust bothers you. Closed-toe shoes are a good idea since you’ll be lifting heavy, uneven material.
You might also use a compost aerator tool. But a pitchfork works well for most piles.
How to Turn the Pile Properly
Turning your compost means mixing the outer layers into the center and loosening compacted areas. This introduces oxygen, which keeps the microbes active. Do this every 1 to 2 weeks to speed up composting.
Follow these simple steps to turn your compost pile correctly:
- Wear gloves and protective clothes to avoid irritation and pests.
- Use a pitchfork or shovel to lift material from the edges of the pile.
- Move this material to the center of the pile where it’s less decomposed.
- Break up large clumps as you mix to improve air flow.
- Turn the top layer down into the pile and bring the bottom layer up.
- Check moisture after turning; add water if it feels dry or dusty.
- Repeat turning every 7 to 14 days for faster, odor-free compost.
Turning keeps the temperature high enough for microbes. It stops the pile from getting slimy or smelly. Not turning the pile often will slow composting and cause bad smells.
Signs You Can Skip Turning
You might skip turning the pile when it’s small or very dry. Slow composting is another reason to turn less often.
Small piles under 3 feet wide may not need frequent turning. They still decompose but more slowly.
Also skip turning if your pile stays moist by itself. Adding bulky materials helps air flow naturally. Too much turning can cool the pile down and slow the process.
Check if the middle of your pile feels warm. The pile’s condition lets you wait longer before the next turn.
Managing Moisture and Temperature for Faster Composting
Keep your compost pile as moist as a wrung-out sponge. Check it by grabbing a handful of compost and squeezing it gently. A few drops of water squeezing out means the moisture is right.
Add water every few days. This helps during dry weather.
Dry ingredients also need more water. Avoid soaking the pile or it will turn soggy and slow down decomposition.
Temperature plays a big role in how fast your compost breaks down. A well-built pile heats up to 130°F to 150°F within a few days. This heat comes from microbes working hard to turn your scraps into compost.
Your pile should be about 3 feet wide, deep, and tall. This equals about one cubic yard. That size helps the pile heat up properly.
Smaller piles don’t hold heat well. Those larger than 8 feet can be hard to manage.
Start your pile with plenty of mature compost. This helps it reach and hold the right temperature. This jumpstarts the microbial action and speeds up the heating.
Turn your pile every week or two. This spreads heat evenly.
It also brings fresh air inside the pile. Good airflow keeps microbes active and prevents the compost from getting too cold or smelly.
Check moisture regularly: too dry or too wet slows down composting and hurts microbes.
The pile size matters for heat. A pile smaller than 3 feet won’t warm well. Larger piles trap heat better but need more effort to turn.
Your pile might be too small, dry, or low in nitrogen if it never warms. Adding kitchen scraps or fresh grass clippings can raise moisture and boost heat.
Common Compost Pile Problems and How to Fix Them
Bad smells in your compost usually mean it lacks air or it’s too wet. When the pile goes anaerobic, it produces a sour or rotten odour. Turn the compost pile well to add oxygen.
Spread it out to dry if soggy. This helps speed up the breakdown. You want a fresh, earthy smell, not something sharp or like ammonia.
Pests and flies appear when food scraps are exposed or the pile is too wet. Fruit flies find open fruit or vegetable pieces inviting.
Cover new food scraps with a dry layer of browns like leaves or shredded paper. Also, avoid adding meat or dairy since they attract animals.
Your compost isn’t breaking down because it’s too dry. Or maybe the pile is too small. Microbes need moisture to thrive.
They also need a good mix of nitrogen-rich greens and carbon-rich browns. Aim for a pile at least 3 feet wide and 3 feet tall. Water lightly if it feels dry and add more greens if decomposition slows.
This table shows common problems with compost piles. It lists causes and easy fixes. Use it to keep your compost healthy.
| Problem | Cause | Solution |
|---|---|---|
| Bad smell | Pile too wet or lacks air | Turn pile, add dry materials, spread out to dry |
| Pests or flies | Exposed food scraps, meat/dairy in pile | Cover scraps with browns, avoid meat/dairy |
| Compost not breaking down | Too dry, small pile, too many browns | Water pile, add greens, build bigger pile |
| Pile stays cold | Small or poor mix of materials | Use enough volume, balance greens and browns |
Turning your pile regularly gives microbes oxygen needed to work fast. Do this every week or two. Keeping your pile moist but not dripping wet helps microbes stay active.
Spray water lightly when your pile dries out. Stop when it feels like a damp sponge.
Keeping trouble away requires a bit of habit. Cover fresh scraps each time. Check moisture weekly and add water when needed.
Mix to keep air moving through the pile. Monitoring these will keep your pile healthy and working well. This makes better compost ready faster for your garden.
How Long Does Composting Take and How to Tell When It’s Ready
Composting speed depends on your method and how often you turn the pile. Hot composting can finish in as little as six to twelve weeks with regular turning. Cold composting takes six months to a year.
It breaks down slowly. This happens without frequent aeration.
Finished compost looks like dark, crumbly soil without any recognizable bits of food or leaves. It should have a mostly even texture and feel loose, not clumpy or wet. The smell will be earthy and fresh.
It should not smell sour or rotten. This means the process worked well.
You can speed up composting by turning the pile often. This adds oxygen to microbes that break down material faster. Also, keeping the pile moist, like a wrung-out sponge, helps microbes stay active.
Removing weeds or seeds before adding materials matters. The pile needs to get hot enough.
Seeds can survive if it doesn’t. They might sprout when you add compost to your garden, which you usually want to avoid.
Checking temperature helps judge readiness. Hot compost should reach 130 to 160 degrees Fahrenheit. The pile cooling and staying cool means it is ready.
This takes a few days. It shows compost is mature and stable.
Indoor composting often involves smaller bins. This slows the process since less heat builds up and turning is tricky.
People usually bring finished compost to a community garden. They don’t often use it indoors directly.
Different Composting Methods and Which One Suits You
Choosing the right composting method depends on your space, time, and what you want to compost. Outdoor piles work well for big yards.
Tumblers suit smaller spots and speed up composting. For apartments or limited space, vermicomposting or bokashi handles scraps without much fuss.
Traditional Compost Pile
This is the classic heap of organic waste in your yard or garden. You pile food scraps, leaves, and yard waste on the soil.
Or, you use an open bin to hold the compostable materials. It’s low-cost and simple but requires turning every week or two to add oxygen.
Piles need at least 3 feet wide and tall to keep heat inside. You get good results in 3 to 6 months with proper moisture and aeration.
Don’t turn the pile, and decomposition slows down. It may start to smell.
Compost Tumblers and Bins
Tumblers are closed, rotating drums that make mixing easy and fast. You spin the drum every few days. This cuts effort and speeds composting.
It takes about 1 to 2 months. They keep critters out and smells low but usually hold less material.
Bins are stationary containers that can be open or enclosed. Open bins need manual turning, while enclosed bins reduce sight and smell issues. Tumblers and bins are good if you want tidy, controlled compost.
Trench and Sheet Composting
Trench composting means burying scraps directly in garden beds in 6 to 12 inch deep holes. This method is low effort and perfect for gardeners who want to compost and plant simultaneously. It takes longer to break down, around 6 months to a year.
Sheet composting spreads materials over the soil surface, then covers them with mulch. It works well for large areas and improves soil health. But it’s slower than piles or tumblers.
Vermicomposting Basics
Vermicomposting uses worms to break down food scraps indoors or outdoors in small bins. It works well for apartments and places without outdoor space. Worm bins produce finished compost in 2 to 3 months and handle kitchen waste quickly.
This method needs a specific worm type (red wigglers) and controlled moisture. It’s low on smell and space but can’t compost meat or dairy safely. Worm care and bin cleaning are important to keep the process smooth.
| Method | Location | Best For |
|---|---|---|
| Pile | Outdoor | Large yards with space |
| Open bins | Outdoor | Easy access and turning |
| Enclosed bins | Outdoor | Reducing sight and smell |
| Tumblers | Outdoor | Easy turning and fast results |
| Bokashi | Indoor or Outdoor | Fermenting meat and dairy scraps |
| Vermicomposting | Indoor | Apartments and small spaces |
The table shows how space and compost type help pick a method. Choose big piles for yard waste, tumblers for small and fast compost, vermicomposting for indoor scraps.
Enclosed bins suit you if smell or critters bother you. Bokashi works if you want to compost meat or dairy indoors.
Don’t add greasy or meat scraps to piles or worm bins. This stops pests and bad smells.
Your First Week: A Quick-Start Action Plan for Composting
Follow this simple plan to set up your compost pile and keep it healthy. Track your progress with easy signs of success.
- Day 1: Choose a shady spot with good drainage for your pile. Check the soil drains well and the space is easy to reach.
- Day 2: Gather brown materials like dry leaves. Add green materials like grass clippings. Aim for a 3-to-1 brown-to-green ratio to balance nutrients.
- Day 3: Layer the pile with brown and green materials. Make each layer 6 to 8 inches thick. Make the first layer brown to help airflow at the base.
- Week 1: Spray the pile lightly with water until it feels like a wrung-out sponge. Too wet or dry slows decomposition.
- Week 2: Turn the pile with a pitchfork or shovel to mix materials and add oxygen. Heat in the center means microbes are active.
- Weeks 3 to 4: Monitor moisture and temperature twice a week. Keep it damp and around 130°F to 150°F for best breakdown.
- After 1 Month: Look for dark, crumbly soil with an earthy smell. That means your compost is almost ready to use in your garden.
Frequently Asked Questions
What’s the Best Time of Year to Set Up a Compost Pile?
The best time is spring or early fall when temperatures are mild. Moisture and temperature are easier to control in these seasons. This helps your compost break down faster.
Can You Compost Meat or Dairy in a Home Compost Pile?
It’s best not to compost meat or dairy at home. These foods attract pests and can cause odor problems in your pile.
How Close Should a Compost Pile Be to Your Garden?
Place your compost pile within 10 to 20 feet of your garden. This makes it easier to add finished compost to your soil when ready.
Do You Need a Special Container to Start a Compost Pile?
No, a container isn’t necessary; you can compost in a simple pile. However, a bin helps keep pests out and retains moisture better.
How Do You Keep a Compost Pile from Smelling Bad?
Maintain a 2:1 ratio of brown to green materials and turn often. This balance prevents odors and keeps the pile aerated.
Is It Okay to Add Weed Seeds to the Compost Pile?
Yes, but only if your pile heats above 140°F for a few hours. This heat kills most weed seeds and prevents them from sprouting later.
Key Points to Remember
Starting a compost pile is simple when you follow clear steps and watch your pile closely. Keep your pile balanced and moist, and you’ll have rich compost in weeks. Take the first step today by picking your compost spot and gathering materials.