How to Plant Bushes in Front of House: Simple Steps for Healthy Growth
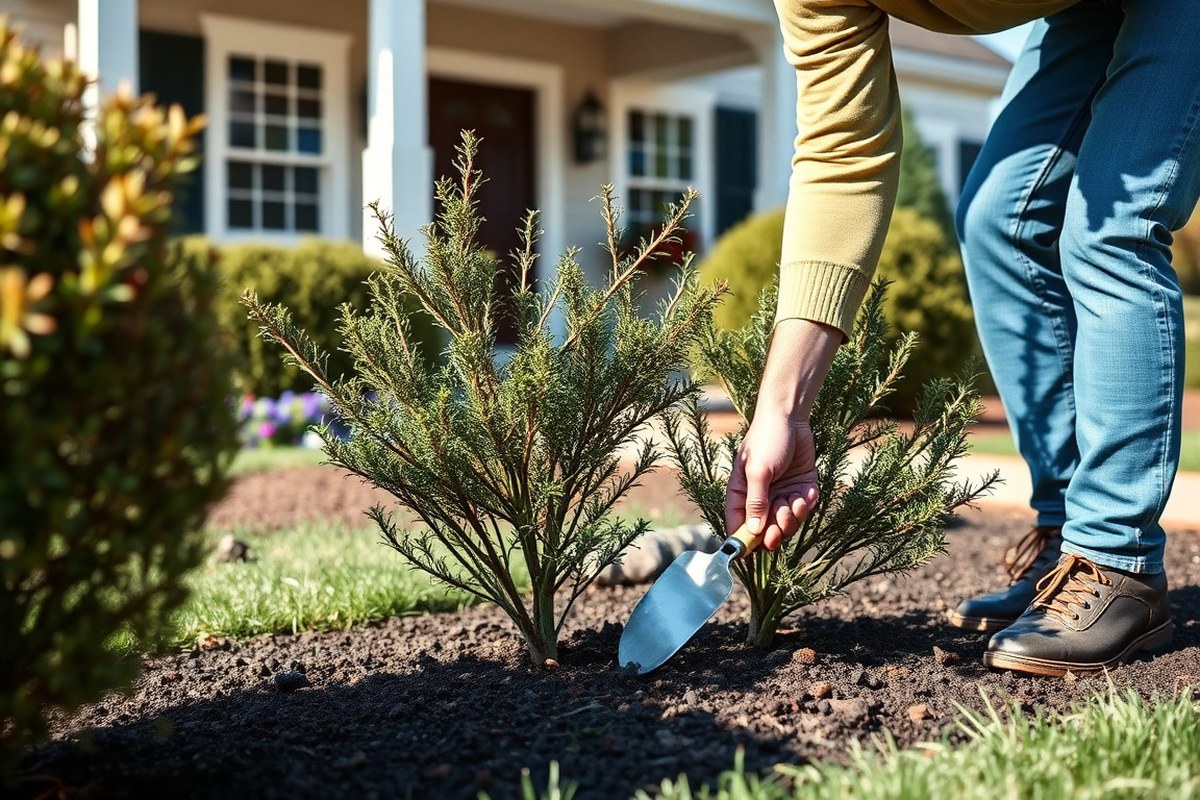
Knowing how to plant bushes in front of house helps you create a neat, welcoming yard. Start by picking bushes that fit your space and sunlight. Make sure to give each plant enough room to grow without crowding the house.
Good soil prep matters a lot. So loosen the ground and add compost before planting.
Dig holes twice as wide as the root ball. Avoid planting too close to the foundation, keep at least 6 feet away for safety.
Plant taller bushes closest to the house. Put medium bushes in the middle. Place small bushes at the front.
This layering adds depth and keeps your yard looking balanced. Water well right after planting to help roots settle in better.
Key Takeaways
- Choose bushes that match your yard’s sunlight and space conditions.
- Dig holes twice the width but same depth as the root ball.
- Keep planting distance at least 6 feet from the house foundation.
- Place taller bushes near the house, smaller ones closer to sidewalk.
- Add compost to soil to improve nutrient content before planting.
- Water new bushes immediately after planting for healthy root growth.
Choosing the Best Bushes for Your Front Yard

Pick bushes that match your house style and yard conditions. For a neat, formal look, boxwoods work well. They stay green all year and fit in sun or partial shade.
Emerald Green Arborvitae can grow up to 20 feet tall in full sun. It provides privacy and adds height to your yard. They need little care and frame corners or fences nicely.
Think about how much sun your front yard gets. Full sun is more than six hours of sunlight a day. Partial shade is between three to six hours.
Full shade means less than three hours of sun. Flowering shrubs like hydrangeas and azaleas prefer part shade. They add spring color but require more watering and trimming.
Your yard’s sunnier spots suit spirea and coneflowers well. They bloom with bright colors. These bushes also need less care.
Choose evergreen bushes if you want green all year. They keep small leaves, giving a tidy look with little leaf drop. Native evergreens survive cold winters well, often down to zone 2 or 3.
Some bushes like Daub’s Frosted Juniper grow low and cover the ground. Taller yews stay under 5 feet but spread out wider. They fit different landscape needs.
Knowing how big bushes get matters for spacing and future growth. For example, a dwarf yaupon holly grows about 4 feet wide. So place them that far apart to avoid crowding.
Match bush size to your space to avoid trimming headaches. Large spirea bushes can get 15 feet tall. They also spread up to 12 feet wide.
They work best in large or informal yard spaces. Smaller types like boxwoods stay compact, ideal near windows or walkways. Also, consider your climate zone.
Shrubs hardy from zones 4 to 8 suit most U.S. Front yards. Some, like azaleas, handle zones 3 to 9, giving flexibility if your winters get cold.
Putting it all together, pick bushes that fit your house’s look, sunlight, and space. An evergreen foundation with flowering accents gives balance and year-round interest. Avoid bushes with a messy, rambling habit in formal yards.
Instead, use low-growing, sculptural types to boost curb appeal without extra work. Following these tips ensures your front yard looks inviting every season and requires less upkeep.
How to Prepare Your Soil and Site for Bush Planting
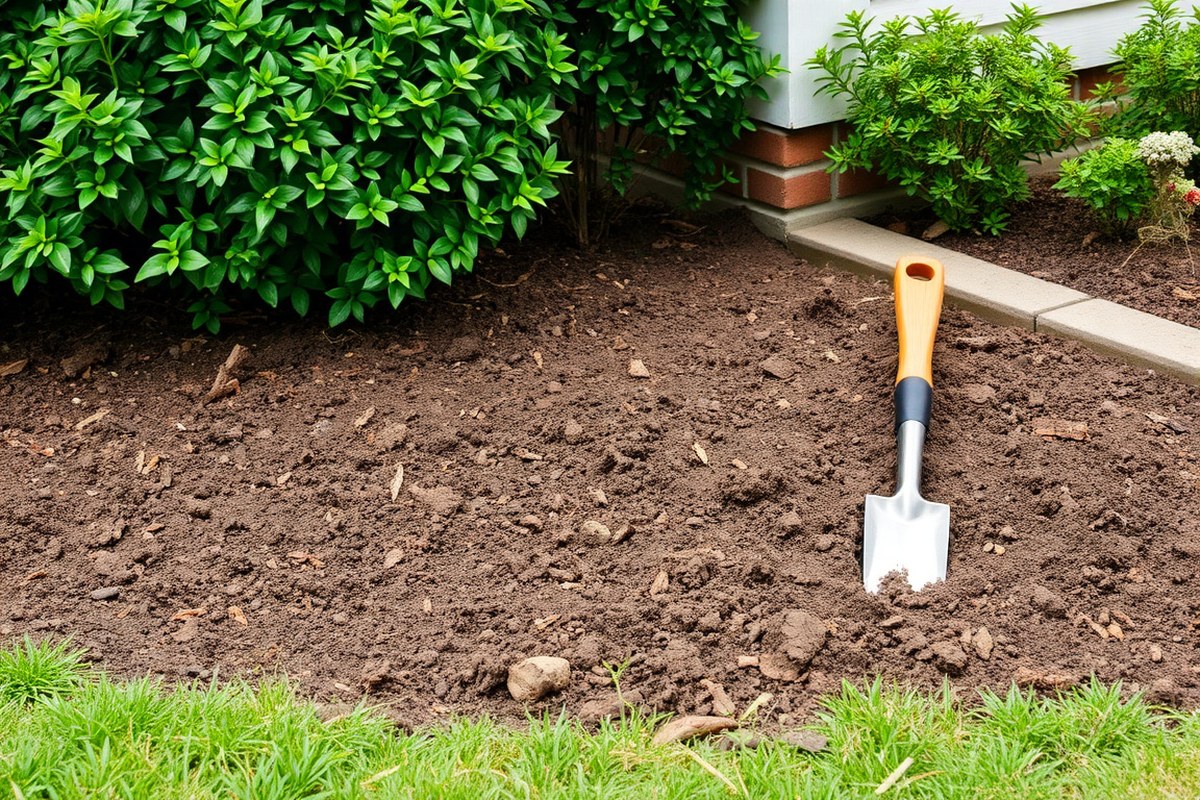
Preparing your soil and spot before planting helps your bushes grow. Good soil and a ready site lead to stronger roots. Take time to prep the area well.
Check your soil before you plant. Add organic matter or grit to fix drainage and soil health. This helps your bushes get the nutrients they need.
Dig holes wider than the root ball but a bit shallower. This lets roots spread out comfortably. It also helps them avoid sitting too deep.
Plant bushes at least 12 to 18 inches away from your home’s foundation. This distance keeps roots from hurting your house. It also protects the house from moisture damage.
How to Test Soil for Bush Planting
Start by checking your soil’s texture and drainage. Dig a small hole about one foot deep where you want to plant. Fill it with water, then see how fast it drains.
Water that stays on soil over four hours shows the soil drains poorly. Drainage problems can harm your bush roots. That means you need to amend it before planting bushes.
Use a simple soil test kit to check pH and nutrient levels. Most bushes prefer a pH near 6 to 7, which helps them absorb nutrients best.
You can find test kits for around $10 to $20 at garden centers or online. Testing will guide you on what your soil lacks or has too much of.
Amending Soil to Improve Fertility and Drainage
Add organic matter like compost or aged manure to heavy, clay soils. This loosens the soil and helps water drain better. Spread 2 to 3 inches of compost over your planting area.
Mix it into the top 6 to 12 inches of soil. This improves soil texture and nutrients. This also adds nutrients to feed your bushes.
For sandy soils that don’t hold water well, compost also helps by improving moisture retention. Drainage issues worsen if soil stays soggy. Adding grit or small gravel helps water move through the soil faster.
This protects roots from too much water. Avoid using too much sand alone, or your soil will dry out too fast.
Digging the Right Sized Hole
Make planting holes twice the root ball’s width but a bit shallower than its height. For example, a 12-inch-wide root ball needs a 24-inch-wide hole. The hole should be 8 to 9 inches deep to keep roots healthy.
Wide, shallow holes give roots room to grow into soft soil. They also stop water from collecting at the hole’s bottom. This keeps roots from drowning.
Rough up the soil inside the hole with a shovel. This lets roots grow out of the hole more easily.
It helps bushes settle in faster. Avoid compacting soil when filling back.
How Far to Plant Bushes from Your House Foundation
Space bushes at least 12 to 18 inches away from your house foundation. This distance keeps roots from damaging the foundation or clogging gutters with falling leaves. It also allows air circulation to reduce dampness near your walls.
Taller shrubs can be closer, around 18 inches. Smaller or dwarf shrubs should be closer to 12 inches. Avoid planting right up against the siding or brick to prevent moisture problems and pest access.
Steps to Prepare Soil and Plant Bushes
Follow these steps before planting to give your bushes a healthy start. Taking the time now avoids problems later with poorly growing or unhealthy bushes.
- Test your soil’s drainage and pH using a hole test and soil test kit.
- Clear the planting area of weeds, rocks, and debris.
- Amend clay soil with 2-3 inches of compost; add grit if drainage is poor.
- For sandy soil, mix in compost to improve moisture retention.
- Dig a hole twice as wide and slightly shallower than the root ball.
- Loosen soil edges inside the hole with a shovel or garden fork.
- Set the bush in the hole, keeping it 12-18 inches from the foundation.
- Backfill with amended soil, firm lightly without compacting, and water well.
Plants placed too close to your home risk root damage and moisture buildup. So keep them at least 12 inches away from the foundation.
Step-by-Step Guide to Planting Bushes Correctly
Planting bushes correctly means setting the roots well and stopping transplant shock. Dig the right hole first. Place the bush carefully inside.
Water it right away. Mulch around to keep moisture. These steps help your bushes grow strong and healthy in front of your house.
Gathering Planting Tools and Materials
Get the right tools and materials ready before you start planting. Get a shovel, gloves, and a watering can or hose.
You may need mulch and a hand rake too. The rake helps smooth soil around the plant.
Also gather your bushes, which you should space based on their mature size. Keep 36 inches clear from walkways.
This includes paths to your front door. It prevents crowding and tripping.
Proper Hole Digging and Root Preparation
Dig a hole wider than the root ball. For a 20-inch root ball, make it 50 inches wide. This gives roots room to spread.
This loosened soil helps roots spread out. Make the hole 2 to 3 inches shallower than the root ball’s height. This stops the bush from settling too deep.
Take the bush out carefully from its container. Gently pull apart any roots that are circling.
This helps roots grow outward. This stops roots from growing in tight circles and strangling the plant later.
Planting and Initial Watering Techniques
Put the bush in the hole with the root ball top slightly above ground. This avoids burying the stem too deep.
This prevents rot and allows air to reach roots. Backfill the hole halfway, then water to settle the soil around roots.
Fill the rest of the hole with soil and water again for good hydration. Water deeply but avoid waterlogging, which can kill roots. Use about 5 gallons of water per bush right after planting.
Mulching for Moisture Retention and Weed Control
Add 2 to 3 inches of mulch around the bush. Keep the mulch away from touching the stems.
Mulch holds moisture and stops weeds that compete for water and nutrients. Use organic mulch like wood chips or pine needles for best results.
Replenish mulch yearly to maintain a steady layer. This simple step keeps your bushes comfortable and helps them settle into their new home.
- Gather tools: shovel, gloves, watering tools, mulch, bushes.
- Dig a hole wider and slightly shallower than the root ball size.
- Loosen circling roots before planting.
- Place bush with root ball top just above soil surface.
- Fill hole halfway, water deeply to settle soil.
- Fill hole completely with soil, water again thoroughly.
- Apply 2-3 inches of mulch around bush, keep mulch off stems.
- Maintain mulch layer yearly to keep soil moist and weed-free.
Watering, Mulching, and Fertilizing New Bushes
After planting bushes, water their root balls once daily for 30 minutes. This keeps roots damp so they adjust well in the soil. Use a drip or soak hose to prevent soil erosion near roots.
After the first week, switch to watering once a week for about two hours. Deep watering encourages roots to grow deeper instead of staying near the surface.
Adjust this routine if rain totals half an inch or more that week. Skip watering to prevent overwatering.
Apply 2 to 3 inches of organic mulch around the bush base. Use materials like shredded bark or wood chips. Mulch helps keep soil moist and cool.
Keep mulch about an inch away from the bush’s stem to prevent rot. Mulch helps keep soil moist, regulates temperature, and reduces weeds, all of which protect new roots.
When the soil feels dry below the mulch, check if it’s time to water again. During summer, water your bushes more often to prevent drying out. Shrubs like dwarf blue spruce need extra water.
Check soil moisture regularly. In cooler months, reduce watering to avoid soggy soil that can harm roots.
Apply fertilizer about six weeks after planting. Use a slow-release fertilizer designed for shrubs at half the recommended strength.
This helps the plant grow without overwhelming new roots with too many nutrients. Avoid fertilizing right after planting, which can cause stress.
Some bushes, like compact PJM rhododendrons, do best in acidic soil. They also need fertilizers made for acid-loving plants. Use the right product for healthy growth.
Check the plant tag for fertilizer advice suited to your bush type. If unsure, ask staff at your local garden center. Matching fertilizer helps bushes grow well.
Fertilizing and watering schedules change by season. In spring, plants awaken and need more water and nutrients.
Come fall, reduce feeding and water to help bushes prepare for winter dormancy. Keep checking soil moisture regularly in every season to avoid drying out or overwatering.
Plant the root ball about an inch above ground level in soil. This helps excess water drain away from the roots. It prevents root rot and keeps bushes healthy.
This prevents root rot during wet periods. Mulch shallow roots gently after planting to keep them cool and moist.
Spacing and Layout Tips for Attractive Bush Planting
Plan spacing based on each bush’s mature width to avoid crowding. A shrub that grows 4 feet wide needs about 2 feet space. This space is from its neighbors, so they don’t crowd each other.
Proper spacing helps each plant grow well. This gives room for healthy growth and airflow.
You can place smaller bushes about 2 to 3 feet apart. Larger ones might need 4 to 6 feet.
Place bushes in layers by height. Low bushes go in front. Medium bushes sit in the middle and tall ones stay at back.
This layering creates depth and balances your house’s scale. Shrubs like Low Scape Mound Aronia stay compact and colorful.
They fit well under windows or near walkways. Their size makes them easy to place.
Plant tall bushes near the house corners or behind shorter plants. Medium bushes fill the spaces between tall and low shrubs, adding fullness. Put low bushes like boxwoods or Shrubby Cinquefoil in front.
They should not block windows or paths. This keeps your entryway clear and cozy.
Decide if you want groups, rows, or isolated bushes based on your style and yard space. Groups of three to five create a natural look.
Rows suit formal styling or lining a walkway. Single bushes can highlight an entry or break up the planting bed.
Keep plants out of walkways to prevent damage and accidents. Leave about 18 to 24 inches from the path edge for low bushes. Keep taller shrubs at least 3 feet from window bases.
This prevents them from blocking views or sunlight. It helps keep your rooms bright. This also lets you prune easily.
Think about bush shape and growth speed too. Columnar ones like ‘Totem Pole’ switch grass fit in tight spots and can hide utilities. Wide shrubs like azaleas make bold statements when spaced well.
Make your layout blend with your home’s style. Traditional homes fit tidy boxwood hedges. Modern ones work with varied shapes and heights.
Don’t crowd plants too close, it invites disease and ruins your carefully planned look.
Common Planting Mistakes and How to Fix Them
Planting bushes too close to your house causes several problems. Roots can damage the foundation, and shrubs may block airflow around your walls. Always plant bushes at least 6 feet away from the house to avoid these issues.
Depth is another common mistake. Planting bushes too deep can smother roots and cause rot.
When you see wilting leaves or slow growth, check the root ball depth. The top of the root ball should be level with the ground.
Poor soil prep and watering harm bushes too. Soil without enough nutrients or poor drainage stunts growth.
Overwatering can drown roots, while underwatering dries out plants. Use a soaker hose to water deeply and slowly, soaking the root zone without runoff.
- Plant bushes at least 6 feet from the house for airflow and space.
- Set the root ball top level with the soil surface, not buried.
- Amend soil with compost or organic matter before planting.
- Water new bushes with a soaker hose twice a week in summer.
- Monitor leaves for spots or browning, which may signal problems.
- Check mature size on tags and space bushes half their width apart.
- Prune only dead or damaged branches until plants establish roots.
Watch for wilting or slow growth and adjust your watering amounts first. Cut back watering if leaves turn yellow or mushy.
Add mulch to keep soil moist and protect roots from heat. Spotty or streaked leaves need pruning of affected parts to lower disease risk.
Recovering struggling bushes takes patience. After fixing soil or watering issues, give plants weeks to bounce back.
Avoid heavy fertilising until leaves look healthy again. Healthy bushes offer better privacy and curb appeal, fitting nicely into your yard’s design.
Pruning and Maintaining Bushes After Planting
Prune bushes once or twice a year to keep their shape and size. For flowering varieties like bigleaf hydrangeas, prune right after they bloom.
Panicle hydrangeas need pruning in late winter. Regular trimming stops bushes from becoming overgrown and messy.
Use clean, sharp shears and cut branches back to a healthy bud or side branch. Trim dead or damaged twigs first to boost growth.
Shaping evergreens like Winter Gem boxwood is easy with light pruning. This shrub grows slowly and stays tidy when cut back annually.
Look closely for pests like aphids or scale, which leave sticky residue or holes in leaves. Treat small infestations with insecticidal soap or neem oil.
For fungal diseases, remove affected leaves and prune crowded areas to improve air flow. Healthy bushes need dry leaves and good sunlight to fight pathogens.
Prepare bushes for winter by adding 2 to 3 inches of mulch around their base. This keeps roots warm and moist during freezing temperatures.
Evergreens benefit from wrapping with burlap to block harsh winds after the first frost. Avoid heavy pruning in late fall to prevent stress during cold months.
Seasonal upkeep includes removing fallen leaves and debris from planting beds. Clean beds reduce pests and diseases.
Feed bushes lightly in early spring with balanced fertilizer to support fresh growth. Pay attention to each bush’s needs, as some require more water or nutrients than others.
Adapting Bush Planting for Different Yard Conditions
Planting bushes in different yard conditions takes some care and adjustments. You tailor your approach to slopes, drought, shade, or poor soil. This way your bushes grow strong and look great in front of your house.
Planting on Slopes and Terraced Areas
Slopes need special steps to keep bushes safe and happy. You should dig a flat planting spot, called a berm or terrace, into the slope. It holds soil and water better than planting directly on a steep incline.
Adding mulch around the base prevents erosion and keeps roots cool. Pick bushes that handle slopes well. Try barberries or drought-tolerant conifers.
They won’t slide downhill. Spacing is important so water doesn’t wash away soil between them.
Build terraces by cutting flat shelves. Line them with stones or wood. This stops soil runoff.
Selecting Drought-Tolerant Shrubs
Look for bushes that survive well with less water if your yard dries out quickly. Barberries and some tough conifers need little watering once settled.
They grow well in full sun and poor soil. They fit hot, dry spots near sidewalks or driveways.
Plants like these save you time and water bills. Plant them where you know watering will be tough or inconsistent. Make sure the soil drains well so roots stay healthy and don’t rot.
Choosing Bushes for Shaded Front Yards
Shade lowers light available for bushes, so pick types that actually enjoy low light. Camellias, inkberry, and some hollies can thrive under tall trees or on north-facing walls. These bushes prefer cool, slightly acidic soil that drains well.
Plant in areas with dappled or partial shade, avoiding spots with no light at all. Shaded areas can hold moisture longer, so water less often to avoid root problems. Choose colors and shapes that brighten your shaded yard.
Managing Soil Drainage and Erosion
Poor drainage can drown roots, while too much runoff washes soil away. Before planting, test soil drainage by digging a hole and filling it with water. It should drain within 24 hours for most bushes.
Add organic matter or sand to improve soil texture and let water pass through. Use mulch and groundcover plants on banks to slow erosion. Inkberry is great for wet soils, while barberries handle dry and poor soils well.
Don’t plant in spots where water pools after heavy rain; roots will rot quickly.
Step-by-Step Action Plan
Follow these simple steps to plant bushes in front of your house today.
- Day 1: Choose bushes that fit your climate and yard sunlight. You picked right if the bushes look healthy at the nursery. They should match your outdoor conditions too. Healthy plants fit the climate and sunlight of your yard.
- Day 2: Clear the planting site of weeds and debris. Smooth, well-drained soil means your bushes will settle in easier.
- Day 3: Dig holes twice as wide and as deep as the root ball. Proper hole size ensures roots spread well and bushes stand firm.
- Day 4: Place bushes in holes, then loosely fill with soil and gently press. Check that bushes are upright and soil supports them evenly.
- Day 5: Water each bush thoroughly, soaking the roots. Water should soak in quickly. The soil should stay moist. This means you planted it right.
- Week 2: Put mulch around the bushes. Make it 2 to 3 inches thick. Keep mulch 2 inches away from the stems. Mulch keeps moisture and reduces weeds well.
- Week 3: Check soil moisture twice weekly and water if the top inch feels dry. Your bushes should look firm and green, not wilted.
- Month 2: Start light pruning to shape bushes and remove any dead or crowded branches. Well-kept branches mean healthy growth ahead.
Frequently Asked Questions
How Do I Protect My New Bushes from Pests?
Use insecticidal soap or neem oil after planting. These products are safe for new bushes and keep common pests away without harming the soil. Regular checks help catch problems early.
Can I Plant Bushes Too Close to My House?
Yes, planting too close can cause moisture problems. Keep at least 2 to 3 feet from the foundation to allow air flow. This prevents root crowding and water buildup against your home.
When Is the Best Time to Plant Bushes in Front of My House?
Early spring or fall is best for planting bushes. These seasons give roots time to settle before extreme temperatures. Avoid midsummer to reduce stress from heat.
Should I Stake My New Bushes?
Most bushes don’t need staking unless winds are strong. Avoid staking to let roots grow stable naturally. Use stakes only if the bush leans or risks damage.
How Deep Should I Plant the Bushes Compared to Their Nursery Pots?
Plant bushes at the same soil depth as in their nursery pots. Don’t bury the stem deeper; this can rot it. The root ball should sit level with surrounding soil.
What Soil Amendments Improve Bush Growth in Front of a House?
Adding compost improves soil structure and drainage. Mix it with existing soil before planting. Avoid too much fertilizer at the start to prevent root burn.
The Bottom Line
Planting bushes in front of your house creates welcoming, fresh curb appeal. Start by picking the right bushes and prepare the soil carefully. Grab your tools and plant a bush today to add life to your yard.