How Can I Build a Greenhouse: A Complete Guide for DIY Gardeners
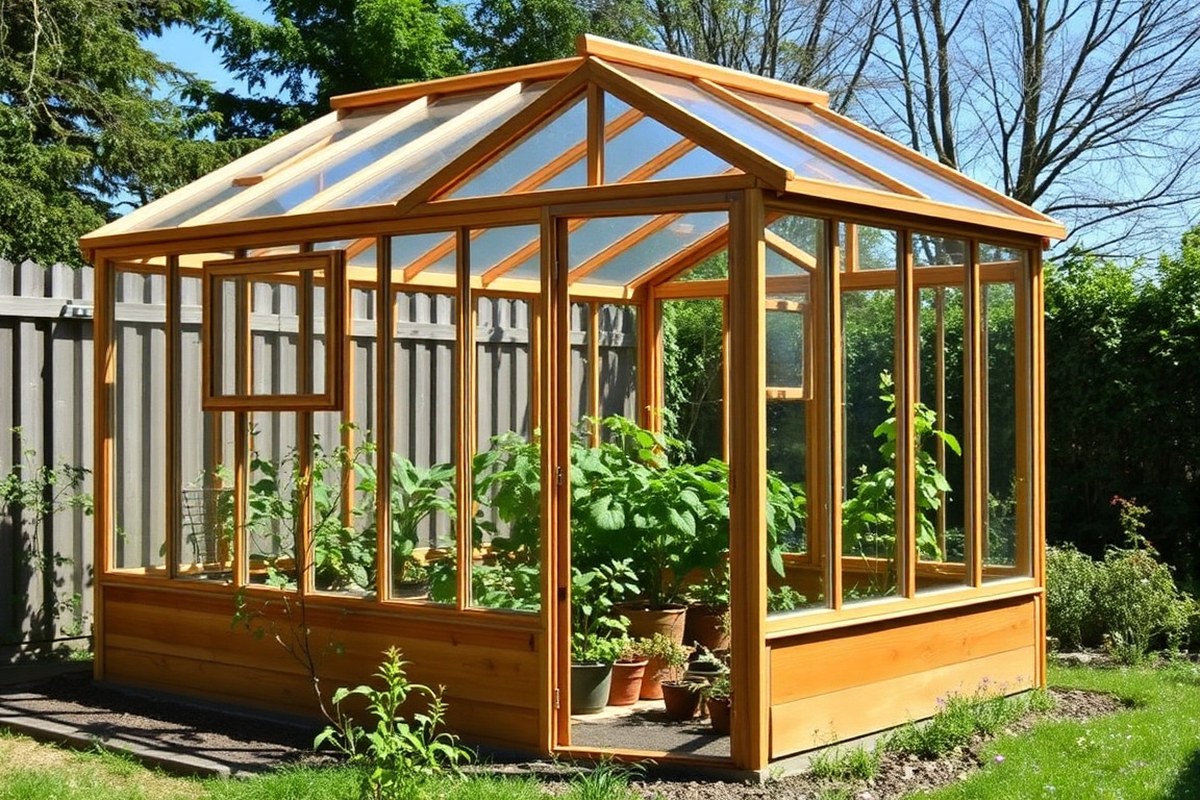
How can I build a greenhouse? Start by choosing a simple frame made of 2×4 wood. Use polycarbonate panels for clear, durable glazing that lets sunlight in but keeps heat inside.
Look for free or cheap materials by checking local listings or recycling centers. Building this greenhouse might cost around $50 if you upcycle materials.
You’ll need to hunt for deals and reused parts. This approach saves money but takes some extra effort.
Begin your build by picking a sunny spot with good drainage. Avoid placing your greenhouse too close to existing structures to ensure proper airflow and sunlight.
Make sure your foundation is level and solid to support the frame. Securing the frame with screws rather than nails makes it sturdier. Add vents or windows for ventilation to control temperature and humidity inside your greenhouse.
Key Takeaways
- Use 2×4 lumber for a sturdy and easy-to-work-with greenhouse frame.
- Polycarbonate panels let in sunlight and hold heat better than plastic sheets.
- Scout free materials locally to keep your greenhouse cost around $50.
- Choose a sunny, well-drained site away from buildings for best results.
- Keep at least 8 feet between your new greenhouse and any existing ones.
- Plan for ventilation to prevent overheating on warm days.
How to Build a Greenhouse: Step-by-Step Construction Guide
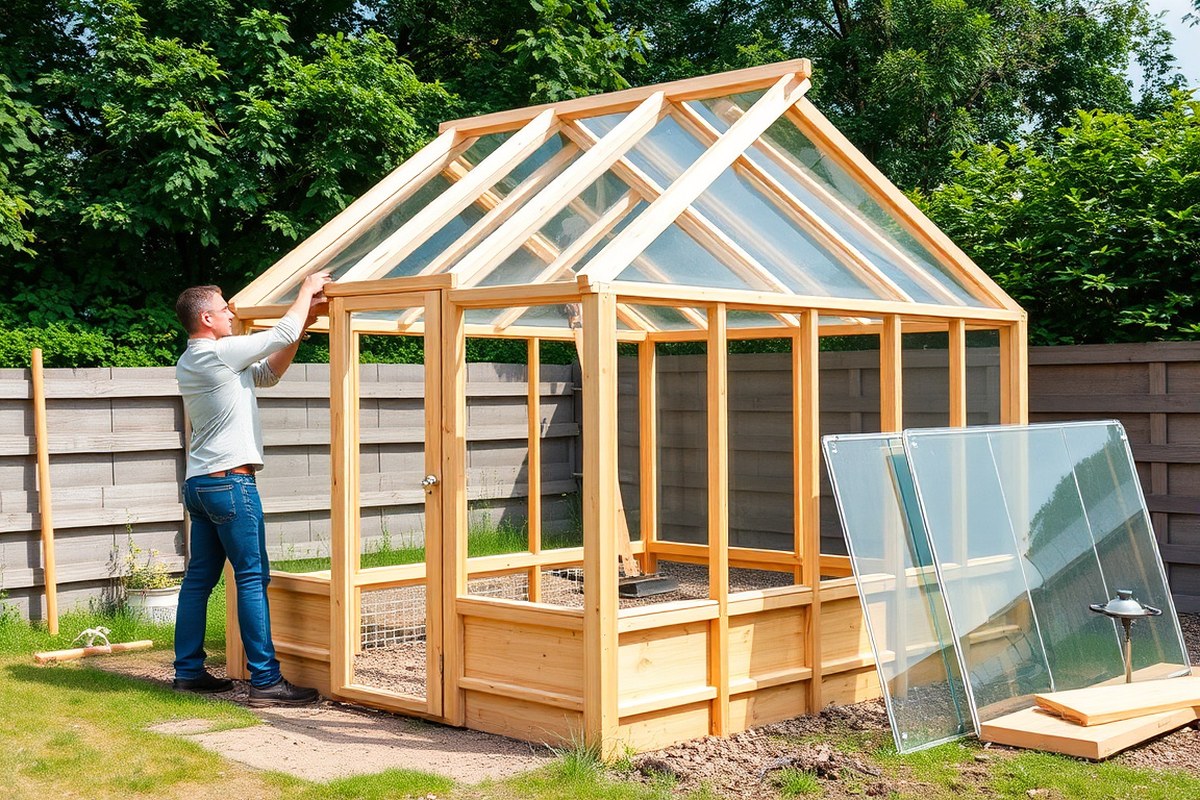
Building a greenhouse step by step ensures it will be sturdy and functional. Begin with a level foundation that suits your chosen frame and climate.
Assemble the frame carefully, then cover the structure with your glazing material. Finish by adding doors, windows, and proper ventilation for the best plant growth.
- Prepare the foundation site. Clear and level your site well. Use compacted gravel or a concrete slab to create a frost-proof base. This foundation prevents shifting and water pooling under the greenhouse.
- Build or place the frame. Select wood, aluminum, or steel depending on your budget and strength needs. Assemble the frame parts using screws and braces for extra stability. Check for square angles to keep the frame aligned.
- Install the frame on the foundation. Anchor the frame firmly to the foundation with bolts or straps. This keeps the structure secure against wind and weather.
- Attach glazing or covering. Use polycarbonate panels, glass, or greenhouse-grade plastic sheeting. Secure panels tightly to prevent drafts but allow room for expansion. Overlap seals on plastic covers to keep moisture out.
- Fit doors and windows. Hang hinged doors that fully open for easy access. Install windows or roof vents that you can open to control airflow. Make sure all openings close tightly to conserve heat.
- Add trim and weatherproofing. Seal edges with weatherstripping or silicone caulk. Attach wooden or metal trim to cover fasteners and gaps. This reduces leaks and improves insulation.
- Test ventilation and structure. Open and close all doors, windows, and vents. Make sure they work smoothly and seal well when shut. Check the frame for any wobbles or loose parts you must tighten.
Building a small 8-by-8-foot greenhouse typically takes two to four days over several weekends. Basic materials and tools keep costs near $500 for a wood frame with plastic covering. Adding polycarbonate panels or aluminum frames can raise costs to $2,000 or more.
These materials improve durability and give better insulation. The extra cost might be worth it.
Common pitfalls include uneven foundations causing frame misalignment and loose glazing that lets heat escape. Taking your time with each step and using a level regularly avoids these problems. Secure anchors and bracing keep your greenhouse stable through weather changes.
Choosing Materials: Frames, Coverings, and Foundation Options

Choosing the right materials affects your greenhouse’s performance and lifespan. Your frame, covering, and foundation shape how well it works. Choose wisely to last longer.
Frames need to be strong and resist weather well. Coverings should insulate and protect plants inside.
Foundations keep your greenhouse steady in different soils and climates. Costs vary widely, so balance durability and budget carefully from the start.
Frame Material Types and Characteristics
Wood frames made from pressure-treated lumber or cedar look traditional and are fairly affordable. Wood frames need regular upkeep to stop rot. They are easy to cut and put together with common tools.
PVC is the cheapest frame option and popular for quick hoop houses. But it lacks rigidity and can bend or break in strong winds.
Aluminum or steel frames cost more but resist rust and need almost no maintenance. Their strength makes them ideal for larger greenhouses or those in tough climates.
Metal frames last many years with little work. They cost more upfront but save effort and repairs later.
Covering Materials: Options and Durability
Polycarbonate panels provide a good balance of insulation, light diffusion, and toughness. They usually last many years and resist cracking, making them ideal for year-round growing. Plastic films are budget-friendly but only last 1 to 4 years before needing replacement.
Glass offers the highest clarity and looks great but is heavy, fragile, and expensive. It suits those who want a classic style and don’t mind extra costs or careful handling.
Match your covering choice to the frame. For example, heavy glass should pair with metal or sturdy wood frames.
Foundation Methods for Various Settings
Concrete slabs create a solid foundation, perfect for permanent greenhouses on firm soil. They prevent weeds and let you anchor the frame securely.
Gravel or compacted soil bases suit well-draining spots. Soft clay or frost-heavy areas may need extra foundation support.
In cold places, raise the foundation off the ground. This prevents damage from frost pushing up the soil. Simple foundations like wood or cinder blocks save money.
You must check often to keep the greenhouse level. Choose a foundation based on your soil type and climate conditions.
Cost Estimates and Budget Tips
Building costs start around $50 for a simple PVC hoop. Quality wood or metal frames with polycarbonate panels cost over $3,000. Wood frames generally cost less than metal but require more upkeep expenses over time.
Plastic film coverings are cheap but need changing every few years. Replacing them adds to your greenhouse’s overall cost. Polycarbonate panels have higher initial prices but last much longer.
Write down all material costs before buying your supplies. This helps avoid surprises and keeps your project within budget.
| Category | Material | Details |
|---|---|---|
| Frame Materials | Wood (pressure-treated or cedar) | Affordable, easy to work with, requires maintenance |
| Frame Materials | PVC | Cheapest, common in hoop houses, lacks rigidity |
| Frame Materials | Aluminum or Steel | Strongest, durable, near-zero upkeep |
| Covering Materials | Polycarbonate Panels | Best balance of insulation, durability, light diffusion, lasts years |
| Covering Materials | Greenhouse Plastic Film | Budget-friendly, lasts 1-4 years |
| Covering Materials | Glass | Excellent clarity, aesthetics, heavy, fragile, expensive |
Keep your foundation perfectly level to avoid frame warping and leaks later.
Selecting the Ideal Greenhouse Location and Size
Place your greenhouse where it gets at least 6 hours of sun daily. Choose a flat spot with good drainage and some wind shelter. Think about the size you need to fit your plants and space.
Finding the Best Spot for Sunlight
Look for a south-facing area if you live in the northern US. This lets your greenhouse catch sunlight all day long. You want a minimum of 6 hours of direct sun to keep plants healthy.
Avoid tall trees or buildings that cast shadows. Early morning light is great, so orient the greenhouse southeast if possible. This helps plants warm up earlier in the day.
Checking the Ground and Drainage
The area needs to be flat to make building easier and keep water from pooling. Uneven ground means you will need to level the site first by adding or removing soil.
Good drainage keeps roots from sitting in water and prevents mold or rot. Look for areas that don’t flood after rain and avoid low spots where water collects.
Protecting from Wind and Weather
Pick a location with natural windbreaks like shrubs, fences, or buildings nearby. Strong wind can damage the greenhouse or cool down the inside too much.
If the site is open, you may need to add windbreaks or build the greenhouse lower to the ground. Anchoring it firmly also helps it stay stable in storms.
How to Decide the Right Greenhouse Size
Match the size to your gardening goals and space availability. The common size is about 8 by 6 feet. But you can go bigger if you have the room and want more plants.
Remember that bigger means more cost, more materials, and more maintenance. Smaller greenhouses heat up faster and work well for starting seedlings.
Working on Slopes or Uneven Land
You can build on a slope, but plan to level the base first. This might mean adding a flat foundation or building a berm greenhouse on a south-facing slope.
Bermed earth greenhouses use the slope to gain extra warmth from the ground. This method requires more work but can improve heat retention through winter.
Controlling Temperature and Ventilation for Healthy Plants
Ventilation keeps air flowing and temperature steady inside your greenhouse. Plants need fresh air to stop mold, mildew, and diseases from growing. Without enough airflow, humidity can climb, causing heat spikes that may damage or stress plants.
Natural ventilation works well if you place vents high and low. Hot air rises. So an upper vent about 12 inches below the roof lets heat escape.
Lower vents near the base draw in cooler air. You can cut vents on opposite sides for cross-ventilation.
This helps reduce humidity and heat inside. The vents should be about window-sized for best effect.
Adding exhaust fans strengthens airflow if natural vents aren’t enough. A 6-inch fan costs $30 to $50. You mount it near the roof to pull hot air out.
You can install an automatic vent opener with a wax cylinder for $20 to $40. It opens vents once temperatures hit the set point, usually 80°F. Then it closes vents to keep warmth inside. The system controls airflow automatically.
Keeping your greenhouse insulated slows heat loss in colder months. Tape foam board or bubble wrap around frame edges. This cuts perimeter heat loss significantly.
University of Georgia says proper insulation can reduce loss by half. Clear plastic or polycarbonate panels add extra insulation while letting sunlight in.
Don’t cover vents or windows with insulation because that blocks airflow. Instead, use removable covers or seal them only during freezing nights.
This setup helps keep your plants safe without suffocating them with stale air. During summer, keep vents open to avoid temperatures rising above 90°F, which can scorch leaves.
Humidity around 60 percent is ideal, combined with a drop in night temperature for healthy growth. You can add a small dehumidifier if your greenhouse feels clammy in warm weather. Monitor temperature and humidity regularly with a digital thermometer-hygrometer to catch problems early.
Plan your ventilation before building by marking vent spots at the top and bottom walls. Verify you have enough screened openings to block pests but still allow ample airflow.
Choose fans with adjustable speeds or thermostats so the system reacts to actual conditions. This approach saves energy and prevents your plants from overheating or drying out.
Planning Your Greenhouse Layout: Shelving, Irrigation, and Electrical
Arrange shelving based on the types and sizes of plants you want. Place taller, sun-loving plants on lower shelves near the greenhouse’s sunnier side. Use adjustable shelves for seedlings, herbs, or bigger pots.
Change the layout as plants grow. You get flexibility with shelf placement.
For space efficiency, consider bench-style shelving along the sides with a walkway down the center. A 10 by 12-foot greenhouse often has benches 2 feet deep. The aisle between benches is usually 3 feet wide.
This gives enough room to reach plants without crowding. Make shelves from treated wood or metal for durability in the moist environment.
Choose your irrigation based on greenhouse size and your daily routine. Small greenhouses do well with a simple watering can or drip irrigation with a timer. Drip lines deliver water directly to the roots, saving time and reducing leaf diseases.
For bigger greenhouses, add a mains-powered drip system or sprinklers. Connect these to a garden hose or water source.
To install drip irrigation, run the mainline tubing along the shelves. Attach small drip emitters near each plant. Add a timer at the water source to control watering time.
Watering usually lasts from 10 to 30 minutes based on plant needs. This setup costs about $50 to $150 for parts, depending on size and complexity.
Adding electrical fixtures needs careful planning to stay safe around water and humidity. Use outdoor-rated wiring and waterproof boxes for power outlets. Install a ground-fault circuit interrupter (GFCI) outlet to prevent shocks.
Run power lines in conduits or back channels in the frame. This protects wires from moisture and damage.
Lights and fans can run on standard 110-volt power from your home’s electrical panel. Place thermostats or timers to control fans based on temperature.
Keep electrical fixtures at least 12 inches from sprinklers or misting systems to avoid water contact. Hiring a licensed electrician can cost $300 or more but ensures code compliance and safety.
Always use waterproof GFCI outlets in greenhouse wiring to reduce shock risks.
Avoiding Common Building Mistakes and How to Fix Them
Common greenhouse building mistakes include poor sealing, weak framing, and inadequate ventilation. These flaws cause heat loss, drafts, or damage during storms. Watch for gaps along joints, loose screws, or uneven walls early to avoid bigger problems later.
Leaks or drafts show up as cold spots or wilting plants on chilly days. You can hold a lighted candle or smoke stick near seams to spot air movement easily.
Check screw fittings and plastic sheeting for holes or tears. These fixes cost under $20 and take about an hour.
- Sealing gaps with waterproof tape or silicone caulk
- Reinforcing frame joints with extra brackets or screws
- Replacing torn plastic or upgrading to double-layer poly for better insulation
- Adding vents or fans to improve airflow during hot weather
- Checking foundation stability and leveling any uneven ground
- Using weatherstripping around doors and windows to stop drafts
Fixing these issues keeps your greenhouse stable and snug, reducing heat loss up to 40%. Double-layer polyethylene cuts heat loss a lot compared to one layer. It costs about 10% more but saves warmth in winter.
This makes it a good choice for colder months. Reinforcing frames stops bending under snow or wind.
This helps in winter or stormy weather. It keeps your greenhouse sturdy and safe.
Be sure the site isn’t too windy or shaded, which increases wear and raises heating needs. Lean-to greenhouses use your house to block wind on one side. This reduces exposure and retains heat.
It makes good use of natural warmth. Check for leaks and loose parts every few months.
This protects your plants from damage. It also saves money by avoiding big repairs later.
How Much Does It Cost and How Long Will It Take to Build?
Building a DIY greenhouse usually costs between $3,000 and $6,000. The price depends mainly on size, materials, and how much help you have. You can save money by picking simple covers like PVC sheets.
Polycarbonate panels cost less than glass too. These options work well for most greenhouses.
The time varies depending on the size and type. Small kits can take just a few days. Larger custom builds might need several weeks.
Foundation and frame prep usually take the longest time. Adding the cover comes after that. Finish with the small details and touches.
Having someone help you makes the process faster. It also helps things go more smoothly.
| Aspect | Typical Range | Notes |
|---|---|---|
| Cost of DIY Greenhouse | $3,000 – $6,000 | About 30-40% less than professional builds |
| Size Example | 7 x 10 feet | Common for backyard projects |
| Build Time | 3 days to 3 weeks | Depends on size and complexity |
| Materials | PVC, polycarbonate, wood frame | Used for economy and durability |
| Professional Build Cost | Approx. $11,000 | Includes labor and premium materials |
Start your budget with lumber for the frame, like cedar or treated pine. These resist rot and hold up well outside. Next, add costs for your covering, PVC is cheapest, while polycarbonate gives better insulation.
You can lower costs by doing all the work yourself. Break the work into steps for an easier process. Start with the base first.
Then build the frame, and last add the covering. Doing things in order helps keep your schedule on track and your budget steady.
Safety and Maintenance Tips for Long-Lasting Greenhouses
Building and maintaining a greenhouse safely protects you, your plants, and your investment. Use proper gear during construction and keep a regular maintenance schedule. Prepare your structure for weather swings to avoid costly damage.
Construction Safety Essentials
Wear sturdy gloves and safety goggles to protect your hands and eyes from sharp edges. Use a stable ladder and have a helper steady it when lifting heavy panels. Check tools before use to avoid injuries from faulty equipment.
Avoid working in wet or windy conditions, which increase slipping or falling risk. Follow the manufacturer’s instructions for any materials or hardware carefully. Securely anchor the greenhouse frame to prevent it from tipping or shifting as you work.
Routine Greenhouse Maintenance Tasks
Check your greenhouse monthly for cracks in the covering. Look for loose screws. Also, watch for rust on metal parts.
Clean glass or plastic panels with mild soap and water to keep sunlight coming through. Remove dead leaves or debris that block ventilation or invite pests.
Lubricate door hinges and locks twice a year to keep them working smoothly. Check irrigation systems monthly for leaks or clogs that could starve plants of water. Maintain a written maintenance checklist to track tasks and timing for your greenhouse.
- Inspect frame and panels monthly
- Clean glazing surfaces quarterly
- Lubricate hardware twice a year
- Check irrigation monthly
- Remove plant debris regularly
- Examine foundation for shifts or cracks annually
Maintaining your greenhouse regularly can extend its life by several years. Ignoring small repairs often leads to bigger structural damage or plant diseases.
Preparing for Seasonal Weather Challenges
Install windbreaks like fences or shrubs on the windy sides to reduce gust impact. Remove snow buildup promptly from roofs to avoid collapse under heavy weight. Use shading cloth or paint mixed with water on hot days to prevent overheating.
Secure all loose objects around your greenhouse before storms or strong winds. Have extra plastic sheeting and extra fasteners on hand to quickly patch punctures or tears. Keep thermometers inside to monitor temperature drops that can harm plants below 40°F (4°C).
Do not wait for a storm to fix weak points in your greenhouse frame or glazing.
Step-by-Step Action Plan
Follow these steps to build your greenhouse efficiently and check each phase as you go. This plan helps you stay on track and avoid common pitfalls.
- Before you start: Choose a good location with full sun and level ground. Confirm it has easy water access and space for your size.
- Week 1: Gather materials like frame parts and covering sheets. Check each for damage or missing pieces.
- Week 2: Build the foundation and frame. Make sure the frame is square and secure before moving on.
- Week 3: Install coverings and doors. Test that doors open easily and coverings hold tight in the wind.
- Week 4: Set up ventilation and irrigation systems. Turn them on to confirm proper airflow and water flow.
- Week 5: Add shelves and organize the inside layout. Walk around to ensure everything fits and feels stable.
- After 6 weeks: Inspect all joints and fastenings weekly. Tighten anything loose and replace worn parts as needed.
Frequently Asked Questions
What Tools Will I Need to Build a Greenhouse at Home?
You’ll need basic tools like a saw, drill, screwdriver, and measuring tape. These help you cut wood, secure screws, and ensure precise assembly for a sturdy greenhouse structure.
How Do I Find Free or Low-Cost Materials for My Greenhouse?
Check local classifieds and recycling centers for leftover wood or old windows. Scouting for free or cheap items helps keep your greenhouse build budget near $50.
Can I Build a Greenhouse by Myself, or Do I Need Help?
You can build a small greenhouse solo with patience and clear instructions. For larger or more complex greenhouses, having one extra person makes lifting and aligning parts easier.
How Long Should a Beginner Expect to Spend Building a Small Greenhouse?
Beginners usually spend a few weekends on an 8’ x 10’ greenhouse project. Taking your time avoids mistakes and ensures a solid, lasting structure.
Is Building a Greenhouse Cost-Effective Compared to Buying Pre-Made Ones?
Building your own greenhouse for about $50 saves money versus buying commercial models. You also get to customize size and materials to fit your yard and budget.
What’s the Best Way to Insulate a DIY Greenhouse in Cooler Climates?
Use double-layer polycarbonate or add bubble insulation sheets inside your greenhouse. These materials keep heat in better than single-pane glass or plastic film.
Final Thoughts
Building your own greenhouse takes some time but pays off with fresh plants year-round. Start by picking the best spot and ordering your materials today. Taking that first step sets your project in motion for success.