How to Plant Potatoes That Are Sprouting: Complete Steps for Best Results
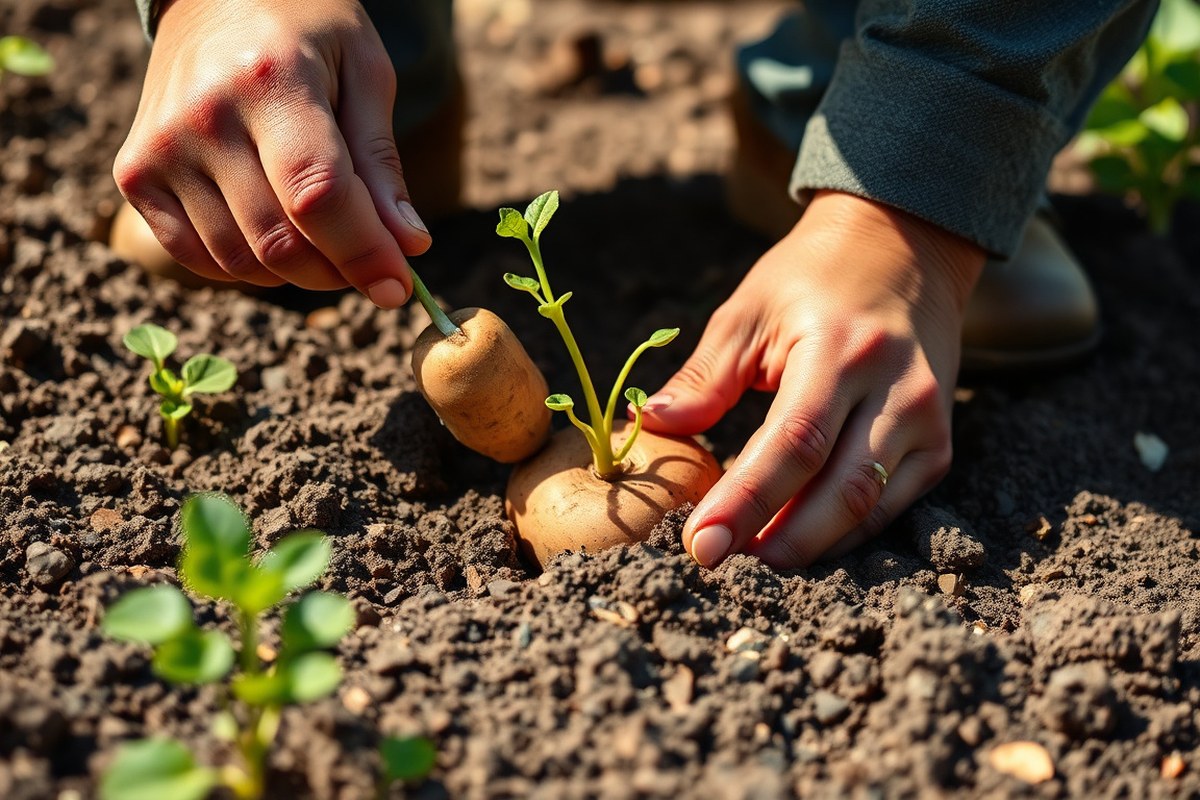
Learning how to plant potatoes that are sprouting is easier than it seems. You simply plant sprouted potatoes about 4 inches deep with the sprouts facing up. Keep them 12 inches apart in rows set 3 feet apart for the best results.
Make sure the soil temperature is around 50°F before planting. At this temperature, the sprouts are short and strong enough to handle planting. This setup helps potatoes grow well and produce a healthy crop.
It’s best to plant sprouted potatoes about 3 to 4 weeks after they start sprouting. That timing lets the sprouts develop enough without getting too long and fragile. Planting too early or too late can slow growth or harm the tubers.
Key Takeaways
- Plant sprouted potatoes 4 inches deep with sprouts facing upward.
- Keep potatoes spaced 12 inches apart and rows 3 feet apart.
- Wait for soil temperature to reach about 50°F before planting.
- Plant sprouted potatoes after 3 to 4 weeks of sprouting.
- Use short, sturdy sprouts for better planting success.
- Avoid planting if soil is colder than 45°F to prevent damage.
How to Plant Potatoes That Are Sprouting Correctly

Plant sprouted potatoes with the sprouts facing up. This helps shoots grow toward sunlight and avoid damage. Space them about 12 inches apart to give each enough room to develop.
Use a planting depth between 6 and 8 inches. This depth supports the tubers and protects them from light, which can cause greening. Rows should be about 3 feet apart for easy care and air circulation.
- Choose a sunny or partly shaded spot with loose, well-drained soil.
- Dig a trench or holes 6 to 8 inches deep.
- Carefully place each sprouted potato with sprouts pointing upward in the trench.
- Cover the tubers gently with soil, avoiding breaking the sprouts.
- Space rows 3 feet apart for enough room to walk and tend plants.
- Water the planted potatoes lightly right after planting to settle the soil.
- Hill soil around shoots as they grow to protect tubers and encourage more production.
Plant sprouts soon after they appear when they are tiny. Larger sprouts still work but handle carefully to avoid breaking them. Planting them right side up helps shoots reach sunlight faster.
When Is the Best Time to Plant Sprouted Potatoes?

Plant sprouted potatoes in early spring when the soil warms to about 50°F. Aim to plant them around your area’s last frost date. Sprouts should be short and sturdy, about 1 centimeter long, before planting.
Soil Temperature and Planting Time
Potatoes need soil temperatures near 45°F to start growing well. When the ground stays at or above 50°F, it’s safe to plant sprouted potatoes. Planting in colder soil delays growth and increases rot risk.
Check local last frost dates to time planting right. Plant just after frost danger passes to protect young potatoes. Early spring usually fits these conditions in most areas.
Ideal Sprout Length for Planting
Sprouts around 1 centimeter or about 1/4 inch are best for planting. These sprouts are strong and less likely to break when planted. Short, stubby sprouts grow roots and shoots faster than longer, leggy ones.
Sprouts shorter than 1/4 inch can still be planted, but growth may slow. Very long sprouts can break easily but are still plantable whole. You can gently tuck long sprouts upward when planting.
Timing Based on Frost Dates
Plan to plant around your region’s last spring frost date. Planting too early risks frost damage to young sprouts. Waiting until soil warms ensures sprouted potatoes start growing fast.
Potatoes planted at the right time sprout above ground in 7 to 21 days. Cold soil or frost slows this timeline and can cause weak growth or decay. Track your frost dates on a gardening calendar.
Adjusting for Different Varieties and Conditions
Early-season varieties planted at the last frost date grow well with sprouted tubers. Add mid- or late-season varieties later for continuous harvest. You can also plant un-sprouted potatoes for variety timing.
In colder climates, wait until soil reaches 50°F before planting. In mild climates, you may plant a little sooner but watch for frost warnings. Sprouted potatoes from storage are safe to plant if soil and timing match timing rules.
Plant sprouted potatoes with sprouts pointing up. Put them one inch deep in soil. Cover the potatoes after planting.
Should You Cut Sprouted Potatoes Before Planting?
You don’t always need to cut sprouted potatoes before planting. Small potatoes around 1 to 1¼ inches wide can go in the ground whole.
Larger tubers must be cut into pieces 1 to 2 inches long. Each piece needs at least one sprout or “eye.””
Cutting increases the number of plants you get from one potato. Cutting tubers poorly or planting too soon risks rotting or disease.
Letting them dry lowers that risk. You have to cure the cut pieces first to reduce those risks.
| Aspect | Whole Tubers | Cut Pieces |
|---|---|---|
| Size | About 1 to 1¼ inches across or smaller | Pieces 1, 2 inches with 1+ eyes each |
| Risk of Disease | Lower risk | Higher risk without curing |
| Number of Plants | Matches number of potatoes | More plants per potato |
| Nutrient Source | Tuber stores nutrients for plant | Smaller pieces may have less nutrient food |
| Preparation Time | Plant as is | Requires cutting and curing (few days) |
Use a clean, sharp knife to cut larger potatoes. Cut so each piece has two or three eyes for best results.
Don’t chop a large potato into more than six pieces. Each piece must hold enough stored food to grow.
After cutting, keep the pieces in a warm, dry spot about 50°F. Leave them there for 3 to 4 days. This “curing” lets the cut surfaces dry and form a callus. It lowers the chance of rot when planted.
Plant cut pieces only after they have cured well. Planting immediately can cause the moist cut areas to rot in soil. Whole tubers don’t need curing and are less hassle.
How to Prepare Your Soil and Planting Site
Preparing your soil well sets your sprouted potatoes up for strong growth. You want loose, fertile soil with a slightly acidic pH. Dig down about 10 to 12 inches to loosen soil deeply before planting.
Loosen Soil Deeply for Root Space
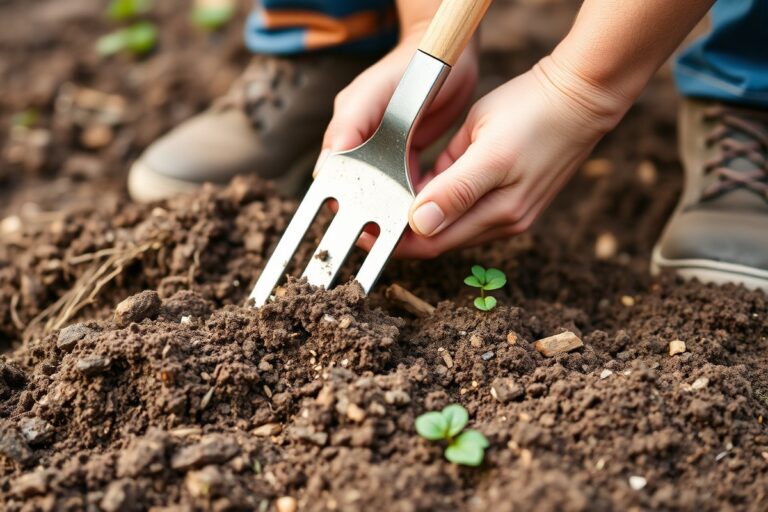
Use a spade or garden fork to dig soil 10 to 12 inches deep. Break up clumps as you go. This helps roots grow well.
Push the tool down, wobble it side to side, and then scoop out the loosened soil. This helps roots grow freely and new potatoes to form underground without resistance.
Loosening soil deeply also improves drainage and air circulation around roots. Avoid compacted or hard soil because it limits root expansion. Deeper loosening is especially important if you have clay-heavy or compacted soil.
Choose Ideal Soil Type and pH
Potatoes prefer well-drained, sandy loam or loamy soil that holds moisture but drains well. This balance keeps tubers from rotting or drying out. Add organic matter like compost or aged manure to improve poor soil texture.
Test your soil’s pH, aiming for a range between 5.0 and 6.5. Slightly acidic soil helps potatoes absorb nutrients effectively. Your soil might be too alkaline.
Add sulfur or peat moss to lower pH slowly. Do this over time for best results.
Preparing the Site Before Planting
Clear the site of rocks, sticks, and weeds to avoid obstacles below the surface. Remove any large stones as they can block tuber growth. Work in 2 to 3 inches of compost to enrich soil nutrients and improve texture.
Moist soil is best for planting, but soil should not be soggy. Plant sprouted potatoes when the ground is workable.
Soil should be at least 45°F to 50°F. This helps sprouts start to grow. Cold or overly wet soil can slow sprout growth or cause rot.
Soil Preparation Checklist for Potatoes
- Test soil pH and adjust to 5.0, 6.5 if needed
- Clear debris, rocks, and weeds from planting area
- Dig or till soil 10 to 12 inches deep
- Add 2 to 3 inches of compost or aged manure
- Ensure soil is moist but drains well
- Keep soil temperature above 45°F before planting sprouts
Following this checklist helps create a good environment for growing healthy potato plants. You’ll find it easier to dig up tubers at harvest too because of loose soil.
Creating the Right Environment for Your Sprouts
Sprouted potatoes need soil that balances moisture and air. Overly wet soil causes tubers to rot, while dry soil prevents sprouting. Keep the area well-drained and monitor soil moisture closely after planting.
Choose a spot that gets 6 to 8 hours of sunlight daily. This helps potatoes grow steadily. Sunlight is key for healthy plants.
Your soil may have heavy clay or drain poorly. Use raised beds or containers with good potting mix. This protects the sprouts well.
How to Care for Sprouted Potato Plants After Planting
Water, fertilizer, and pest care keep sprouted potato plants healthy. Hilling helps protect tubers and boosts yield. Use a steady watering schedule and add fertilizer once plants grow to 6-12 inches tall.
Watering Frequency and Methods
Sprouted potato plants need about 1 to 2 inches of water per week. Water evenly and avoid soaking the soil to prevent rot. Use a soaker hose or drip irrigation to keep leaves dry.
Water deeply once or twice a week, depending on rainfall and soil type. Sandy soil may need more frequent watering. Check soil moisture regularly by feeling 2 inches deep; water if dry.
Timing and Technique for Hilling Potatoes
Hilling protects tubers from sunlight and supports plant growth. Begin when sprouts reach 6 to 8 inches tall. Repeat hilling every two to three weeks as the plants grow.
Follow these steps to hill potatoes:
- Gather loose soil from around the plant base or nearby.
- Use a shovel or hoe to mound soil up around the stems.
- Cover stems up to half their height, leaving some green leaves exposed.
- Add compost or light fertilizer on top of the hill for nutrients.
- Repeat when plants grow taller to keep tubers covered.
Only hill up to half the plant’s height to avoid choking stems.
Fertilizer Types and Application Schedule
Use a balanced fertilizer with equal parts nitrogen, phosphorus, and potassium. Apply the first dose when plants reach 6 to 12 inches tall. This supports healthy leaves and tuber growth.
Side-dress with compost or a light fertilizer every 3 to 4 weeks during hilling. Avoid over-fertilizing because that can cause leafy growth without many potatoes. Organic options like compost or fish emulsion work well.
Common Pests and Prevention Measures
Keep an eye out for potato beetles, aphids, and wireworms. Handpick beetles off plants regularly. Remove damaged leaves to reduce habitat for pests.
Use row covers or insect netting to keep flying pests away. Rotate potato crops yearly to reduce soil pest buildup. Avoid broad-spectrum pesticides which can harm beneficial insects.
How Long Until You Can Harvest Sprouted Potatoes
You can expect to harvest potatoes from sprouted tubers in about 70 to 100 days. The exact time depends on whether you want new potatoes or fully mature ones. Plant at least 70 days before your area’s first frost date.
This timing grows tender new potatoes. For full-size potatoes, plant about 100 days ahead.
New potatoes are small and delicate, harvested a few weeks after the plants flower. They have thin skins and a sweeter taste. Mature potatoes form after the vines die back and have thick skins ideal for storage.
Look for signs that your potatoes are ready to dig. When the vines yellow and start to wither, this signals that maturation is near.
For new potatoes, check 2 to 3 weeks after flowering. For full harvest, wait until the vines fully dry and brown.
Soil temperature and weather affect the timeline too. Potatoes grow best in cooler conditions, around 55 to 70°F. Plant sprouted potatoes after your last frost date.
This gives them time to mature. Hot weather later can slow their growth.
You can speed harvest by planting sprouted tubers with close spacing, about 6 inches apart. According to Utah State University Extension, this can bring harvest 7 to 14 days earlier. Keep tubers firm and free of rot to avoid losing your crop.
Patience helps. Harvesting too early can make potatoes small and less tasty.
Wait too long, and tubers might sprout in the ground or get damaged. Check the vine condition regularly for the best timing to dig.
Can You Plant Potatoes with Very Long Sprouts?
Potatoes with very long sprouts can still be planted, but they need careful handling. Long sprouts are fragile and can break easily during planting, which may slow early growth. Protect these sprouts by trimming them or planting gently to avoid damage.
Sprouts between ½ inch and 2 inches usually do well if left alone. When sprouts grow past 2 inches, cut them back to 1 or 2 inches.
This lets the potato put energy into roots and tubers. This pruning also reduces the risk of sprout breakage while planting.
- Trim very long sprouts to about 1 to 2 inches before planting.
- Handle seed potatoes gently to avoid snapping sprouts.
- Plant potatoes with the sprouts facing upward for easier shoot growth.
- If sprouts get broken, plant the potato as usual. New sprouts often appear afterward.
- Use firm, healthy potatoes with sturdy sprouts for best yields.
- Wear gloves if sprouts look weak or fragile to protect them better.
Planting potatoes with very long sprouts won’t necessarily reduce your harvest. But broken sprouts can delay the plant’s growth.
Uneven sprout lengths might cause uneven plant emergence. Keeping sprouts trimmed and intact helps secure uniform plant development and better yields.
When planting, press the potato firmly into the soil without putting extra pressure on the sprouts. Cover sprouts lightly with soil. This protects them while letting in light.
Air can also reach them, which helps growth. After planting, healthy shoots usually grow within a few days. Proper sprout care supports this early growth.
Common Mistakes When Planting Sprouted Potatoes and How to Fix Them
Planting sprouted potatoes too deep can stop them from growing well. A good depth is around 4 inches. Planting deeper can make shoots struggle to get sunlight and slow growth.
Poor spacing also causes problems. Space each potato 12 inches apart and rows 2 to 3 feet apart. Crowding plants makes them compete for nutrients and water, leading to smaller potatoes.
Watering mistakes are common too. Overwatering leads to rot, while underwatering causes wilting. Water enough to keep soil moist but not soggy, especially during early growth.
- Plant potatoes 4 inches deep to protect sprouts but avoid burying shoots.
- Space each tuber 12 inches apart to reduce competition.
- Water deeply once or twice a week, depending on rainfall.
- Watch for yellowing leaves, which suggest overwatering or nutrient issues.
- Avoid planting in heavy, wet soil to limit rot risk.
- Use a garden fork carefully, placing it 18 inches away from plants when harvesting.
Wilted or yellow plants often show signs of watering errors or poor soil. Yellow leaves appearing early mean cut back on watering when soil stays wet. Also, add balanced fertilizer high in potassium and phosphorus to boost growth.
Planting sprouted potatoes in soil that dries out fast helps prevent rot. Mulching with straw keeps soil moist and cool. Avoid planting where water pools after rain.
Do not plant sprouted tubers deeper than 4 inches to avoid stunting their shoots.
Step-by-Step Action Plan for Planting Sprouted Potatoes
Follow these steps to plant your sprouted potatoes. You will get good results in your garden.
- Before planting, pick sprouted potatoes with firm, healthy eyes. Choose sprouts shorter than 1 inch for easy planting.
- On Day 1, cut large seed potatoes into pieces. Keep one sprout on each piece. Let pieces dry for 2 days to stop rot.
- On Day 3, loosen soil to 8 inches deep. Add compost or balanced fertilizer for nutrients.
- On Day 3, plant seed pieces 12 inches apart in rows. Space rows 3 feet apart. Put sprouts facing up and cover with 3 to 4 inches of soil.
- Week 2: Water the soil to keep it moist but not soaked. Soil should not dry out around the planted potatoes.
- At weeks 3 and 4, when plants are 6 inches tall, mound soil around stems. This covers the base and protects tubers from sunlight.
- Between weeks 6 and 12, water deeply once a week. Water more if the weather gets hot. Check plants for pests or disease.
- After 10, 12 weeks: Check for mature potatoes by gently digging near plants. Harvest when leaves start to yellow and die back.
Frequently Asked Questions
How Do I Store Sprouted Potatoes Before Planting?
Store them in a cool, dark, and dry place. This prevents rot and keeps sprouts fresh for planting.
Can I Use Garden Soil Straight from the Yard for Planting Sprouted Potatoes?
It’s best to loosen and enrich garden soil before planting. Adding compost improves drainage and nutrients.
Should I Water Sprouted Potatoes Right After Planting?
Yes, water them lightly after planting to settle the soil. Avoid soaking; too much water can rot tubers.
Can Mulch Help Sprouted Potato Plants Grow Better?
Mulching keeps soil moist and cool, which potatoes like. It also controls weeds around your plants.
How Often Should I Check for Pests on Sprouted Potato Plants?
Check your plants once or twice a week for pests. Early removal prevents damage and saves your crop.
Is It Necessary to Hill Soil over Sprouted Potato Plants?
Hilling soil protects tubers from sunlight, which turns them green. Do this when plants are about 6 inches tall.
Wrapping Up
Sprouted potatoes can grow into healthy plants if you handle them right. Start by picking the best sprouts and planting them at the right depth. Now, get your hands in the soil and plant those potatoes today.