How to Sow Seeds Indoors: A Complete Guide for Fast, Healthy Seedlings
Knowing how to sow seeds indoors helps you grow healthy plants earlier. Start by picking the right seeds for your region and season. Use clean containers and fresh seed-starting soil to give seedlings a good start.
Plant seeds about 6 to 8 weeks before the last frost date in your area. Keep the soil warm, around 65 to 75°F, so seeds germinate faster. Avoid direct sunlight at first and place trays in bright, indirect light.
Water the soil gently to keep it moist but not soggy. After seedlings show, give them 12 to 16 hours of light daily to prevent legginess.
Thin seedlings when they reach 2 to 3 inches. So they have room to grow.
Key Takeaways
- Count back 6 to 8 weeks from your last frost date to start seeds indoors.
- Use seed-starting soil and containers with good drainage for best results.
- Keep soil temperature between 65 and 75°F to encourage seed germination.
- Water seeds gently to keep soil moist without overwatering.
- Provide 12 to 16 hours of light per day once seedlings appear.
- Thin seedlings when they grow 2 to 3 inches tall to avoid crowding.
How to Sow Seeds Indoors Step-by-Step
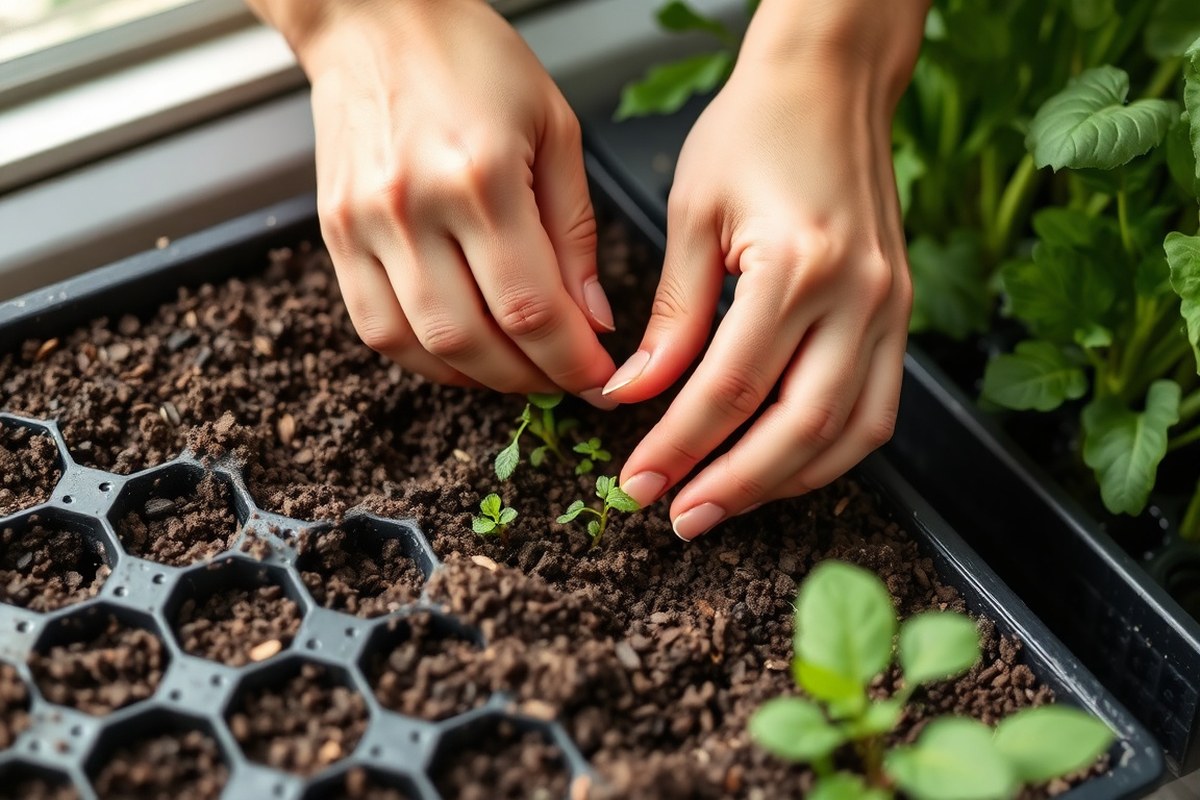
Sowing seeds indoors starts with clean containers and good soil. Plant seeds at the right depth. Water them gently after planting.
Keeping seeds moist and warm speeds germination. Follow each step carefully to get seedlings off to a strong start.
Choosing and Preparing Containers
Select seed trays, module trays, or small pots for sowing seeds indoors. Clean them well to avoid diseases that can kill young seedlings. Don’t have seed trays?
Use old food containers. You can also make pots from newspaper.
Put containers in waterproof trays or tubs to catch water. This keeps your work area neat.
It also prevents mess. This setup also helps you water efficiently without flooding the soil.
Filling with Seed-Starting Mix and Firming Soil
Fill your prepared containers about 3/4 full with seed-starting mix, not garden soil or potting soil. Seed-starting mixes are sterile and free of disease and weed seeds, which keeps seedlings healthy.
Gently firm the mix to remove big air pockets but don’t pack it tight. The soil should feel moist but not wet.
It should be fluffy to touch. This helps roots grow easily.
Planting Seeds at Proper Depth and Spacing
Check the seed packet for recommended planting depth and spacing before you sow. Plant most seeds twice as deep as their size.
This is usually 1/4 to 1/2 inch. Small seeds need shallower planting.
Place two to four seeds in each pot or cell. Push seeds gently into the soil and cover them lightly but fully with mix. So they stay moist without blocking light.
Watering and Covering to Maintain Moisture
Water the soil after sowing using a spray bottle or a gentle watering can. Avoid flooding or washing seeds away. Spritzing is perfect for small, delicate seeds.
Cover trays loosely with plastic wrap or a humidity dome. This keeps soil moist and warm.
It helps seeds sprout faster. Poke a few holes in the plastic for airflow to prevent mold build-up.
Placing Trays in Warm, Well-Lit Location
Put your trays in a spot with temperatures around 72 to 75°F (21 to 24°C). Most seeds germinate best in this range, but some prefer cooler or darker conditions.
Choose a bright location but avoid direct sunlight, which may dry out or overheat seeds. A windowsill with filtered light or under fluorescent grow lights works well.
- Clean your containers thoroughly to avoid disease.
- Fill containers 3/4 full with sterile seed-starting mix and firm gently.
- Plant seeds at the depth stated on the seed packet, spacing them properly.
- Water seeds gently using a spray bottle or fine watering can.
- Cover trays loosely with plastic wrap or a humidity dome for moisture.
- Place trays in a warm, bright spot, avoiding direct sunlight.
- Check soil moisture daily; mist again if the surface starts to dry.
When to Start Seeds Indoors for Best Results
Start seeds indoors about 6 to 8 weeks before your area’s last expected frost date. This timing helps seedlings grow strong enough for outdoor planting. Find your last frost date using local extension services or online tools.
The Almanac’s Frost Date Calculator is a good option. Knowing this date helps you plan seed starting.
Each plant needs a different start time. For example, tomatoes usually start 6 to 8 weeks before frost. Peppers may need 8 to 10 weeks.
Leafy greens like lettuce can start about 4 weeks before your frost date. They grow faster and handle early starts well. This timing helps them mature before hot weather.
You can start seeds indoors during winter. But seedlings will need extra warmth and light. Without this equipment, they often grow tall and weak, called legginess.
Starting seeds indoors in summer is rare but doable for fall crops. Kale and broccoli like cooler temperatures outside. Planting in summer indoors prepares them for fall gardening.
Make a simple schedule by counting backward from your last frost date. Write down when each type of seed needs planting indoors based on their seed packet instructions. If your last frost is April 15, start tomatoes by February 15.
Peppers need an earlier start, around February 1. This ensures they are ready to plant on time.
Always check your seed packet for specific start timing. It shows how many weeks to start before the frost date. Follow these instructions for better seedling success.
Starting seeds too early causes crowded, weak seedlings. These plants need more care and may not grow well. Proper timing helps healthy, strong seedlings ready for outdoors.
Starting too late means plants won’t mature before cold weather. Keeping track of your frost date and seed needs helps avoid these problems.
Selecting Seeds, Soil, and Containers for Indoor Sowing
Picking the right seeds, soil, and containers sets up indoor seed sowing for success. Use seed types that sprout well indoors. Choose a sterile seed-starting mix to stop disease.
Use containers that drain well and fit your room. These choices speed germination and grow strong seedlings ready for transplant.
Seed Varieties Suited for Indoor Starting
Vegetables like tomatoes, peppers, and eggplants are popular for indoor sowing. They need a long growing season and benefit from early indoor starts.
Herbs like basil and parsley grow well indoors. They prefer steady warmth and plenty of light.
Some flowers, especially annuals like marigolds and petunias, are great for indoor seed starting. Their seeds germinate easily and transplant without trouble. Avoid large seeds that need deep soil unless you have big pots for them.
Differences Between Soil and Seed-Starting Mix
Seed-starting mix is finer and lighter than regular potting or garden soil. It holds moisture while draining excess water, helping fragile seeds not to rot.
Garden or old potting soil often has pests or disease. These can kill young seedlings fast.
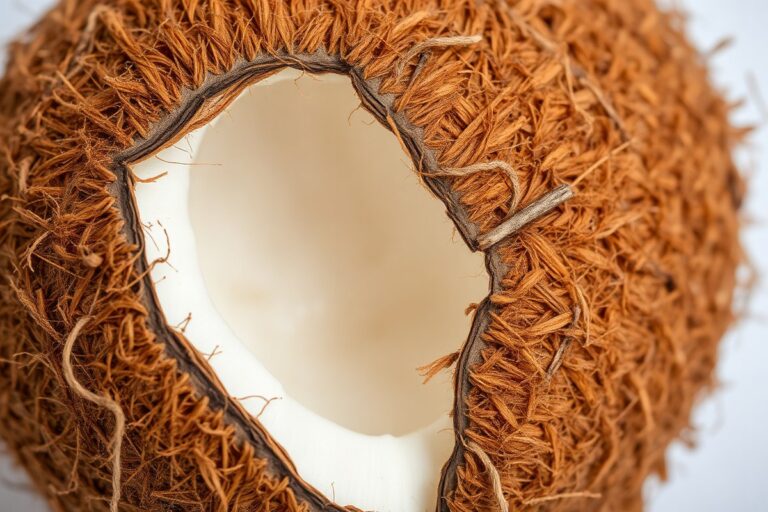
You want a mix made of peat moss or coco coir, perlite, and vermiculite. These materials give good airflow and moisture control.
Seed-starting mixes cost around $10 to $20 for 8 quarts. You can buy them at garden centers or online.
Container Types with Pros and Cons
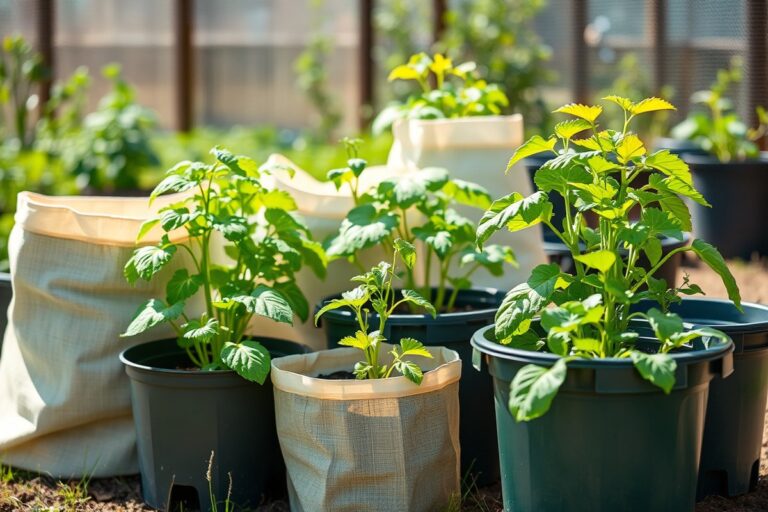
Containers need to drain well and hold enough soil for seedlings to grow strong. Small plastic pots suit larger seeds and individual seedlings.
Seed trays work best for many tiny seeds. You can sow many at once and thin easily.
Biodegradable pots made from peat or coir let you plant seedlings directly outdoors. They reduce transplant shock but dry out faster indoors.
Pick trays, pots, or tubes based on seed size. Also, think about your watering habits and seedling plans.
| Container Type | Best For | Pros | Cons |
|---|---|---|---|
| Seed Trays | Small seeds (e.g., herbs, flowers) | Holds many seeds, easy to thin, space-saving | Needs careful watering, risk of root crowding |
| Plastic Pots | Larger seeds (e.g., tomatoes, peppers) | Good drainage, sturdy, reusable | Takes more space, seedling roots need careful handling |
| Biodegradable Pots | Transplants to garden directly | Less root disturbance, eco-friendly | Dries out quickly, can be fragile |
For best results, fill containers with moist seed-starting mix before sowing. Make sure containers have drainage holes to avoid soggy roots. Match container size to seed type to avoid overcrowding and weak growth.
Providing Optimal Light and Temperature for Seedlings
Seedlings need 12 to 16 hours of light daily to grow strong and bushy. Natural light often isn’t enough, especially in northern climates early in the year. Using LED grow lights provides the right light duration and intensity you need indoors.
Position your grow lights 2 to 4 inches above the seedling tops. That keeps the light intense without drying out or burning the plants.
Use a timer to switch lights on and off automatically. Aim for 12 to 16 hours of light daily.
Keep soil and air temperatures between 65 °F and 75 °F. This range suits most seed germination and seedling growth. Starting seeds in colder months like January needs extra warmth.
Use a heat mat or heated propagator to maintain it. Cooler temps slow germination and growth, so warmth speeds things up.
Place seedlings on a windowsill only if you watch temperature closely. Be ready to adjust as needed. Nights can drop below ideal, which stresses young plants.
Move seedlings or add a heat source at night if needed. This keeps temperatures steady for better growth.
Basic grow lights and heat setups cost $30 to $70. This includes LED units, timers, and heat mats. This upfront cost pays off by producing healthier seedlings.
Proper light and warmth make seedlings grow sturdier stems. Leaves stay darker green, not tall or leggy.
Keep your light setup close and consistent, and maintain steady warmth. Your seedlings will develop thick stems and lots of leaves, ready for planting out. Watch for leggy seedlings, they stretch when light is too weak or too far away.
Watering, Humidity, and Moisture Management
Seeds need steady moisture to start growing but avoid too much water. Check soil every day.
Water only when the top feels dry. Use a watering can with a fine spout or a spray bottle for gentle, even watering that won’t wash seeds away.
Keeping humidity high around the seeds helps them stay moist and warm, which speeds up germination. You can cover your seed tray with a clear humidity dome or plastic wrap. This traps moisture and heat, creating a mini greenhouse effect that supports seed growth.
Always remove the humidity cover after seedlings emerge to prevent mold and damping off.
Soil should feel evenly moist but not soggy. Overly wet soil encourages fungal diseases like damping off. Use well-draining seed-starting mix and avoid heavy watering that pools at the tray bottom.
Soak the tray from below for better moisture control. Use a water reservoir under the tray. This lets the soil soak water slowly and evenly.
Using a heat mat beneath your seed tray helps maintain steady warmth and prevents moisture loss. This is especially useful in cooler homes. Keep soil covered until the sprouts appear.
Once sprouts show, take off the cover. Increase airflow to lower humidity around the seedlings.
- Water newly sown seeds gently every 1 to 3 days, depending on drying speed
- Use a spray bottle or fine rose to avoid displacing seeds
- Apply water from below by soaking trays if possible
- Cover trays with a humidity dome or plastic wrap to maintain moisture
- Remove covers once seedlings appear to prevent diseases
- Use a heat mat to keep soil temperature steady for faster germination
- Check soil moisture daily and adjust watering as needed
Some seeds stay on top of soil and need light. Covering those can stop germination. Always follow the seed packet’s depth instructions for best results.
Use a small fan to keep air moving after sprouts appear. Moving air helps stop mold and fungus. These problems happen in high humidity.
Managing Seedling Growth: Thinning and Preventing Legginess
Thin seedlings when they grow their first true leaves. Use small scissors to snip weaker seedlings at soil level. This leaves the strongest seedlings more room to grow without disturbing roots.
Seedlings need about 2 to 3 inches of space between them once thinned. Crowded seedlings compete for water, light, and nutrients. That slows their growth and makes them weak.
Legginess happens when seedlings stretch toward light. Their stems get long and thin, making plants fragile. Put a light source 2 to 4 inches above seedlings.
This helps keep stems short. It also makes them thick and strong.
Using a grow light helps keep light even and strong. Natural window light often isn’t enough to stop legginess. The closer the light, the sturdier the seedlings will be.
Seedlings that get too tall before thinning may never recover. You can pinch back leggy seedlings to encourage branching. Another trick is to bury elongated stems deeper in soil to support growth.
Use gentle airflow from a fan or opening a window briefly. This strengthens stems by mimicking outdoor breezes. Avoid too much heat, which makes seedlings grow too fast and weak.
Preparing and Hardening Off Seedlings for Outdoor Planting
Hardening off means slowly getting your indoor seedlings used to outdoor weather. It helps prevent shock from wind, sun, and temperature changes. This process usually takes 7 to 10 days before you plant seedlings in your garden.
Starting Hardening Off Indoors
Begin hardening off by placing seedlings near an open window or door for a few hours. Start with 1 to 2 hours of fresh air exposure in a sheltered spot. This lets plants experience outdoor breezes without harsh sun or wind.
Watch seedlings closely for stress signs like drooping or leaf burn. If they look fine, increase outdoor exposure time the next day. Keep soil moist but not soggy during this stage to avoid drying out.
Gradual Outdoor Exposure Schedule
Move seedlings outdoors in dappled shade for 2 to 3 days to build resilience. Then, place them in partial sun for another 2 to 3 days. Finally, expose plants to full sun for 2 to 3 days before transplanting.
Make sure temperatures stay above 50°F (10°C) during the day while hardening off. Bring seedlings inside at night or cover them if frost threatens. This slow increase in sun and wind strengthens stems and leaves.
- Set seedlings outside in a shaded area for 2 to 3 hours the first day.
- Extend outdoor time by 1 to 2 hours each day over a week.
- Shift plants into partial sun for 2 to 3 days to increase light.
- Expose seedlings to full sun gradually for the last 2 to 3 days.
- Ensure nighttime temperatures stay above 50°F (10°C) or bring plants inside.
- Check soil moisture daily and water lightly as needed.
- Watch for signs of stress like leaf yellowing or wilting.
Final Transplanting into Garden or Pots
After hardening off, your seedlings are ready for planting during the day. Choose a calm, overcast day to reduce transplant shock. Water your seedlings well before moving them outdoors.
Dig holes slightly larger than the root ball in your garden or container. Gently remove seedlings from their original containers, handling them by leaves not stems. Place each seedling into its hole, cover roots, and firm soil around it.
- Water seedlings thoroughly the day before transplanting.
- Choose a cool, cloudy day for planting to limit stress.
- Prepare garden soil or containers, loosening it and adding compost.
- Dig holes twice as wide and as deep as the pot.
- Gently remove seedlings from containers, holding leaves not stems.
- Set seedlings in holes at the same soil depth as indoors.
- Fill holes, press soil gently around roots, and water well.
- Monitor new transplants daily for water needs and sun exposure.
Common Mistakes and How to Fix Them When Starting Seeds Indoors
Seeds often fail because they sit too wet or deep in the soil. Overwatering causes damping off, a fungal disease that kills seedlings fast. Check soil moisture daily.
The soil should stay moist but not soggy. Using a spray bottle or misting nozzle helps control watering better than pouring.
Poor light makes seedlings stretch and grow leggy. Leggy plants have thin, weak stems and lean toward the light source.
Place seedlings where they get 12 to 16 hours of bright, direct light. A fluorescent or LED grow light works well if natural light is weak.
Planting depth matters too. Seed packets give the right depth, usually no deeper than the seed size.
Seeds planted too deep waste energy trying to reach the surface. Sprinkle a thin layer of seed-starting mix, no thicker than the seed itself.
- Water gently with a mist or spray, avoid soaking soil
- Place seedlings close to lights or a sunny window
- Follow seed packet depth instructions for planting
- Space seedlings to avoid overcrowding and uneven growth
- Thin groups of seedlings to keep only the strongest
- Watch for soft stems and yellowing leaves as warning signs
- Remove any diseased seedlings immediately to stop spread
Seedlings sometimes crowd and shade each other, causing uneven growth. Thin clusters by snipping weaker sprouts at the soil line. This frees room for strong plants to grow big and healthy.
If a seed tray fails, clear out the old soil, rinse the container, and try sowing fresh seeds in new soil. Use fresh seed-starting mix to reduce disease risk.
Never water seedlings from above too often, since damp leaves invite fungal disease. Water soil surface carefully instead.
Step-by-Step Action Plan for Indoor Seed Sowing
Get your seeds started right with this simple plan. Follow these steps to see healthy seedlings grow.
- Before You Start: Choose seeds suited for indoor sowing and gather seed-starting mix plus containers. Healthy seeds and proper soil set you up for success.
- Day 1: Fill containers with moist seed-starting mix. Sow seeds at the depth on the packet. Cover gently and label each container clearly.
- Day 2: Place containers where they get bright, indirect light and keep soil evenly moist. Check daily to avoid dry or soggy conditions.
- Week 2: After seedlings sprout, give them 12 to 16 hours of light. Use grow lights or a sunny window. Watch for sturdy, upright growth.
- Week 3: Thin seedlings to one healthy plant per container. Snip the weaker ones at the soil. This prevents crowding and promotes vigor.
- Week 4: Begin hardening off seedlings by placing them outside a few hours. Keep them in the shade. Increase outdoor time gradually over 7 to 10 days.
- After Hardening Off: Transplant seedlings outside or into bigger containers. Do this on a cloudy day or late afternoon. Water well to help them adjust.
Frequently Asked Questions
Can I Reuse Seed Starting Soil for Multiple Planting Cycles?
It’s best to use fresh seed starting soil each time. Old soil loses nutrients and may harbor diseases, which can harm new seedlings.
Is It Necessary to Cover Seeds with Plastic After Sowing?
Covering seeds with plastic helps keep moisture in. But remove it once seedlings appear to stop mold and allow air circulation.
Can I Start Seeds Indoors Without Grow Lights?
You can, if you have a very bright southern window. But grow lights ensure strong, healthy seedlings by providing enough light.
How Long Do Seeds Usually Take to Germinate Indoors?
Most seeds sprout within 7 to 14 days, but some take longer. Check seed packets for specific timing to avoid overwatering.
Should I Fertilize Seedlings Before Transplanting Outdoors?
Seedlings generally don’t need fertilizer until their first true leaves appear. Use a weak, balanced liquid fertilizer to avoid burning roots.
What’s the Best Way to Label Seedlings in Small Containers?
Use small plant markers or write on popsicle sticks. Labeling helps you track different varieties and avoid mix-ups later.
The Bottom Line
Growing your own seedlings indoors gives you a jump start on the garden. Try sowing a few seeds today. Watch your plants grow and get ready to move them outside soon.