Are Potatoes Easy to Grow? Simple Steps and Methods That Work
Are potatoes easy to grow? Yes, they are one of the simplest crops to grow in a home garden.
You only need loose, fertile soil, a bit of space, and some patience. Planting seed potatoes in early spring gives you a steady supply of fresh potatoes by summer.
Start with cutting seed potatoes or smaller fingerlings in shallow trenches about 5 inches deep. Space the pieces about 12 inches apart to give each tuber room to grow. Keep the soil moist because potatoes need plenty of water to develop well.
Potatoes are forgiving, but avoid planting in heavy, compacted soil. Also, make sure your planting site has enough sunlight and good drainage. These simple steps let you enjoy fresh potatoes with little fuss or special tools.
Key Takeaways
- Plant seed potatoes 2 to 4 weeks before your last spring frost date.
- Use trenches about 5 inches deep and space seed potatoes 12 inches apart.
- Choose loose, fertile soil or raised beds for the best tuber growth.
- Keep soil moist but not waterlogged to prevent drying or rotting.
- Early-season varieties grow in 60 to 80 days and harvest sooner.
- Chit seed potatoes by letting them sprout 2-3 weeks before planting.
Are Potatoes Easy for Beginners to Grow?

Potatoes are generally easy for beginners to grow and produce a large, reliable crop. Potatoes need loose, fertile soil. Plant them about 5 inches deep.
Give roots room to spread. You do not need fancy tools or special skills to get started.
Potatoes are beginner-friendly because you start with seed potatoes. Seed potatoes are pieces of potato. Each has two or three buds called “eyes.”Each seed potato can grow 5 to 10 potatoes.
The exact number depends on variety and soil quality. About 1 pound of seed potatoes can produce 10 pounds of potatoes. This small amount is a good investment.
Potatoes grow best in well-drained soil with organic matter. A sunny spot also helps. You can grow potatoes in containers or grow bags.
This works well if your garden soil is heavy clay. Containers need to be at least 16 inches deep and filled with loose soil. This avoids soil compaction problems and limits pests.
Potatoes take between 60 and 120 days to mature, depending on variety. Early potatoes grow faster and can be harvested in early summer if planted in spring.
This gives new gardeners a quicker reward to stay motivated. You will not see potatoes growing above ground because tubers form underground.
Keep soil moist but not soggy. Watch out for pests and diseases that attack tubers or leaves.
Monitoring these regularly is easier in containers or grow bags. Avoid planting potatoes where you grew tomatoes or peppers last year because they share pests.
Potatoes suit you if you have moderate space. Avoid heavy clay soil or use containers instead. Check soil moisture each week.
Cover new shoots with soil or mulch to protect them. You do not need daily care, but don’t ignore them either.
Which Potato Varieties Are Best for Easy Growing?

Pick a potato variety based on how fast you want to harvest. Also, consider if you need good storage and your local climate. These factors will help you choose the best type.
Early potatoes grow fast and ready to pick in about 10 weeks. Maincrop types take much longer but store well. Specialty kinds like fingerlings offer unique shapes and flavors.
Early-Season Potatoes for Quick Harvest
Early potatoes grow fast, maturing in 10 to 12 weeks. Plant them in early spring to harvest small new potatoes by mid-June. Give each plant about 16 inches (40 cm) of space to grow well.
Planting early potatoes in containers or a greenhouse speeds up growth and protects them from frost. Chitting seed potatoes before planting encourages faster sprouting, which helps with an extra early crop. These varieties are perfect if you want fresh potatoes fast for salads or boiling.
Maincrop Potatoes for Storage and Yield
Maincrop potatoes take longer, around 135 days, to mature but produce larger tubers that store well. Varieties like Russets and other large potatoes are common maincrop choices. You usually harvest these in late August through October after the vines die back.
The storage ability of maincrop types means you can keep them through winter. Proper curing and storing in a cool, dark, and ventilated spot helps them last for months.
Choose potato types that suit your zone for longer storage. They tend to resist diseases better and give higher yields in your area.
Specialty Types: Fingerlings and Reds
Fingerling potatoes are small, around 3 inches (7.5 cm) long. They take longer to grow but taste different and look unique. You can grow them in pots or garden beds with usual spacing.
Red potatoes are another specialty type popular for their smooth skin and good boiling qualities. They are often used fresh and don’t store as long as maincrop types. Reds and fingerlings add good variety for cooking or fresh eating.
Use them when you want different tastes right from your garden. They are great choices for home gardeners.
| Type | Time to Harvest | Size | Best for | Storage Life |
|---|---|---|---|---|
| Early | 10, 12 weeks | Small to medium | Quick harvest, new potatoes | Short (weeks) |
| Maincrop | Up to 135 days | Large | Storage, larger yield | Months (with curing) |
| Fingerling | Varies, medium | Thumb-sized (3 in long) | Specialty flavor, containers | Short to medium |
| Red | Medium | Medium | Boiling, salads | Short to medium |
Select varieties suited to your climate and garden size. Early potatoes grow well in cooler, short seasons.
Maincrop potatoes do better in longer summer zones. Fingerlings and reds suit gardeners wanting specialty tastes or container growing.
Always pick disease-free seed potatoes that suit your growing zone for stronger plants.
How and When Should You Plant Potatoes for Best Growth?
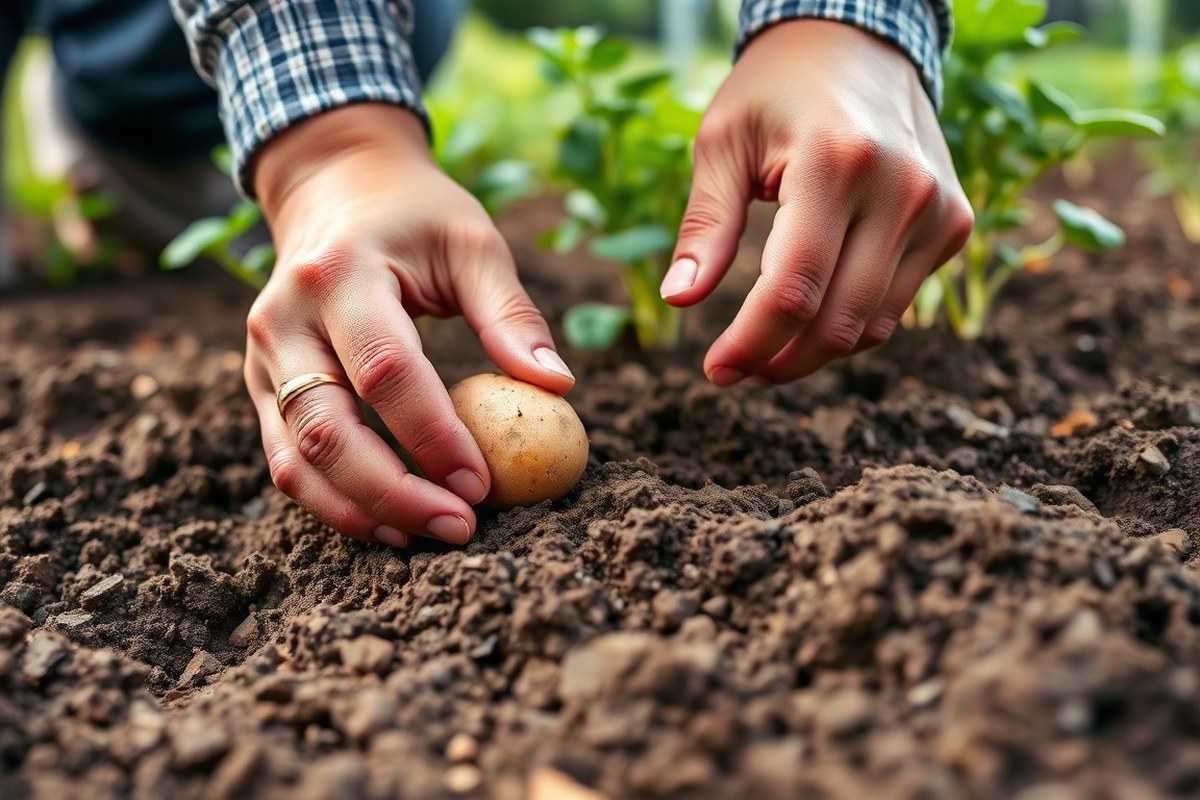
Start planting potatoes 4 to 6 weeks before the last frost arrives. Cut seed potatoes into pieces and plant them 3 to 4 inches deep. Place each seed potato about 12 inches apart so they can spread out.
Preparing Seed Potatoes and Chitting
Chitting means letting your seed potatoes sprout before planting. This gives them a head start and helps plants grow stronger. Start chitting your seed potatoes 2 to 3 weeks before planting.
Place seed potatoes in a cool, bright place with the eyes facing up. Let short green shoots appear, about half an inch long. Do not plant potatoes with very long or weak sprouts, as they can break easily.
Soil Preparation and Ideal Temperature for Planting
Choose a sunny spot with loose soil that drains well for planting. Dig trenches that are 4 to 6 inches deep before placing the seed potatoes. Make sure the soil temperature reaches 55°F (13°C) or higher in the daytime.
Planting in soil warmer than 40°F (4.4°C) helps potatoes establish good roots. Plant only when soil is warm enough and not soggy.
Wet or cold soil can cause potatoes to rot or grow slowly. Check soil moisture and temperature before starting your potato patch.
Planting Seed Potatoes with Correct Spacing
Cut large seed potatoes into pieces weighing about 1.5 to 2 ounces each. Each piece should have at least one or two eyes. Use whole small seed potatoes to avoid cutting if preferred.
Place seed potatoes or pieces 12 inches apart in the trench, eyes facing up. Rows should be spaced roughly 3 feet apart to give plants enough room.
Covering and Watering After Planting
Cover seed potatoes with 3 to 4 inches of soil after planting. Fill the trench so the soil gently covers the potatoes but doesn’t compact too hard. This keeps them safe and promotes root growth.
Water the soil well right after planting so it settles around the potatoes. Keep soil moist but not soggy during the growing season for healthy tubers.
- Choose seed potatoes with healthy, firm skin and good eyes.
- Chit them by placing in a bright spot, eyes up, 2-3 weeks before planting.
- Prepare your garden spot by digging trenches 4 to 6 inches deep in loose soil.
- Cut large seed potatoes into pieces, each with an eye.
- Plant seed potatoes or pieces 12 inches apart, eyes facing up, in trenches.
- Cover with 3 to 4 inches of soil, then water thoroughly.
- Space rows about 3 feet apart for easy growth and access.
What Are the Best Methods for Growing Potatoes?
Potatoes grow well in many ways. You can plant them in the ground. Containers, straw mulch, and grow bags work too.
You can plant them in raised beds, which gives loose soil and good drainage. Containers and grow bags suit small spaces, allowing you to grow potatoes on decks or balconies. Straw mulch covers potatoes planted on the ground to protect them and make harvesting easier.
Each method needs some hill-building as the potato plants grow. Plant potatoes in ground or raised beds. Wait until shoots reach about 7 inches tall.
Then, pull loose soil up around the shoots. Use containers or grow bags for potatoes. Add soil or straw as stems grow.
This keeps tubers covered and safe from the sun. A 12-inch thick straw mulch works well to shield and keep the ground loose.
| Method | How It Works | Best For | Challenges |
|---|---|---|---|
| In-Ground Raised Beds | Loose soil, hill soil up around plants, good drainage | Medium to large spaces, good soil | Requires soil prep, digging, and enough space |
| Containers | Use large pots, hill soil as stems grow | Small spaces, decks, and poor soil | Crops smaller, need regular watering |
| Straw Mulch (No-dig) | Plant tubers on soil, cover with 12-inch straw | Protecting tubers, easy harvest, loose soil | Need thick mulch, watch for pests |
| Grow Bags | Fill bags with soil, add more as plants grow | Balconies, patios, very small spaces | Drainage can dry out, smaller yield |
Loose soil 18 inches deep suits potatoes in the garden or raised beds. These beds drain well and stop waterlogging. Containers and grow bags let you grow in places with poor soil and limited space.
You’ll need pots at least 12 inches deep and wide. Check soil moisture daily since pots dry faster.
With straw mulch, plant seed potatoes directly on top of soil. Cover tubers with 12 inches of straw or hay. This method stops soil compaction and keeps potatoes cool.
It also makes harvest easier, just pull back the straw. Watch for mice or slugs, which like straw.
Choose the method that fits your space and soil type. Containers and grow bags are a good pick if you lack garden space.
Raised beds in good soil give bigger yields but take more work. Straw works well in garden beds for quick setup and easy digging.
How Should You Water and Care for Growing Potatoes?
Potatoes need about 1 inch of water per week, depending on rainfall and soil type. Water the soil deeply once or twice weekly to keep it moist but never soggy. Avoid watering leaves to cut down on disease risks and focus on the root zone instead.
Potatoes need 6 to 8 hours of direct sunlight for good growth. Sunlight gives potatoes the energy to grow healthy tubers underground. Try raised beds or containers in sunny areas if your garden is shady.
Feeding potatoes with a balanced fertilizer or compost boosts growth and tuber size. Apply fertilizer at planting, then side-dress about halfway through the growing season. Organic options like compost or well-rotted manure work well and improve soil texture over time.
Hilling means piling soil or mulch around the base of potato plants to cover growing tubers. Start hilling when plants are about 6 inches tall, then repeat every 2 to 3 weeks.
This keeps tubers from sunlight, which makes them green and bitter. It also helps roots produce more potatoes.
- Water deeply about once or twice weekly to reach 1 inch total
- Ensure potatoes get 6 to 8 hours of direct sun daily
- Fertilize at planting and again mid-season with compost or balanced feed
- Hill soil around stems when plants reach 6 inches tall
- Repeat hilling every 2-3 weeks to keep tubers covered
- Keep weeds down to reduce competition for nutrients and water
- Check soil moisture regularly and adjust watering after rain
Be careful not to overwater; soggy soil can cause tuber rot and poor growth.
Weed control matters because weeds steal water and nutrients from potatoes. Pull weeds by hand or use a hoe carefully between rows. Regular attention to moisture and sun levels leads to bigger, healthier potatoes to enjoy.
How and When to Harvest Potatoes for Best Yield?
You can harvest new potatoes about 10 to 12 weeks after planting. Mature potatoes usually take 90 to 120 days to be ready. Dig carefully to avoid bruising or damaging the tubers.
Signs Potatoes Are Ready to Harvest
New potatoes show up about 2 to 3 weeks after the plants flower. Their skin is thin and delicate, making them tender and tasty. For mature potatoes, the best sign is when the vine leaves turn yellow and die back.
The dying foliage means the potatoes have stopped growing. At this stage, the skin thickens and sticks firmly to the tubers. You can confirm readiness by digging a small test hill to check size and skin toughness.
Harvesting New Versus Full-Size Potatoes
New potatoes should be dug gently, so the delicate skin stays intact. Use your hands or a small garden fork, easing the soil away from the tubers. For mature potatoes, a garden fork or spade helps loosen soil without stabbing the spuds.
Start digging about 12 inches from the plant base to avoid piercing tubers. Carefully lift the soil and pull out potatoes, taking care not to drop or bruise them. Let new potatoes dry briefly on the soil surface before gathering.
Follow these steps to dig potatoes without damage:
- Stop watering about two weeks before harvest to let soil dry.
- Use a garden fork to loosen soil around the plant’s edge.
- Gently lift soil and tubers, avoiding piercing with your tools.
- Collect potatoes by hand, inspecting for damage.
- Brush off dirt but don’t wash potatoes yet.
- Let tubers dry in shade for a couple of hours.
- For mature potatoes, cure them before storing.
Curing and Storing Potatoes After Harvest
Curing toughens potato skin and helps heal small bruises. Leave tubers in a dark, humid spot at about 50 to 60°F. Keep them there for 1 to 2 weeks.
This helps them cure properly before storage. This step improves storage life and reduces rot risk.
Store potatoes in a cool, dark place after curing. Keep temperatures near 40 to 45°F. This keeps them fresh longer.
Use well-ventilated boxes or sacks to prevent moisture buildup. Avoid washing potatoes before storage to prevent early decay.
What Are Common Potato Pests and Diseases and How to Manage Them?
Potatoes face several common pests, including flea beetles and Colorado potato beetles. Flea beetles are tiny and jumpy, leaving tiny holes in the leaves.
Colorado potato beetles are easy to spot with their yellow and black stripes. These pests can quickly damage your crop if not managed early.
Diseases like late blight and scab also cause major problems. Late blight shows as dark spots on leaves that spread fast, especially in wet weather. Scab causes rough, corky patches on potato skin.
These patches change how your potatoes look. Scab can also lower the potato’s quality.
To manage these issues, start by planting certified seed potatoes, which lower disease risk. Rotate where you plant potatoes each year to avoid disease buildup in soil.
Use straw mulch around plants. It helps keep pests like Colorado potato beetles away and reduces disease chances.
- Inspect plants twice a week for holes, spots, or beetles.
- Handpick beetles and larvae off plants and drop them in soapy water.
- Apply neem oil or insecticidal soap every 7 to 10 days for flea beetles.
- Remove and destroy any plants showing late blight symptoms immediately.
- Use copper-based fungicides approved for home gardens if needed.
- Plant herbs like basil or marigold nearby to repel pests naturally.
- Switch pesticides yearly to prevent resistance by potato pests.
Organic sprays like neem oil cost about $10 to $20 each. One bottle treats around 1,000 square feet. This covers most home garden plots.
Apply these when you see pests or signs of disease early. Chemical options exist but use them carefully, following label instructions and local laws. Healthy, green leaves without holes or spots mean your controls are working well.
Early action matters. Not spotting an infestation can let pests ruin plants quickly. Check your potatoes often for signs of pests or disease.
Use crop rotation with natural or mild pesticides combined. This helps you grow a better harvest.
What Mistakes Should You Avoid When Growing Potatoes?
Potatoes turn green when exposed to sunlight. This green skin has solanine, a mild toxin. It tastes bitter and may cause stomach upset.
Eating a lot of it can be harmful. Cover any tubers popping out with soil right away.
This helps you avoid green potatoes. Don’t wait to hide them beneath the dirt.
Low yields or rotten tubers often happen from poor soil and water management. Planting potatoes too deep or too shallow affects growth.
Overwatering or not draining well leads to rotten tubers. You want soil that stays moist but not soggy.
Check your planting depth carefully. Seed potatoes should go about 4 inches deep. When shoots reach 6 to 8 inches tall, pile up soil around stems.
This “hilling” protects tubers from sunlight and supports the plant. When soil drains well and stays loose, roots get oxygen.
Good oxygen levels help roots avoid rot. You want soil that doesn’t hold too much water.
- Plant seed potatoes 4 inches deep in loose soil
- Hill soil around shoots once they reach 6 to 8 inches
- Water consistently but avoid standing water
- Give plants full sun, at least 6 hours daily
- Cover any tubers exposed above ground immediately
- Rotate crops with no nightshade family plants for 3 years
Potatoes need full sun to produce healthy tubers. Less light means fewer and smaller potatoes. Keep plants at least 6 hours in sun to avoid weak growth.
Too much water encourages fungi and rot. Let soil dry a bit between waterings.
Don’t plant potatoes where tomatoes, peppers, or eggplants grew recently; it raises disease risk.
Step-by-Step Action Plan to Grow Potatoes Easily
Follow these clear steps to grow your own potatoes with confidence. Each step explains what to do and how to tell if it works.
- Before Planting: Choose a potato variety suited for your climate. Look for firm, sprouting seed potatoes to start strong.
- Week 1: Cut seed potatoes into pieces with at least two eyes each. Let them dry for 1-2 days to prevent rot.
- Planting Day: Plant seed pieces 4 inches deep in loose, well-drained soil. Space rows about 12 inches apart to allow growth.
- Week 2 to 4: Water your potatoes deeply once or twice per week. Soil should stay moist but never soggy.
- 3 Weeks After Planting: Hill soil around stems when plants reach 6 inches tall. Check if shoots grow taller after mounding.
- Mid-Growing Season: Watch for pests and remove any affected leaves. Use safe methods to protect plants without chemicals.
- Harvest Time (Usually 2-3 Months): Wait until foliage yellows and dies back. Test by gently digging to see if potatoes are the right size.
- After Harvest: Cure potatoes in a cool, dark, ventilated space for 1-2 weeks. Check for firm skins before storing.
Frequently Asked Questions
Can You Grow Potatoes in Containers or Pots?
Yes, potatoes grow well in containers with loose, fertile soil. Use a container at least 16 inches deep to give roots space to expand.
Do Potatoes Need Full Sun to Grow Well?
Potatoes grow best in full sun, meaning at least six hours a day. More sun helps them produce bigger, healthier tubers.
Can You Plant Potatoes in Poor Soil?
Poor soil makes it harder but not impossible to grow potatoes. Adding organic matter improves soil fertility and boosts your crop.
Is It Necessary to Hill Potatoes While Growing?
Hilling potatoes helps protect tubers from sunlight and encourages bigger yields. You can do it by piling soil around the stems as plants grow.
Do Early Potatoes Yield Less Than Maincrop Potatoes?
Early potatoes grow faster but usually produce smaller yields compared to maincrop types. They taste fresh and are ready to eat sooner.
Does Growing Potatoes Require Many Fertilizers?
You need some fertilizer that’s rich in potassium. Too much nitrogen makes more leaves but fewer potatoes.
Use fertilizer carefully to balance growth and tuber production. Work compost into the soil before planting.
Wrapping Up
Growing potatoes is a doable and rewarding project for your garden. Start with quality seed potatoes and good soil. Plant today by picking your variety and prepping your seed pieces.