How to Moss: Simple Steps for Growing and Maintaining Healthy Moss
How to moss starts with knowing moss prefers cool, shady spots with high moisture. Moss grows best between 60 and 85 degrees Fahrenheit.
So pick a place with these conditions. Avoid direct sunlight and dry air since moss dries out fast and won’t thrive there.
Next, check your soil’s pH because moss likes acidic soil below 5.5. Use pH test strips to verify this before planting moss. Preparing the surface by cleaning off debris ensures moss can attach and spread smoothly.
Moss doesn’t take decades to grow. You can see results in weeks with proper care. Keep your moss damp.
Mist it twice daily for three weeks. Skip misting if rain keeps it wet. This simple routine helps moss settle and start growing strong on your chosen spot.
Key Takeaways
- Choose a shaded area with steady temperatures between 60 and 85°F.
- Test soil acidity to confirm a pH below 5.5 for best moss growth.
- Clear soil or surfaces of sticks and weeds before planting moss.
- Dry gathered moss for 3 to 4 days indoors, out of direct sunlight.
- Mist new moss patches twice daily for three weeks if no rain falls.
- Avoid placing moss where temperatures fall below 50°F to keep it alive.
What Is Moss and What Environment Does It Need?

Moss is a simple plant that does not have roots like other plants. It absorbs water and nutrients through its leaves and can grow on many surfaces. You can find moss on rocks, logs, soil, and even on bricks.
Moss grows best in shady, damp spots because it needs moisture. It likes acidic soil with a pH of about 5.0 to 5.5.
Still, moss can handle soils that are neutral or a bit alkaline. This means you often don’t need to fully change your soil to grow moss well.
Many people think moss only grows in deep shade. But some types tolerate full sun. Hair cap moss grows well in partial sun.
It likes sandy, acidic soil. This helps it thrive in those spots. Shade helps moss stay moist, which is important since moss dries out easily in hot sun.
Temperature-wise, moss can survive freezing weather by going dormant in cold months. It slows its growth when temperatures drop but will spring back when it warms up. Moss can thrive in many climates.
It needs to stay moist most of the time. Moisture helps it survive and grow right.
You don’t need soil for moss to grow well, which is uncommon for plants. It clings to surfaces by tiny root-like structures but takes nutrients directly from the environment. That is why damp surfaces like stones or tree bark are perfect spots for moss.
Choosing the Right Location and Surface for Moss Growth
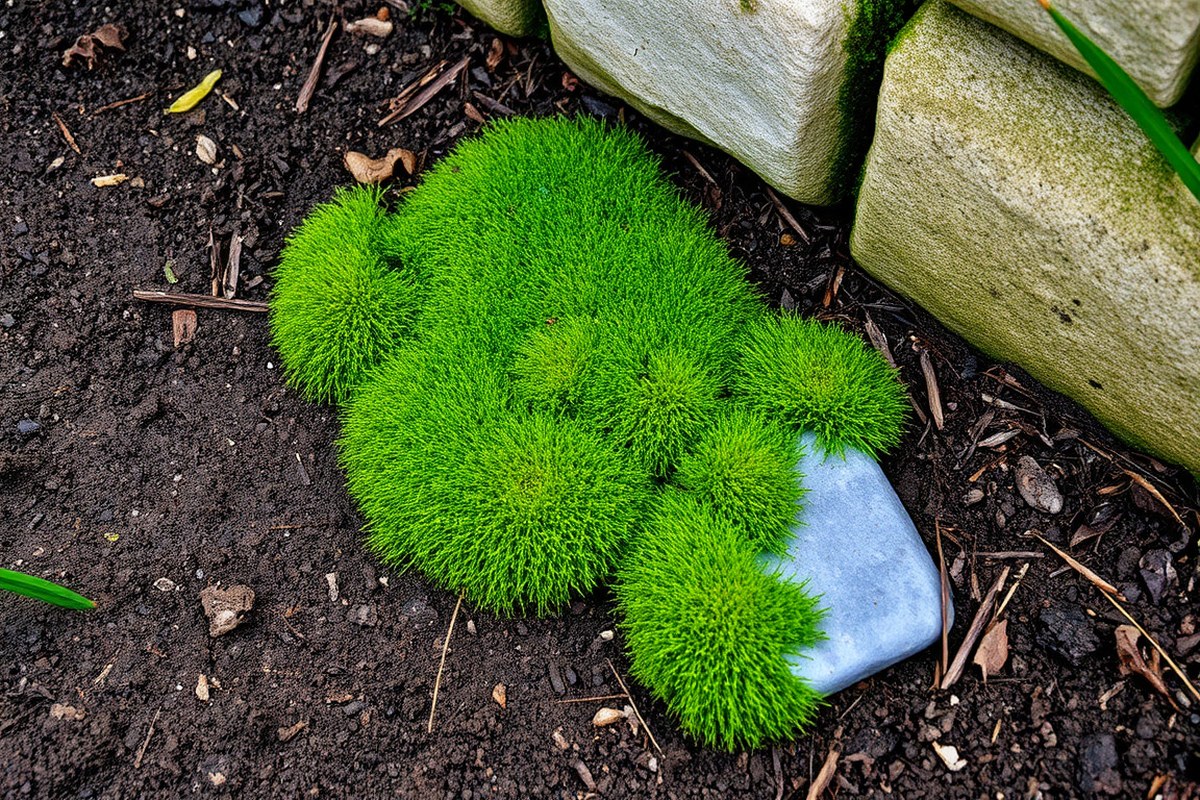
Moss grows best in shady, moist spots where sunlight is limited. It thrives in places with steady moisture but not swampy or waterlogged soil.
Slightly acidic soil with a pH between 5 and 6 helps moss grow. Still, it can tolerate a wider range if other conditions are right.
You can grow moss on many surfaces like rocks, bricks, logs, and bare soil. Moss can even grow on glass or clay pots if the conditions suit it. Shady garden corners, under trees, or along shady paths work well.
Retaining walls in shade also encourage moss growth. These places stay cooler and damper.
Moss grows slowly. It can take up to a full season to settle. Patience helps moss establish properly on new surfaces.
Clean the surface before applying moss. Keep the moss moist at all times.
Press it down firmly so it sticks well. Patience is key to seeing full coverage.
- Choose shaded areas with partial to full shade.
- Keep soil or surfaces damp but not soaking wet.
- Select spots with slightly acidic soil (pH 5 to 6 preferred).
- Clear surfaces of debris and loose dirt before planting moss.
- Place moss on rocks, bricks, soil, logs, or garden pots.
- Press moss firmly to ensure good contact with surfaces.
- Watch moisture levels and avoid full sun to prevent drying out.
Make sure to keep moss moist during its first few weeks to help it attach firmly.
Growing moss on objects like stones or pots takes care and a bit more work. You can mix crumbled moss with sand and sprinkle it on flat surfaces. For uneven or vertical surfaces, a liquid moss slurry helps the moss stick better.
Good airflow helps prevent mold and decay. Keeping moss from drying out too fast. Moss does not need fertilizer if in the right spot.
It gets nutrients from the environment naturally. Avoid fertilizer to keep moss healthy. Avoid sunny spots where heat dries the moss quickly.
Preparing Soil and Surfaces Before Planting Moss
Preparing the surface is key before planting moss. Test soil pH to ensure it is acidic, clean off debris, and keep the area moist. These steps help moss grow strong and cling well.
Testing Soil pH Correctly
Moss grows best in soil that has a pH from 5.0 to 6.0. Test the soil with pH strips to be sure before you start.
Collect soil from several spots at the site, about 2 to 3 inches deep. Mix the samples, then moisten a small amount with distilled water for testing.
Dip the strip into the moist soil and compare the color to the chart. Avoid using tap water for mixing since it can alter pH readings.
Clearing and Cleaning the Site
Remove leaves, grass, roots, and any other debris from the planting spot. Clear the surface until bare soil or rock shows.
After clearing, rake the soil lightly but do not disturb compacted clay soil much. Moss prefers firm, compacted soil where it can hold tight.
Compact soil helps moss anchor and absorb nutrients better. Avoid loosening soil too much, or moss may lift from the substrate later.
Adjusting Soil Acidity Safely
Should soil pH measure over 6.0, adjust it to suit moss growth.0, lower it by adding elemental sulfur or organic materials like pine needles. These materials naturally acidify soil over time.
Spread a thin layer of pine needles or apply sulfur according to package instructions. Do not overdo it, as too acidic soil can also harm moss.
Wait a week after adjustment, then retest the pH. Moss grows best when the soil stays in that 5.0 to 6.0 range for acidity.
Moisture Preparation and Retention
Moist soil is important. Keep the soil damp but not soggy to help moss establish and grow quickly.
Water the area lightly a day before planting. After planting, mist moss twice daily for the first three weeks.
Use a plastic sheet under moss mats to reduce water loss. This stops moisture from wicking away from the soil beneath.
- Test soil pH with strips to get an acidity reading below 5.5.
- Remove all debris like leaves and grass from the site surface.
- Lightly rake or compact the soil to create a firm base for moss.
- Adjust soil acidity by spreading pine needles or adding sulfur if pH is too high.
- Retest soil pH after one week to confirm it is in the proper range.
- Water soil to keep it damp; avoid overwatering or pooling.
- Place plastic sheeting under moss mats to help retain moisture.
- Mist moss twice a day in the first three weeks after planting.
Proven Methods to Propagate and Plant Moss
There are several ways to start growing moss in your garden. You can transplant moss fragments, use moss slurry, spread moss directly, or propagate from store-bought mats.
Choosing the best method depends on your surface type. It also depends on how fast you want results.
Transplanting Moss Fragments
Gather moss from a healthy patch in your yard. Remove sticks and grasses to clean the moss.
Then dry it indoors for three to four days. Once dry, crumble it and press the fragments firmly on your prepared soil or surface.
Keep the area moist for a few weeks. The moss will start to attach and grow over time. This method works well for small areas and gives the moss a good start.
Making and Using Moss Slurry
Moss slurry helps cover larger areas quickly. Crumble the clean moss in a blender.
Add one part beer and three parts rain or distilled water. Blend it until smooth, adding a bit more liquid if needed for spreading.
Paint or pour the slurry onto the surface you want to cover. Keep it moist and avoid direct sun. This technique lets moss spores settle and attach, even on challenging surfaces like concrete.
Direct Spreading on Soil or Rocks
Clean live moss before laying it flat. Place it on the soil or rocks where you want growth.
Press it gently so it fits the surface well. Water regularly to keep the moss moist as it establishes.
This is the simplest method for bare soil or rocky garden spots. It takes a bit longer to see full coverage but can look very natural.
Propagating Moss from Store-Bought Mats
Buy moss mats designed for gardening from a nursery or garden store. Cut or tear the mats into smaller pieces. Lay them where you want moss to grow and press firmly onto the surface.
Keep the mats moist for several weeks. They will attach and spread over time. This method saves time by using mature moss, especially on wood or concrete.
Here is a table comparing methods for different surfaces. This should help you pick the best way to grow moss.
| Method | Best Surface | Speed of Coverage | Cost | Ease of Use |
|---|---|---|---|---|
| Transplanting Moss Fragments | Soil, rocks, wood | Slow to moderate | Low (gather from yard) | Moderate (needs drying and crumbling) |
| Moss Slurry | Concrete, soil, rocks | Fast | Low (just moss, beer, water) | Moderate (requires blender and mixing) |
| Direct Spreading | Soil, rocks | Slow | Free (from existing moss) | Easy (just pressing and watering) |
| Store-Bought Mats | Wood, concrete, soil | Moderate to fast | Medium (cost of mats) | Easy (lay and water) |
Choose transplanting for a natural, low-cost start if you have moss nearby. Use slurry for quick cover, especially on tough surfaces. Direct spreading works best for simple soil or rocks.
Store-bought mats give you mature moss ready to plant, but they cost more. Keep your chosen area moist and shaded for the best results.
Watering, Feeding, and Caring for Moss After Planting
Moss likes to stay damp, especially right after you plant it. Water your moss lightly but regularly to keep the soil moist for about the first year. Avoid soaking, since moss doesn’t like puddles or standing water.
Fertilizing your moss is optional. But a weak fertilizer solution can help new moss grow faster. Use about half the strength of a typical plant fertilizer.
Apply it once after planting. Too much fertilizer can harm moss by encouraging other plants to take over.
Because moss grows slowly, it requires very little pruning. You can trim dead or overgrown patches carefully indoors.
This keeps the moss neat and helps it grow fresh. Check your moss weekly to catch dry spots or browning early.
- Water moss gently, every few days when new
- Keep soil consistently moist, but not wet
- Apply half-strength fertilizer once after planting
- Trim moss lightly if it looks sparse or messy
- Watch for brown or dry patches as warning signs
- Reduce watering in cool seasons or rainy weather
- Remove fallen leaves to prevent moss suffocation
Healthy moss will look lush and bright green all year. Brown or dull moss usually means it isn’t getting enough moisture. Overwatering, however, can cause mold or algae, so balance is key.
Keep moss damp but never swampy. Too much water can kill it while too little causes brown patches.
Common Mistakes When Growing Moss and How to Fix Them
Moss fails to grow when its location gets too much sun. Moss usually grows in deep shade, where it stays cool and moist. Move your moss to a shady spot.
Use shade cloth or plants to create shade. This helps moss grow better.
Another mistake is planting moss on rough or dry surfaces. Moss likes smooth rocks or compact soil that holds moisture. Clean the surface well before placing moss.
Damp it thoroughly to help moss stick. This makes moss grow faster.
- Don’t let moss dry out; keep it slightly damp by misting daily.
- Avoid planting moss where temperatures drop below 32°F (0°C), which kills moss.
- Use local moss that matches your garden’s conditions for better survival.
- Transplant moss patches from spots similar to your garden for easier growth.
- Remove weeds or plants competing with moss to give it space and nutrients.
Watering mistakes often stop moss growth. Moss does not like flooding, so avoid overwatering and using heavy watering tools. A gentle mist keeps the moss moist without washing it away.
Check your moss when it looks brown. See if it dried out or bugs ate it. Act based on what you find.
Some gardeners add fertilizer to moss, but it usually does not need feeding. Fertilizer can harm moss by encouraging weeds or making the moss grow too fast and weak.
Plain water is usually best for moss care. Watching your moss for these mistakes helps it grow lush and green.
Seasonal and Temperature Considerations for Moss Care
Moss can survive freezing temperatures, but extreme cold may slow its growth. Most mosses handle light frost down to about 20°F (-7°C).
Heavy freezes can cause dormancy, where moss stops growing but stays alive. Once warmer weather returns, moss usually revives on its own without extra help.
Watering needs change with seasons. Moss prefers steady moisture but not soggy soil. In spring and fall, water moss once or twice a week if rain is scarce.
During hot summer days, mist moss daily in the morning to keep it from drying out. In winter, reduce watering to about once every two weeks, especially if temperatures drop below freezing. Too much water in cold weather can cause rot.
Moss grows slowly compared to typical garden plants. You might see new growth patches within four to six weeks under good conditions. It spreads through tiny spores or small fragments.
These need constant moisture. The moisture must last about two to three weeks to take hold.
Consistent watering during this time is important. Rushing moss growth by overwatering or adding fertilizers can harm it.
In dry, sunny spots, moss quickly turns brown and dies because it loses moisture fast. Shade and indirect light suit moss better because they help keep moisture levels steady.
You can boost moss health by removing weeds that compete for moisture around it. This maintenance keeps moss growing evenly and looking green throughout growing months.
On tiles or rocks, the temperature changes a lot during the day. This can dry out the moss fast. The moss struggles to stay moist.
Water moss during cooler parts of the day, like early morning or evening. Avoid watering under direct midday sun to prevent heat stress. Moss will cling better and grow thicker if you keep moisture balanced through each season.
Tools, Materials, and Safety Tips for Growing Moss Successfully
You need a few basic tools and materials to grow moss well. Keeping moss moist and healthy requires careful watering and proper light. Indoor moss needs extra attention to avoid mold or allergies.
Essential Tools for Moss Gardening
A simple spray bottle is a must for daily misting to keep moss moist. A shallow tray or flat container works great for indoor growing. You may also need a soft brush to clean the surface gently before planting.
Other useful items include a pair of scissors to trim moss or remove damaged parts. Garden gloves protect your hands when handling rough surfaces outdoors. You need them if you grow moss outside.
For lighting, natural sunlight is best. But indoor moss benefits from aquarium LED lights with a full spectrum.
- Spray bottle for frequent misting
- Shallow trays or containers for indoor moss
- Soft brush to clean planting surface
- Scissors to trim moss
- Garden gloves for outdoor handling
- Aquarium LED grow lights for indoors
Using these tools helps you keep moss healthy and looking smooth. They also prevent damage during planting and care. Always check the lighting for your moss type.
Some moss grows well in sun. Others need shade.
Safe Water and Fertilizer Use
Moss needs constant moisture but not soggy conditions. Use clean, room-temperature water for misting daily to keep moss hydrated.
Water moss outdoors in the morning. This helps it dry during the day.
Fertilizing moss is optional and should be light. After moss is in place, mist it once with a very diluted fertilizer solution. Avoid overfeeding since moss naturally thrives on low nutrients and excess fertilizer can harm it.
Overwatering or heavy fertilizer can damage moss growth and cause decay.
Keep watering schedules consistent based on location and weather. Outdoors, adjust for rain; indoors, mist more if dry air causes quick moisture loss.
Avoiding Mold and Allergies Indoors
Growing moss indoors requires good air flow to prevent mold growth. Place moss near windows or use a small fan to keep air moving. High humidity with poor ventilation encourages mold and mildew.
Some people are sensitive to mold spores or allergies triggered by damp moss. Monitor your indoor moss area for any musty smells or visible mold. Stop watering if mold appears and increase air circulation immediately.
- Keep moss near a window for fresh air
- Use a small fan to reduce humidity
- Check daily for mold or mildew spots
- Avoid overwatering indoors
- Choose moss types less prone to mold indoors
Handling moss with clean hands also helps avoid spreading unwanted spores. Notice your allergies worsening?
Try growing moss outdoors instead of inside. Managing moisture and air quality is key.
Step-by-Step Action Plan for Growing and Caring for Moss
Follow these steps to start growing moss and keep it healthy over time. Each step helps you check if your moss is thriving.
- Before you start: Pick a shady spot with moisture. Look for rocks or hard soil as your surface. Moss should feel soft and not dusty to grow well.
- Day 1: Prepare the surface by cleaning or lightly scraping it. Moss needs a fresh place to stick, so get rid of dirt or leaves.
- Week 1: Spread moss fragments or use a moss slurry on the prepared spot. Look for a light green patch that shows moss is settling in.
- Week 2: Water the moss daily with a mist or gentle spray, especially in dry weather. Keep the moss damp, but avoid puddles.
- Month 1: Check growth by gently pressing the moss. It should feel firm and hold together without crumbling.
- After 2 months: Adjust watering based on weather and moss condition. Moss may need less water in cool, humid weather but more in heat.
- Seasonal care: Clear fallen leaves and debris each fall to prevent moss from suffocating. Also, protect moss from harsh sun by adding shade if needed.
- Ongoing: Avoid foot traffic on moss areas. Use signs or barriers to keep moss healthy and growing smoothly.
Frequently Asked Questions
How Long Does It Take Moss to Establish After Planting?
Moss usually begins to settle within a few weeks. You might see visible growth after a few months.
Growth speed varies based on conditions. Keep it moist and shaded to help it grow faster.
Can Moss Grow on Concrete or Man-Made Surfaces?
Yes, moss can grow on concrete if the surface stays damp and shady. Rough surfaces hold moisture better than smooth ones, supporting moss growth.
Is It Necessary to Remove Weeds Before Planting Moss?
Yes, removing weeds is important because they compete for moisture and nutrients. Clearing the area helps moss establish without competition.
Can Moss Survive Full Sun If Watered Regularly?
Moss usually does not thrive in full sun, even if watered often. It prefers low light because sun dries it quickly and stresses the plant.
Are Fertilizers Recommended for Growing Moss?
Fertilizers are generally not needed for moss. Too much fertilizer can actually harm moss by encouraging algae or weeds.
What Is the Best Way to Harvest Moss for Planting?
Start by picking moss from a clean spot. Remove all dirt and junk carefully. Dry it inside, away from sunlight, for 3 to 4 days.
The Bottom Line
Moss can beautify shady parts of your garden with simple care. Start by picking a good spot and keep moss moist and clean. Your next step is to gather moss and try planting it with these clear steps.