How to Take Humidity Out of a Room: 8 Effective Methods That Really Work
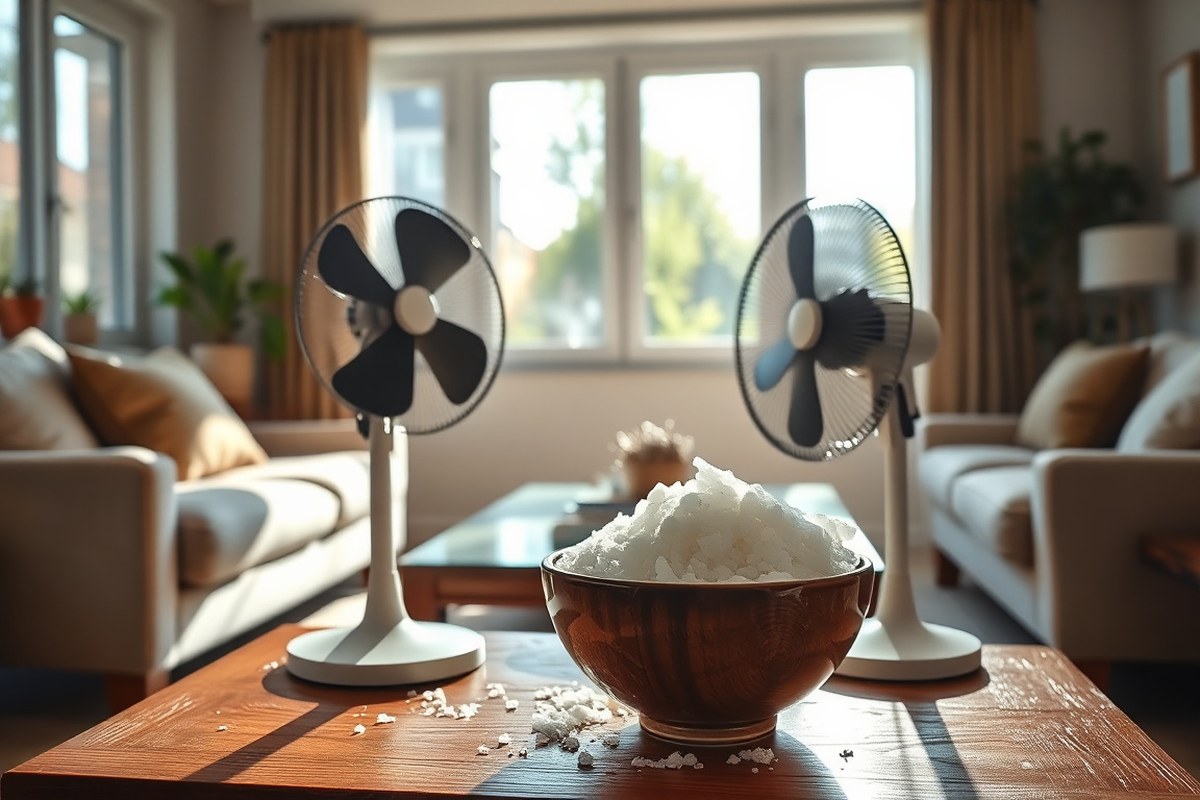
Knowing how to take humidity out of a room means making air feel more comfortable fast. You can try natural ways like improving airflow or using salt as a moisture absorber. These approaches work without electrical devices and help avoid mold or sticky air.
Start by opening windows or using fans to move air around. Moisture likes still spaces, so do what you can to keep air flowing. Using simple materials like bowls of salt or baking soda also absorbs excess dampness.
Keep an eye on where moisture may sneak in, like around window frames or damp walls. Fixing these spots can stop humidity from climbing again. These small steps put you back in control of your home’s comfort.
Key Takeaways
- Open windows and doors to increase air circulation and reduce humidity.
- Use fans to speed up air movement in rooms with high moisture.
- Place bowls of salt or baking soda to naturally absorb indoor humidity.
- Check window frames and door jambs for leaks causing extra moisture.
- Keep indoor plants moderate to avoid raising room humidity too much.
- Repair any visible water damage or leaks promptly to prevent moisture buildup.
1. How to Take Humidity Out of a Room Quickly and Naturally

Removing humidity naturally and fast starts with improving airflow in your room. Stagnant air traps moisture, making the space feel damp and stuffy. Opening windows on opposite sides creates a breeze quickly.
This breeze pushes humid air out. It also pulls fresh air in within minutes.
Using household items like salt bowls can also help pull moisture from the air. Salt absorbs water vapor but works best in small spaces. It takes several hours to show results.
Use it in enclosed areas for better drying. Putting frozen water bottles in front of a fan cools the air.
This causes moisture to condense and lowers humidity a little. You need several bottles for this to work well.
- Open windows on opposite walls for 10 to 15 minutes to create cross-ventilation
- Place bowls of table salt around the room to absorb moisture
- Use frozen water bottles with a fan for short-term cooling and mild dehumidifying
- Keep ceiling or standing fans on to circulate air but not to dry it directly
- Remove damp laundry or wet items from the room promptly
Ventilation works best when the outdoor air is less humid than inside. Check the humidity outside with a smartphone app or a hygrometer if possible before opening windows. Ventilate several times a day.
Don’t leave windows open all the time. This helps more if outdoor humidity is low. Avoid crowding rooms with too many plants or people.
Both add moisture by breathing and transpiration. Less moisture means lower indoor humidity.
Natural methods don’t require electricity or special equipment, and they cost almost nothing. However, they won’t lower humidity as precisely or as fast as mechanical devices. Notice dampness or humidity over 60%?
Use a dehumidifier or find hidden moisture. Persistent humidity means you may need extra help reducing it. Still, starting with good ventilation and simple salt bowls often improves comfort right away.
2. How Ventilation and Air Movement Control Indoor Humidity

Ventilation helps lower indoor humidity by exchanging moist air with drier outdoor air. Good air movement speeds drying and keeps moisture from building up. Properly timing window openings and using fans can boost this effect.
Setting Up Cross-Ventilation Correctly
Cross-ventilation moves air through a room by opening windows or doors on opposite sides. This airflow replaces humid air with fresher, drier air quickly. It works best in rooms with windows facing different directions to create a natural breeze.
Follow these steps to set up cross-ventilation:
- Identify windows or doors on opposite sides of the room or home.
- Open these windows fully to allow maximum airflow.
- Privacy matters, so open the high or low window parts for airflow.
- Close interior doors to guide airflow through the space you want to ventilate.
- Use a window fan facing outward on one side to pull moist air outside, if available.
- Leave the setup for 15 to 30 minutes to clear the humid air.
- Adjust the window openings if airflow feels weak or stalled.
Opening just one window won’t create much airflow; always open windows on opposite sides.
Best Times to Ventilate Based on Weather
Open windows early in the morning when the air is coolest and least humid. This timing gives dry air a chance to reduce moisture inside effectively. Avoid ventilating during hot, humid afternoons as outdoor air can raise indoor humidity.
On mild or cooler days, crack windows open for cross ventilation for 15 to 30 minutes. In cold seasons, open windows briefly to exchange moist air. Don’t keep them open too long to avoid chilling the room.
Keep windows closed on rainy or humid days. Use fans or dehumidifiers to control moisture.
Don’t leave windows open all day in winter. Brief airing prevents heat loss and dryness.
Using Fans to Improve Air Movement
Fans speed up air circulation and help move moist air toward open windows. Put a fan near an open window facing outside.
It pushes wet air out of the room. Ceiling fans or portable fans circulating air inside prevent moisture buildup in corners.
Use fans along with cross-ventilation for best results. A box fan facing outward in a window works well for a larger room. In tight spaces, smaller oscillating fans keep air moving and dry surfaces faster.
Position fans carefully; avoid blowing moist air back into the room.
3. Natural Moisture Absorbers: Salt, Baking Soda, and Silica Gel Compared
Salt, baking soda, and silica gel all absorb moisture but work best in different ways. Salt works well for high humidity. Baking soda fits small spaces.
Silica gel is good for specific spots. How well they work depends on moisture level. Placement also matters a lot.
Overview of Rock Salt as a Moisture Absorber
Rock salt naturally pulls moisture from the air through its hygroscopic nature. Place a bowl of rock salt in damp corners. Also use it in closets and shoe racks.
This helps lower humidity. When working right, the salt looks wet or clumps, showing it absorbed water vapor.
Use one to two pounds of rock salt. This suits a small room of about 50 to 100 square feet.
Keep it in an open bowl or mesh bag so air circulates freely. Change the salt every few weeks or dry it out in the sun before reuse.
Pros and Cons of Baking Soda
Baking soda is cheap and easy to find. It helps with minor moisture problems.
It’s usually used in fridges or cabinets to reduce odors and dampness at the same time. Around a half-cup placed in an open dish can handle small humid spots effectively.
It works better in closed or semi-closed spaces rather than large open rooms. Baking soda tends to absorb less moisture than salt.
So don’t expect it to fix heavy dampness. Replace every one to two months or when it turns clumpy or has an odor.
Silica Gel: Features and Reusability
Silica gel packets absorb moisture efficiently and are common in packaging for electronics or shoes. Unlike salt or baking soda, silica gel holds moisture without dissolving, making it reusable.
Dry them in the oven at low heat to reuse. Leave them for a couple of hours.
Use silica gel in small, enclosed areas that need precise humidity control, like electronics or toolboxes. These packets work best when kept sealed apart from open air after absorbing moisture. They cost more upfront but last longer with proper recharging.
Here’s a table comparing these natural moisture absorbers:
| Absorber | Best for | Amount Needed | Reuse Possible | Cost | Maintenance |
|---|---|---|---|---|---|
| Rock Salt | High humidity areas, large rooms | 1-2 lbs per 50-100 sq ft | No, needs replacing or drying out | Low | Replace every few weeks |
| Baking Soda | Minor humidity, small enclosed spaces | ½ cup in open dish | No, replace when clumpy or smelly | Low | Replace every 1-2 months |
| Silica Gel | Small, sealed areas, electronics | Packets sized to container volume | Yes, dry in oven to reuse | Moderate | Recharge after moisture absorption |
Salt pulls a lot of humidity and costs little but needs regular checks for dampness. Baking soda is gentler and good for odor control where humidity is low. Silica gel suits small spots where you can manage reuse easily and want reliable absorption.
4. Role of Air Conditioners and Dehumidifiers in Humidity Control
Air conditioners do reduce humidity while cooling a room. They pull warm, moist air inside. Then, cool it down.
Water condenses on the coils. This condensation drips away, lowering the room’s humidity as a side effect of the cooling process.
However, air conditioners aren’t designed primarily to remove moisture. They work best when cooling larger areas and are less effective in very humid environments.
Humidity stays high even when cooling. Use a dedicated dehumidifier instead.
Dehumidifiers pull air over cold coils. This causes moisture to condense. Then, they send dry air back.
They keep humidity around 30% to 50%. This stops mold and dampness. You’d use a dehumidifier in spaces like basements or bathrooms with persistent dampness.
Energy use differs between the two devices. Running an AC unit to control humidity can be costly since it cools the entire room. A typical window air conditioner may use 500 to 1,500 watts depending on size.
Dehumidifiers use less power. Small units often need 300 to 700 watts.
Upfront costs also vary. A basic dehumidifier can cost $150 to $300, depending on capacity.
Central air systems or window units cost a few hundred to several thousand dollars. Consider your climate and space size before deciding which one to buy.
Keep in mind that dehumidifiers need regular emptying or a hose for drainage. They work best when doors and windows are closed to keep out moist air. Air conditioners need proper maintenance, like cleaning filters, to keep humidity control efficient.
You can try DIY methods. Place frozen water bottles in front of a fan. This mimics dehumidifying.
But these don’t match mechanical devices for effectiveness. Air purifiers or ionizers remove pollutants but don’t significantly impact humidity.
5. How Indoor Plants Affect Room Humidity Positively and Negatively
Houseplants usually raise humidity because they release water vapor during transpiration. This means they add moisture to the air, which can be good in dry seasons. However, some plants can reduce humidity by absorbing moisture through their leaves or roots.
Common houseplants like ferns, peace lilies, and Boston ferns increase humidity the most. These plants need regular watering and thrive in humid environments.
On the other hand, succulents, cacti, and snake plants help lower humidity slightly. They use less water and absorb moisture from the air slowly.
How many plants affect your indoor moisture depends on the room size and airflow. A few large leafy plants might noticeably raise humidity in a small room. In larger spaces, you would need many plants to change the air moisture much.
- Ferns and peace lilies raise humidity by releasing water vapor.
- Succulents and cacti help reduce humidity by absorbing moisture.
- Snake plants also help lower humidity and need little water.
- Place moisture-absorbing plants in rooms prone to dampness like basements.
- Group plants with high water needs together to limit humidity spread.
- Avoid too many plants in small, poorly ventilated rooms to prevent excess moisture.
To use plants for humidity control, place moisture-absorbing species in humid areas. Put plants that increase humidity in rooms needing more moisture, like dry bedrooms in winter. Monitor your room’s humidity with a cheap hygrometer.
Keep an eye on soil moisture. Overwatering plants can raise room humidity too much.
Plant placement matters. For example, a cluster of succulents near a window reduces moisture in bright spots.
Ferns near air vents increase humidity in dry areas. You can balance the types and amount of plants to keep humidity comfortable.
6. Identifying and Fixing Hidden Moisture Sources That Raise Humidity
Hidden sources can quietly raise your room’s humidity and lead to mold. Leaks in pipes, roofs, or walls let moisture in.
Drying clothes indoors puts a lot of water vapor into the air, especially in small rooms. Poor insulation, especially around windows, causes cold spots where moisture collects and condenses.
Check your windows every morning for condensation or water droplets. This usually means humid air meets a cold window surface.
Plastic window frames can trap moisture since they don’t “breathe” like wood ones. Faulty window jambs let moist air settle around the frame, causing mold over time.
- Leaking pipes: Look for water stains or musty smells. Fix leaks quickly.
- Drying laundry indoors: Switch to outdoor drying or use a vented dryer.
- Poor insulation: Add weather stripping or foam sealant around windows and doors.
- Cold spots: Use thermal curtains or window insulation kits in winter.
- Faulty window jambs: Repair or replace damaged frames to stop drafts.
- Shower steam: Use an exhaust fan or crack a window open during showers.
- Unsealed cracks in walls or floors: Fill with caulk or mortar to keep moisture out.
Use a thermal camera like Flir One to spot cold leaks around windows and walls. Sealing those leaks stops humid air from hitting cold surfaces. Air the room for 5 to 10 minutes.
Then close windows. Raise the heat a bit to help dry the moisture faster. This small extra step helps prevent condensation and mold.
Regular home maintenance lowers humidity long term. Fix leaks and cracks right away. Upgrade insulation where needed, especially on outside walls.
These repairs can cost from a few dollars for sealant to several hundred for window repairs. But you’ll cut moisture buildup and save on heating bills too.
7. Measuring and Tracking Indoor Humidity for Effective Control
Use a hygrometer to measure indoor humidity accurately. Aim to keep humidity between 30% and 50% for comfort and health. Check readings regularly to adjust your humidity control methods effectively.
Choosing and Setting Up a Hygrometer
Select a digital hygrometer for precise humidity readings. These models cost between $15 and $40 online or at home stores. Place the device in the room’s center, away from windows, vents, and direct sunlight.
Calibration ensures accurate results. Some digital models auto-calibrate. For others, follow the manufacturer’s instructions, usually resetting or using a salt test.
Reset the hygrometer if readings drift or after moving it to a new room. This avoids false readings that lead to wrong adjustments.
Reading and Understanding Humidity Levels
Normal indoor humidity ranges from 30% to 50%. Levels below 30% feel dry and can irritate skin and throat. Above 50%, you risk mold growth and dust mites increasing.
Check the hygrometer’s display for the current percentage. Some devices also show temperature, which helps correlate comfort levels.
For example, a reading of 65% means humidity is too high. So you should run a dehumidifier or increase ventilation. A level of 25% suggests adding humidity with a humidifier or water source.
When and How to Adjust Humidity Control Measures
Measure humidity twice daily, morning and evening, for a week. Track fluctuations related to activities like cooking or showering. This helps you spot tough moisture spikes.
- Check the hygrometer at consistent times each day.
- Note the readings in a notebook or app.
- Compare daily numbers to your 30-50% target range.
- Adjust use of dehumidifiers or ventilation based on data.
- Repeat humidity checks after any adjustment to see effect.
- Call your local public health department if high humidity persists.
Give changes at least 24 to 48 hours to show results. Too quick or frequent adjustments confuse what really works. Consistent monitoring helps maintain optimal indoor comfort without guesswork.
8. When to Use a Dehumidifier or Call a Professional for Humidity Problems
When your usual methods don’t lower indoor humidity, try a dehumidifier. It works better to reduce moisture in the air. A dehumidifier can help when other ways fail.
These devices work well when humidity stays above 60% consistently, especially in damp basements or bathrooms. You see wet stains, peeling paint, or a musty smell. High moisture probably needs more than simple fixes to solve.
Prolonged high humidity can cause mold growth, which harms your health and damages your home. Mold can trigger allergies, asthma, and respiratory problems. It also weakens wood and causes drywall to crumble, leading to costly repairs if left untreated.
Some signs mean you should hire a professional for mold removal or insulation work. You notice black or greenish spots on walls or ceilings. If mold keeps coming back after cleaning, call experts for help.
Power outages or leaks cause water damage that keeps coming back. You often need professional repairs to fix the root cause. This stops humidity from building up again.
- Indoor humidity stays above 60% for several days
- Musty or damp smell does not fade with ventilation
- Visible mold or mildew on walls, ceilings, or corners
- Repeated condensation on windows or pipes
- Water stains, bubbling paint, or crumbling drywall
- Health symptoms like asthma or allergy flare-ups indoors
- Previous DIY fixes fail to stop moisture issues
Dehumidifiers range from $150 to $400 depending on size and features. Choose a dehumidifier sized for the room. For example, a 30-pint unit covers about 1,500 square feet.
Keep doors closed when running it for best results. Professionals usually charge $500 to $2,000 for mold cleanup and repairs. The cost depends on how bad the damage actually is.
Good results mean lowering humidity to 30-50%, removing visible mold, and stopping musty odors. Watch for improvements over several days after starting a dehumidifier or after repairs.
Moisture returning quickly means the source wasn’t fixed well enough. It also means the treatment probably wasn’t done thoroughly.
Don’t ignore persistent mold or water damage. It can harm your health and home structure fast.
Step-by-Step Action Plan to Lower Room Humidity
Follow these clear steps to reduce humidity effectively and see quick results. Check progress by measuring humidity with a cheap hygrometer.
- Day 1: Open windows and doors for 30 minutes to boost airflow. Notice if the room feels drier or less stuffy afterward.
- Day 2: Place bowls of salt or baking soda in the room corners. Check for dampness on surfaces after a few days.
- Week 1: Run your air conditioner or dehumidifier for a few hours daily. Watch humidity drop on your hygrometer by 5% or more.
- Week 2: Remove or relocate houseplants that add moisture. Pay attention to how the air feels cooler and less humid.
- Week 3: Inspect hidden moisture spots like leaks or damp walls and fix them. Look for spots drying out with no new water stains.
- Week 4: Keep a fan running to improve air movement, especially in bathrooms or kitchens. You should notice less condensation on windows.
- Monthly: Monitor humidity levels weekly and adjust ventilation or moisture absorbers as needed. Aim for indoor humidity between 30% to 50%.
Frequently Asked Questions
How Do I Take Humidity Out of a Room Quickly Without Machines?
Open windows and doors to boost airflow. Place bowls of salt to passively absorb moisture. This approach cuts humidity fast and uses natural materials you likely have at home.
Can Running an Air Conditioner Actually Lower Home Humidity?
Yes, AC units cool air and also pull moisture out as they run. This drops indoor humidity but might not fix very damp rooms fully. Use it with ventilation or a dehumidifier for best results.
Is It Okay to Sleep in a Room with 80% Humidity?
No, 80% humidity is quite high and can cause discomfort or mold. High humidity makes air feel sticky and can affect breathing. Aim for 40-60% to protect your comfort and health while sleeping.
What Are Signs That My Room Humidity Is Too High?
Condensation on windows or steamed-up mirrors means too much moisture inside. Musty smells and damp spots on walls also show high humidity. Check these signs regularly to catch problems early.
How Many Frozen Bottles Do I Need to Reduce Humidity by 10% in My Room?
It depends on room size and air circulation. Frozen bottles cool air nearby. They can reduce humidity in that spot.
In a small room of about 750 square feet, placing several bottles helps a little. It might lower humidity slightly. It won’t replace a real dehumidifier.
What Else Causes Indoor Humidity to Spike Besides Water Sources?
People, pets, and houseplants all release moisture through breathing and transpiration. Freshly washed or drying clothes inside add humidity too. Managing these sources helps keep humidity at comfortable levels.
The Bottom Line
Taking humidity down makes your home more comfortable and healthier. Start by opening a window and measuring the room’s humidity today. That small step puts you on the right track to better air quality.