

How to Propagate Peperomia: 8 Easy Methods with Expert Tips
Knowing how to propagate peperomia helps you grow new plants easily at home. The best way is to use healthy cuttings from a mature plant.
Take cuttings during spring or early summer for best results. This timing lets the cuttings root faster because the plant is actively growing then.
Start by cutting just below a leaf joint with sharp, clean scissors. Using room-temperature water or a well-draining soil mix gives cuttings the right environment to develop roots. Keep the cuttings in bright, indirect light and warm temperatures around 65 to 78°F.
Peperomia roots typically form within 2 to 6 weeks, depending on light and humidity. Avoid letting the cuttings sit in cold drafts. Also, keep them away from direct sunlight.
Both can slow growth or cause damage. These simple steps raise your chances of growing new, healthy peperomia plants successfully.
Key Takeaways
- Propagate peperomia best from spring to early summer for faster rooting.
- Use sharp, clean scissors cut just below a leaf node for cuttings.
- Root peperomia cuttings in room-temperature water or well-draining soil.
- Keep cuttings in bright, indirect light and temperatures between 65-78°F.
- Roots usually appear within 2 to 6 weeks after cutting.
- Avoid direct sunlight and cold drafts during rooting.
1. Best Ways to Propagate Peperomia Plants Easily

Peperomia plants mainly develop roots through three methods: stem cuttings in water, stem cuttings in soil, and leaf cuttings in soil. Large, established plants can also be divided to produce more plants. Stem cuttings in water are the simplest way and work for all peperomia varieties.
Stem cuttings in soil prevent transplant shock and are also suitable for any peperomia type. Leaf cuttings root best with solid green varieties. But they usually take more time to grow roots.
Division is a simple way to propagate peperomia. It works best when the plant has many stems. It also helps if the roots crowd the pot.
It lets you separate a mature plant into smaller sections. So you get full plants almost instantly. Some peperomia species respond better to leaf cuttings.
Others root more reliably from stem cuttings or division. Avoid leaf cuttings for variegated peperomia types.
Their leaf colors might not grow true. This method usually does not work well for them.
| Method | Best For | Speed to Root | Difficulty |
|---|---|---|---|
| Stem cuttings in water | Beginners, all peperomia types | 2, 4 weeks | Easiest |
| Stem cuttings in soil | All types, avoiding transplant shock | 2, 4 weeks | Easy |
| Leaf cuttings in soil | Solid-green varieties | 4, 8 weeks | Moderate |
| Division | Mature plants with multiple stems | Immediate new plants | Easy |
Stem cuttings in water let you watch roots form, which helps for timing your next step. Soil propagation for stems skips moving plants, cutting down shock. Leaf cuttings need more patience because new plantlets emerge slowly from the leaf base.
Division avoids the weeks-long wait altogether but requires a bigger, established plant. Some peperomia species root well in both water and soil. So personal preference and available supplies play a role too.
2. How to Prepare Peperomia Cuttings for Best Rooting Success
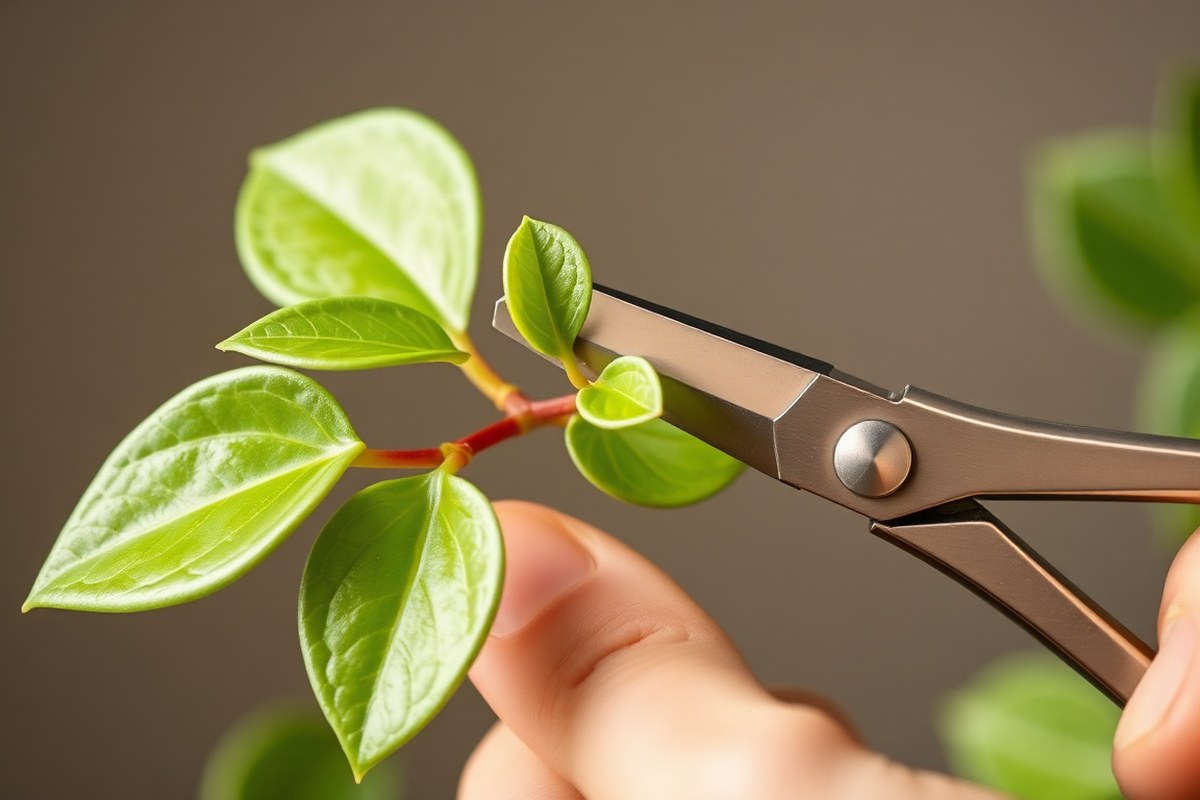
Start with selecting healthy stems or leaves for your peperomia cuttings. The cuttings should be free of disease and damage, with firm, vibrant leaves. Proper preparation sets the foundation for good rooting success.
Choosing Healthy Stems or Leaves
Pick stems that look strong and are free of brown spots or wilting. You want leaves that are shiny and fully formed, not old or yellowing. Avoid limp or damaged growth because it lowers the chance of rooting well.
For stem cuttings, choose branches with several leaves spaced along the stem. Leaf cuttings should come from mature single leaves with a bit of petiole attached. Avoid harvesting from flowering stems as they can sap energy from the cutting.
Cutting Length and Leaf Removal Tips
Cut stem sections 2 to 3 inches (5 to 8 cm) long. Include 2 to 4 healthy leaves on each section.
This length fits well in pots and encourages roots near leaf nodes. Remove leaves from the lower half of the stem to expose bare sections for planting.
When taking leaf cuttings, cut where the petiole joins the stem, leaving about 1 to 1.5 inches intact. Too long or too short petiole pieces can dry out or rot more easily. Always make smooth cuts just below leaf nodes using sharp scissors to avoid crushing the stem.
Sanitizing Tools and Preparing Cut Ends
Clean your scissors or blade before cutting. Use rubbing alcohol or diluted bleach.
Dirty tools can transfer diseases that cause rot or infections. Allow the tools to dry completely before use.
After cutting, trim any rough or ragged edges on the stem or leaf base. Dust the cut ends with rooting hormone to speed rooting.
This step is optional. Keep the cut ends clean and plant soon after preparing them.
Wash your hands before handling cuttings to limit bacteria. This small step can significantly improve success rates, especially in humid environments. Follow these steps to prepare your peperomia cuttings properly:
- Inspect your plant for healthy stems or leaves with no damage.
- Use sanitized scissors or a blade to cut 2 to 3 inch stem sections.
- Remove lower leaves to clear the base for planting.
- For leaf cuttings, snip at the petiole base with 1 to 1.5 inches intact.
- Trim any jagged edges to clean the cutting.
- Optionally, dust cut ends with rooting hormone.
- Plant cuttings immediately to prevent drying out.
- Sanitize tools again after finishing to keep them ready for next use.
Never reuse dirty scissors without cleaning to avoid spreading disease between plants.
3. Propagating Peperomia in Water: Step-By-Step Guide
Propagating peperomia in water is an easy way to watch roots grow. Use clean, room-temperature water and keep humidity around the cutting. Change water regularly and place cuttings in bright, indirect light for best results.
Setting Up Cuttings in Clean Water
Cut a healthy peperomia stem with at least two leaves and no roots yet. Use sharp, clean scissors to avoid infection.
Fill a clear glass with filtered water. Use tap water left out for 24 hours to remove chlorine.
Only submerge the stem, not the leaves, to prevent rot. Keep cuttings in a spot with bright, indirect light. Too much sun can scorch the leaves, while too little slows root growth.
- Choose a healthy stem with at least two leaves.
- Use clean scissors to make a 3-6 inch cutting below a node.
- Fill a glass with filtered or dechlorinated water at room temperature.
- Place the cutting in the water, submerging only the stem.
- Put the glass in bright, indirect light away from direct sun.
Maintaining Water Quality and Humidity
Change the water every 3 to 4 days to keep it fresh and free of bacteria. Dirty water can cause root rot and leaf wilt. Using room-temperature water helps avoid shocking the cutting.
Peperomia cuttings lose water through their leaves but have no roots yet. Keep humidity near 60-70% around the cutting by misting or covering loosely with plastic. This prevents drying and helps roots form faster.
Recognizing Root Development Signs
Tiny white roots can appear in 2 to 6 weeks. This depends on light and warmth.
Check the water daily and remove any mushy or rotting parts. Roots should be at least 1-2 inches long before transplanting.
Leaves will stay healthy and firm with good care. Dull, wilting, or mushy leaves signal problems like rot or underwatering.
When roots grow enough, pot your peperomia in moist, well-draining soil. Keep it away from harsh sun.
4. Propagating Peperomia in Soil: Choosing the Right Medium and Technique
Choose a well-draining potting mix for peperomia cuttings to avoid soggy soil. A 50/50 blend of standard indoor potting soil and perlite works well.
You can use a cactus mix with 20 to 30 percent perlite added. This improves drainage and helps air flow around the roots.
Use a small pot with drainage holes to prevent water buildup. Plant stem cuttings about an inch deep. So the nodes where roots form are buried but leaves stay above soil.
Leaf cuttings should lie flat on moist soil. Or set them just deep enough. Make sure their base touches the soil.
Keep the soil consistently moist but not soaked. Water until the soil feels damp to the touch. Cover with clear plastic or a mini greenhouse.
This raises humidity around the cuttings. Extra moisture helps roots grow.
Remove the cover daily for 10 to 15 minutes. This stops mold and rot from building up.
Check moisture levels often by sticking your finger about a half-inch into the soil. Water gently when the soil feels dry. Stop when water drains out the bottom.
Don’t let the soil dry out completely at first. Keep it moist during the first weeks. This helps the roots form well.
Place the pots in a warm spot with indirect light. Rooting usually takes a few weeks, and new leaves signal success.
Overly wet soil or poor drainage can cause cuttings to rot instead of root. So keeping the balance right matters.
5. How to Propagate Peperomia by Leaf Cuttings and Division
Preparing and Planting Leaf Cuttings
You can propagate some Peperomia types from a single leaf. Choose species with fleshy leaves, like Peperomia obtusifolia. Avoid variegated kinds; they rarely root from leaf cuttings.
Cut a healthy leaf with a small piece of the stem attached. Let the cut end dry for a few hours to prevent rot. Then plant it in moist, well-draining soil.
- Pick a healthy, mature leaf with a ½-inch stem piece.
- Use a clean, sharp knife or scissors to cut the leaf.
- Let the cut end dry for 3 to 4 hours to callous.
- Prepare a 50/50 soil mix of potting soil and perlite.
- Plant the stem end 1 inch deep into moist soil.
- Cover with a humidity dome or plastic bag to retain moisture.
- Keep soil warm around 70°F and out of direct sunlight.
Don’t skip drying the cut end; it helps stops stem rot down the road.
Dividing Mature Peperomia Plants Safely
Division splits a mature Peperomia into smaller, fully rooted plants. It works best for multi-stem types like Peperomia caperata. You instantly get plants with roots, so no rooting guesswork.
Gently loosen the root ball and carefully separate sections with your hands or a knife. Each new plant should have roots and stems attached. Repot them right away.
- Remove the plant from its pot and shake off excess soil.
- Loosen the roots gently to see natural divisions.
- Use a clean, sharp knife to cut through the root ball if needed.
- Ensure each division has roots and stems attached.
- Pot each division in fresh, moist potting mix.
- Keep new plants in a humid, warm spot away from direct sunlight.
Use a sharp tool and clean cuts to avoid damaging roots or spreading disease.
Expected Rooting and Growing Times
Leaf cuttings take longer to root, usually 3 to 6 weeks. Roots start small, and new growth appears after the roots develop. You might see tiny baby plants at the leaf base.
Divided plants already have established roots, so they grow faster. You’ll notice new leaves within 1 to 3 weeks if conditions are right. Both methods do best in spring or summer.
6. Environmental Conditions and Timing for Successful Peperomia Propagation
Peperomia plants root best in warm temperatures between 65 and 86 degrees Fahrenheit. Keep cuttings away from cold drafts or direct heat sources. Temperatures below 60 degrees can slow or stop root growth, so avoid chilly rooms.
Humidity helps peperomia cuttings form roots faster by keeping the leaves from drying. Aim for 50 to 70 percent humidity around the cuttings. You can raise humidity by placing cuttings inside a clear plastic bag.
Another way is to cover them with a small plastic dome. Open the bag or vent the dome daily. This lets fresh air in and prevents mold.
Grouping cuttings with other houseplants raises humidity naturally. You don’t need extra tools for this.
Light should be bright but indirect. Direct sunlight can burn delicate new leaves and slow rooting. A north or east window works well for light.
Use fluorescent grow lights 12 inches above for 12-16 hours daily. Some people use affordable IKEA grow lights to speed up growth during dim seasons indoors.
Peperomia roots best from spring to early fall during active growth. You can still propagate in winter with added light and warmth. For example, keep cuttings near 72 degrees with a humidity dome in low light.
Consistent warmth, moist air, and bright indirect light produce healthy, strong roots. Too little humidity makes leaves shrivel or rot without rooting. Move cuttings to brighter spots if leaves yellow or fall in low light.
Check the temperature to ensure it’s not too cold. You don’t need rooting hormones. But making this environment right boosts your chances to over 80 percent rooting success.
7. Potting Up and Caring for New Peperomia Plants After Rooting
Rooted cuttings show small but firm roots about 1 to 2 inches long. The leaves stay healthy and firm, not limp or yellow. Once roots reach this size, the cutting is ready to pot up in soil.
Pick a pot about 3 to 4 inches wider than your peperomia’s roots. Young peperomia plants need just a bit more space to grow. A pot that’s one size bigger than the root ball works well.
Use a well-draining houseplant mix with added perlite. Terracotta pots are a good choice because they dry faster and help prevent root rot.
After potting, water the soil until it feels evenly moist but not soggy. Let the top 1 to 2 inches dry out between waterings.
Place your new plant where it gets bright, indirect light. Avoid direct sun that can scorch young leaves.
Young peperomias do best with steady humidity and no cold drafts. You can keep humidity high by putting a clear bag or glass dome over the pot. Take off the cover for one to two hours daily to lower fungus risks.
- Check roots on cuttings until they are 1 to 2 inches long and firm.
- Pick a pot slightly bigger than your root ball, about 3-4 inches wide.
- Fill the pot with moist, well-draining soil mixed with perlite.
- Plant the cutting gently, covering roots without burying leaves.
- Water to moisten soil evenly; avoid making the soil soggy.
- Put the pot in bright but indirect light indoors.
- Cover with plastic bag or glass dome to keep humidity high.
- Remove the cover daily for an hour to allow air circulation.
8. Common Peperomia Propagation Mistakes and How to Fix Them
One common mistake is overwatering peperomia cuttings, which causes root rot. The leaf stores more water than it looks like.
So you only need light moisture. Keep the soil damp, never soggy, and let the top dry out slightly before watering again.
Cuttings often fail because of poor light. They need bright indirect light but no direct sun that can scorch them.
Place your cuttings near a window with filtered light. Use a grow light on low for 12 to 16 hours a day.
Using unclean tools spreads diseases and fungal infections. Always sterilize pruning shears with rubbing alcohol or a diluted bleach solution before taking cuttings. This stops infections that cause wilting, mold, or rot during rooting.
- Clean and sterilize your cutting tool before every use.
- Keep cuttings in bright, indirect light, avoiding direct sun.
- Water cuttings lightly; do not soak the soil or leaves.
- Watch for mold or mildew and remove affected parts immediately.
- Don’t disturb cuttings; wait 2 to 3 weeks for root development.
- Use whole leaf cuttings for better success chances.
- Limit water propagation to 1 to 2 weeks to prevent rot.
Wilting or drying happens if cuttings lose too much moisture or face strong sun. Misting lightly or moving cuttings to a less bright spot can help.
Keep the soil moist but not soaking wet. Remove any shriveled or damaged leaves to reduce stress.
Leave cuttings still for the first 2 weeks. Only check moisture and light during this time. Avoid moving them too much.
Cuttings left too long in water risk root rot, which looks like brown, mushy roots. Swap water every few days and watch for root health. Spot any rot?
Trim it off fast with clean scissors. Otherwise, start again with fresh cuttings.
Step-by-Step Action Plan for Propagating Peperomia
Follow these clear steps to propagate your peperomia with confidence. Each step tells you what to do and how to check if it worked.
- Before you start: Gather clean scissors and small pots with drainage. Get rooting hormone if you want. Prepare fresh potting mix. Healthy leaves or stem cuttings should be ready.
- Day 1: Cut just below a node on the stem. Use healthy leaves or stems. These are your cuttings. Dip cuttings in rooting hormone if you want faster roots.
- Day 1 or 2: Put stem cuttings in water to root. Or place leaves and stems into moist soil. Keep soil damp but not soggy for soil method.
- Days 3-7: Set your cuttings in bright, indirect light away from direct sun. Watch for tiny root buds or new growth starting to show.
- Week 2: Check roots length if in water. In soil, gently tug the cutting, resistance means roots are forming.
- Week 3-4: When roots are 1-2 inches long, move cuttings. New leaves in soil also mean it’s time to transplant.
- After transplanting: Water new plants lightly to keep soil moist. Raise humidity by misting or using a plastic bag for days.
- Week 5 and beyond: Gradually expose the new peperomia to regular indoor conditions. Start feeding with diluted fertilizer after a month.
Frequently Asked Questions
Is It Better to Propagate Peperomia in Water or Soil?
Both water and soil work well for peperomia propagation. Water lets you watch roots grow, while soil skips transplant shock. Choose based on your comfort and plant type.
Can You Grow Peperomia from a Cutting?
Yes, peperomia grows easily from stem or leaf cuttings. Healthy cuttings root in water or soil in 2, 4 weeks. Keep cuttings moist and warm for best results.
Why Is It Illegal to Propagate Plants?
Propagating some plants can be illegal due to patents or copyrights. These rules protect breeders’ rights on commercial varieties. Always check local laws before sharing or selling propagated plants.
Can Peperomia Be Propagated in Water?
Yes, peperomia stem cuttings root well in water within weeks. Change the water regularly and keep cuttings in bright, indirect light. Transplant to soil once roots are a few inches long.
How Long Does It Take for Peperomia Cuttings to Root?
Peperomia cuttings usually root in 2 to 4 weeks. Leaf cuttings may take longer, up to 8 weeks. Patience and steady moisture help achieve healthy roots.
Should You Remove Lower Leaves Before Rooting Peperomia Cuttings?
Yes, removing lower leaves prevents rot and helps focus energy on root growth. Make sure no leaves sit underwater if rooting in water. Trim damaged leaves and keep cuttings clean.
The Bottom Line
Peperomia propagation can be simple with the right timing and care. Start with healthy cuttings and give them good light and moisture. Take your first step today by preparing your tools and selecting cuttings for rooting.


