How to Burlap Wrap a Tree: Complete Steps, Tips, and Protection Benefits
Knowing how to burlap wrap a tree helps protect it from winter damage. The key is to wrap burlap loosely around the trunk and branches, leaving space for air.
Tie the burlap at spots about 12 inches apart. This keeps it secure without squeezing the tree.
Start by measuring the tree’s height to get enough burlap to cover it fully. The burlap should extend about 6 to 12 inches past the tallest branch.
Wrap the tree from the bottom up with one foot overlap. This keeps the tree covered and safe.
Use natural burlap instead of plastic or synthetic since burlap lets air and moisture pass through. Avoid wrapping burlap too tight or touching the trunk directly.
Leave about six inches of space. This way, the tree stays dry and prevents mold or bark injury.
Key Takeaways
- Measure the tree height and add 6 to 12 inches to the burlap length.
- Leave a 6-inch gap between the burlap and the tree trunk.
- Tie the burlap around the tree every 12 inches to keep it in place.
- Overlap burlap layers by about 1 foot when wrapping from bottom to top.
- Use natural burlap to allow air circulation and moisture escape.
- Build a burlap tent with stakes 12 to 16 inches away from foliage.
How to Burlap Wrap a Tree Step-By-Step

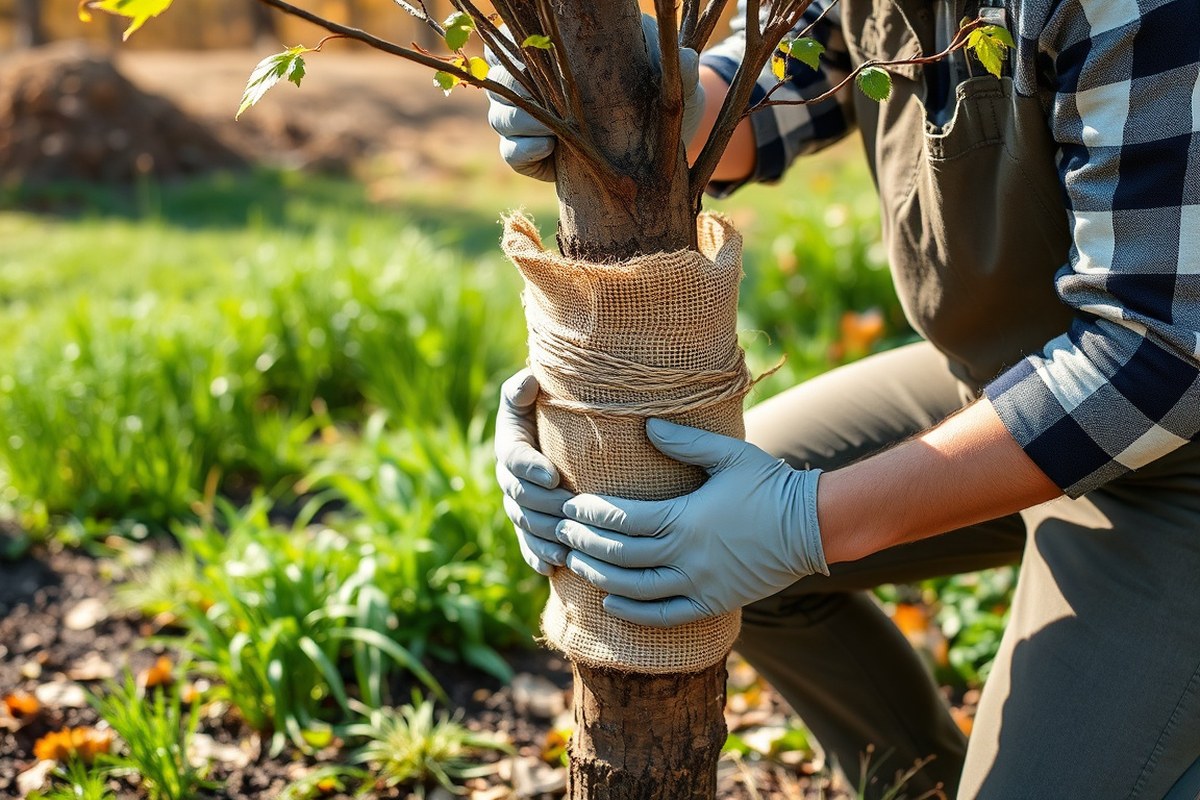
Burlap wrapping a tree means covering its trunk and lower branches with strips of burlap. Start wrapping at the base of the trunk. Wrap upward, overlapping the burlap as you go.
This protects the tree from cold and animal damage. Secure the burlap with twine or stakes, making sure it’s snug but not too tight.
Preparing the Burlap and Tree
Cut burlap strips about 2 feet wide and 5 feet long. You’ll also need twine, stakes, and a ladder for taller trees. Clear away leaves or snow around the base for better wrapping and to avoid moisture build-up.
Check the tree for loose bark or wounds that burlap could irritate. That helps prevent extra damage under the wrap. Gathering everything before starting saves time and hassle when you’re on a ladder.
Wrapping the Trunk and Lower Branches
Start wrapping the burlap at the base of the tree trunk. Wrap upward, overlapping each layer by about 1 foot to block wind and cold effectively. Make sure the burlap covers the lowest branches as well for better protection.
Leave enough room so the burlap isn’t tight against the bark. The tree needs air circulation to avoid moisture problems.
Avoid wrapping too high. Typically, wrap to just above the lowest branches or 5 to 6 feet high.
Securing the Burlap with Twine or Stakes
Tie the burlap around the tree with twine at intervals about every 12 inches. The twine should keep the burlap in place but never pinch or cut into the bark. For taller trees, drive stakes into the ground around the tree.
Secure one edge of the burlap to a stake. Then wrap the burlap around the stakes to make a loose “room” around the trunk. This helps stabilize the burlap during wind and snow, especially for young or thin-barked trees.
Adjusting for Windy or Exposed Locations
Add extra stakes if the site catches strong winds often. Space stakes evenly to support the burlap and keep it from flapping.
You can double-wrap the burlap in these spots for extra strength. But leave space to prevent trapping moisture.
Wrap the burlap snugger here but watch that it still allows the bark room to breathe. Avoid tying knots directly on the bark to prevent damage. Use wider burlap strips in exposed areas.
You can also put wider tree wrap under burlap. This adds extra protection for your tree.
- Gather burlap, twine, stakes, ladder, and clear debris around the tree base.
- Cut burlap strips about 2 feet wide and 5 feet long to cover trunk and branches.
- Start at the bottom of the trunk, wrapping the burlap upward with 1-foot overlaps.
- Cover lower branches along with the trunk for full protection.
- Tie twine around the burlap every 12 inches to secure it without squeezing bark.
- In tall or windy spots, drive stakes around the tree. Attach one edge of the burlap to a stake. This keeps the wrap from blowing away.
- Wrap the burlap around the stakes, making a loose enclosure with the tree inside.
- Add extra stakes or double-wrap if the location is very windy, keeping burlap snug but breathable.
Which Trees Need Burlap Wrapping and When to Do It

Young and thin-barked trees benefit most from burlap wrapping to avoid winter damage. Protect species like Japanese maples and new saplings, especially during their first years. Wrap these trees before harsh weather arrives and unwrap in early spring.
Trees Most Vulnerable to Winter Damage
Young trees with thin bark don’t have enough natural protection from cold and sunscald. Japanese maples, birches, and redbuds usually need wrapping the first 3 to 5 winters. You should protect these trees early while they are still young.
Wrapping helps them survive harsh winter weather more safely. Broad-leaf evergreens like rhododendrons and hollies may need wrapping in cold, windy spots.
Cedar and arborvitae trees benefit from wrapping to stop snow and ice from splitting branches. Trees with bark that is still smooth or light are also good candidates. Once bark thickens and furrows, wrapping usually isn’t necessary.
- Japanese maple: first 5 winters
- Young saplings of any species: first 3 years
- Cedar and arborvitae: first 2 winters or exposed locations
- Birch and redbud: young trees due to sensitive bark
- Broad-leaf evergreens: conditional for harsh spots
Wrapping helps avoid sunscald and frost cracks on vulnerable bark. Animals that chew on bark or buds also pose a threat during winter.
Optimal Timing for Wrapping and Removal
Begin wrapping trees in late autumn, just before frost or ice arrives. Doing this guards bark against sudden temperature changes that cause damage. Wrapping trees too soon holds moisture, which can lead to rotting problems.
Remove the burlap wrap in early spring before new leaves begin to emerge. This favors good air circulation and avoids trapping moisture against the bark during warmer weather. Leaving wrap on too long can weaken bark and encourage pests.
Choose a mild day for wrapping and removal to avoid stressing the tree.
Situations When Wrapping Is Unnecessary or Harmful
Mature trees with thick, furrowed bark don’t need burlap wrap. Their own bark protects them well.
Oaks and other hardwoods usually fall into this category and should be left alone. Wrapping these trees can trap moisture, inviting fungus problems.
Avoid wrapping trees in mild climates where severe freeze or sunscald isn’t a threat. Trees with hardened, mature bark are also not good candidates. Wrapping after the bark has hardened won’t provide much benefit and could cause issues.
Never wrap trees too tightly; it can damage bark and slow growth.
The Burlap Tent Method: Setup and Benefits
The burlap tent method uses stakes to hold burlap away from the branches. This setup leaves the top open for air to flow freely through the tree. It protects branches and lets the tree breathe.
Unlike direct wrapping, it doesn’t hug the leaves tight. This way, branches stay safe without trapping moisture.
Selecting and Placing Stakes Around the Tree
Pick wooden or metal stakes taller than the tallest branches. Space them about 12 to 16 inches from the outer branches.
This distance keeps the burlap from touching the foliage. So it doesn’t freeze onto the tree.
Place stakes evenly around the tree’s widest part to form a stable frame. Check the tree from all sides to avoid crowding branches or leaves. Setting stakes too close will trap moisture and block light.
Attaching Burlap to Stakes to Form the Tent
Use burlap wide enough to wrap the tree plus about a foot of overlap. Wrap it loosely around the outside of the stakes. Leave the top wide open to let air circulate.
Secure burlap edges to the stakes with twine, tying in the opposite direction of the wrap. This keeps it from slipping down in wind or snow. Make sure the burlap does not touch the trunk or branches inside.
- Drive stakes into the ground 12, 16 inches from branches.
- Measure and cut burlap to wrap around the stakes with overlaps.
- Drape burlap loosely around the stakes, leaving the top open.
- Tie twine around stakes, opposite the burlap’s wrap direction.
- Adjust burlap to maintain a 6-inch gap from the trunk.
- Check that burlap doesn’t touch branches anywhere inside the tent.
- Clip burlap to the top branch if necessary for extra hold.
Advantages of Air Circulation with This Method
Leaving the top open stops moisture from building up under the burlap. Good air flow reduces fungal diseases by drying wet branches quickly. The tent also prevents burlap freeze-ups that can damage bark and buds.
This method prevents overcrowding of branches, so leaves get light and air. Keeping fabric off foliage lets the tree stay healthier through freezes and thaws. Moisture trapped by tight wrap can cause rot or harm the tree’s growth.
When to Prefer Burlap Tents vs Direct Wraps
Burlap tents suit dense evergreens or trees with sensitive branches needing air. Direct wrapping can crowd leaves and branch tips, reducing light and causing stress. Trees prone to fungal infections benefit from the ventilation that tents provide.
Use direct wrapping on smooth-barked trees or species less sensitive to moisture. Tent wraps work best for fragile trees where frozen burlap may peel bark. They require more material and effort but offer safer protection for certain trees.
Materials and Tools Needed for Burlap Wrapping
You need coarse burlap fabric to wrap a tree well. Find burlap pieces that cover the whole tree. Add 6 to 12 inches above the tallest branches.
This extra length helps protect the top fully. This overhang helps protect the tips from harsh winds and snow.
Burlap comes in different weaves. Choose a fine weave for small trees and shrubs to keep the wrap snug. Pick burlap with an open weave for bigger trees.
This lets air flow through and reduces moisture. It’s especially good for evergreens.
Besides burlap, gather twine or rope to tie the wrap tightly around the trunk. Use a needle to sew burlap edges neatly. A clean cover slides over the tree easily.
This keeps the wrap secure and tidy. Wire cutters may be necessary if your tree has a wire basket from planting.
You can reuse burlap from previous years if it’s still strong and not rotted or torn. Fresh burlap costs about $1 to $3 per square foot, so reusing saves money. Check for mildew or dirt before reapplying it each season.
Match burlap size to your tree’s height and width for proper coverage. Smaller pieces will not protect well. Bigger burlap pieces are easier to work with.
But they can get heavy and trap moisture. Choose a proper weave to avoid problems.
| Burlap Type | Best For | Size Notes | Price Range (per sq ft) |
|---|---|---|---|
| Fine Weave Burlap | Small trees, shrubs | Smaller pieces, snug fit | $1, $2 |
| Open Weave Burlap | Larger evergreens | Larger pieces, allows airflow | $2, $3 |
Prepare burlap pieces tall enough to cover the tree top-to-bottom. Sew or tie them loosely so you can slide the wrap over the tree. Always keep the wrap tight enough to stay put without damaging bark.
Ready burlap wraps protect against cold, wind, and wildlife damage through winter. Treat the burlap gently during wrapping to avoid ripping. Check the wrap periodically once winter starts to make sure it stays secure and dry.
How Burlap Protects Trees from Winter Damage and Animals
Burlap protects trees by shielding them from harsh winter conditions. It blocks cold winds that suck moisture from the bark and leaves. This helps prevent winter drying and bark cracking, both common problems in cold climates.
Sunscald happens when winter sun heats the tree bark during the day. Then, at night, temperatures drop quickly, causing the bark to crack.
Wrapping with burlap offers a buffer against these temperature swings. The mesh allows the tree to breathe while softening the sun’s heat.
Frost cracks form when freezing water inside the tree expands and splits the bark. Burlap limits rapid temperature changes, reducing these cracks.
Its insulation helps keep the tree steady in freezing weather. It works best between 20°F and 40°F. This is when frost cracks often happen.
Deer and other animals rub or bite young trees in winter. These wounds let disease in and stunt growth.
Burlap wrapping acts as a physical barrier against these critters. Dense burlap slows down their access, protecting the trunk from nicks and scrapes.
Burlap also guards against snow weight that can deform limbs. It cushions major branches and helps prevent bark damage caused by heavy, wet snow. This keeps the tree’s shape steady through harsh storms.
You can add chemical repellents under your burlap wrap for extra deer protection. Use products labelled safe for trees and follow the instructions carefully. Always apply repellents before wrapping, so chemicals don’t wash off indoors.
Make sure burlap isn’t wrapped too tightly. Air needs to flow to prevent moisture build-up.
Common Mistakes When Burlap Wrapping and How to Avoid Them
Wrapping burlap too tightly around a tree is a common mistake. It can damage the bark. Strong winds may break the stems.
The tree swaying makes this more likely. Leave some space for the tree to breathe and expand by wrapping loosely but securely.
Starting the wrap too late in fall puts the tree at risk. The best time is before the first hard frost. Waiting until freezing weather starts can stress your tree.
It can also leave the tree open to wind damage. Salt used on roads can hurt it too.
Covering the trunk too far into the soil can trap moisture. Wrapping the entire tree also traps moisture. This can harm the tree’s health.
This may cause rot or pest buildup. Limit burlap coverage to the trunk and lower branches only.
- Wrap burlap with gentle tension, allowing for air flow.
- Put up the wrap before late October or first frost arrives.
- Keep the burlap above soil level, not touching mulch or dirt.
- Check the wrap every few weeks during winter for tight spots.
- Adjust or replace damaged burlap to maintain proper protection.
Checking your wrapped tree at least once a month helps catch problems early. Look for signs of damage, sagging burlap, or wet patches that don’t dry. Loose burlap or holes let in pests and wind, so fix those quickly.
To fix tight wrapping, gently unwrap and add spacing or use wider burlap strips. Make sure the tree is protected from strong winter winds right away if you wrapped it late.
Remove excess burlap near roots to prevent moisture buildup. Taking these steps protects your tree through winter without causing harm.
Watering and Post-Winter Care for Wrapped Trees
Water your tree before wrapping it with burlap. The soil should be moist but not soggy. This helps the tree handle winter stress better.
During cold months, water your tree only if the soil is dry. Check the soil by digging 1 to 2 inches down. Water when the top soil feels dry, usually every 3 to 4 weeks in mild winters.
Mulching helps keep the soil temperature steady and preserves moisture. Spread 2 to 4 inches of mulch around the base after wrapping. Keep mulch 3 to 6 inches away from the trunk to avoid rot.
Remove burlap in early spring, after the last frost. Check the local frost date to time it well, often mid-April. If you remove too early, the tree may get cold damage.
To take off the burlap, cut the tie or unwrap it gently. Unfasten from top to bottom without pulling or jerking. Dispose of the burlap or store for next winter, if dry and clean.
After removing burlap, inspect the tree for damage or pests. Prune any broken branches, if needed. Keep watering the tree regularly until it fully wakes from dormancy.
The burlap should be loose enough to allow airflow and water to reach the tree. Tight wrapping can cause bark damage or mold. Check the wrap periodically during winter for any tears or water buildup.
Wrapping correctly and watering lightly protects roots and bark from harsh weather. Mulch adds an extra layer of insulation for the roots. Removing the wrap on time prevents moisture problems and lets the tree breathe again.
Comparing Burlap Wrap to Other Tree Wrap Materials
Burlap stands out because it lets air flow while protecting trees from winter cold. Plastic wraps trap moisture and can cause bark to rot or freeze. Cardboard offers some insulation but gets soggy and breaks down fast, exposing the tree.
Polypropylene lasts longer but doesn’t breathe as well as burlap. Crepe paper breaks down quickly and can tear, making it less reliable for long winters.
Burlap’s natural fibers help prevent bark damage from sudden temperature drops. It suits most tree types, especially in cold, dry climates. Plastic may work where moisture is not a big concern.
It can damage trees in humid, wet places. Avoid using plastic wraps in these areas. Cardboard works best for short-term use or small trees but needs replacing often.
Polypropylene is useful if you want a reusable option but costs more. Crepe paper works for quick use but offers minimal protection over months.
| Material | Breathability | Durability | Cost | Best Use |
|---|---|---|---|---|
| Burlap | High | Moderate (lasts one winter) | Low | Cold, dry climates; most trees; 6 ft trees need ~24 sq ft |
| Plastic | Low | High | Low | Dry climates; when moisture build-up is not a concern |
| Cardboard | Moderate | Low (breaks down when wet) | Low | Short-term use; small trees or branches |
| Polypropylene | Moderate | High (reusable) | Medium | Long term; gardeners wanting reusable options |
| Crepe Paper | Moderate | Low (quick breakdown) | Low | Short winter protection or temporary use |
Burlap is easy to work with. Simply wrap it around the trunk, overlap slightly, and secure. You can buy a roll for less than $10.
It covers about 24 square feet. That’s enough for a six-foot tree.
Cardboard or crepe paper might cost less but need frequent replacement. Polypropylene wraps usually cost two to three times more but last several seasons if stored properly.
Don’t use plastic wraps for long periods. They trap moisture and can harm the tree bark.
Your choice depends on the tree type and local climate. Also, consider how long you need the wrap. These factors guide your decision.
For most home gardeners, burlap hits the right balance of protection, air circulation, and cost. Outdoor moisture and winter temperatures below 20°F call for breathable wraps.
Quick fixes in milder climates could use cardboard or paper. But be ready to replace often for continued protection.
Step-by-Step Action Plan for Burlap Wrapping Your Tree
Follow these key steps to wrap your tree before winter arrives. Each step helps you protect your tree effectively.
- Late fall: Check your tree’s species to confirm it needs burlap wrapping. Around 85% of evergreens and young fruit trees benefit most.
- Before first frost: Gather materials: burlap, twine, stakes, and scissors. Make sure burlap pieces are large enough to cover trunk and branches.
- Same day: Set up any supporting stakes if using the burlap tent method. Make sure stakes stand firmly and form a triangle shape around the tree.
- Day of wrapping: Wrap the trunk loosely with burlap. You can also tent burlap over branches to protect them. Watch for tight spots to avoid bark damage.
- Immediately after wrapping: Tie the twine firmly around the burlap but don’t choke the tree. Check if burlap holds in place without gaps.
- Mid-winter check: Inspect for any tears or loose burlap after storms. Re-secure as needed to keep the tree shielded.
- Early spring: Remove burlap once temperatures rise consistently above freezing. Wait until buds start swelling to avoid damage from cold moisture.
- After burlap removal: If the soil is dry, water the tree. This helps it recover and grow strong in spring.
Frequently Asked Questions
Can I Burlap Wrap a Tree That Is Already Dormant?
Yes, you can wrap a tree once it is dormant. Wrapping earlier protects it better from winter damage and animals.
How Tight Should the Burlap Be Wrapped Around the Tree?
Wrap the burlap snug but not tight. It must allow air circulation without chafing the bark.
Can I Reuse Burlap from Last Year’s Wrapping?
Burlap is biodegradable but reusable if still in good shape. Store it dry to prevent mold.
Is It Necessary to Wrap Both the Trunk and the Branches?
Wrapping both trunk and branches offers better protection. This keeps fragile limbs safe from wind and snow.
What Type of Twine Works Best to Secure Burlap?
Use natural fiber twine like jute. It’s strong, biodegradable, and won’t damage bark.
Should I Remove Burlap Wrap in Early Spring or Leave It on Longer?
Remove burlap in early spring as buds swell. Leaving it on too long can trap moisture and cause rot.
Final Thoughts
Burlap wrapping helps your tree stay healthy through harsh winter weather. Protect your tree today by choosing the right timing and wrapping it carefully. Start by checking your tree type and gather your burlap materials this week.