How to Grow a Vegetable Garden: Complete Steps and Expert Tips for Success
How to grow a vegetable garden starts with picking a sunny spot that works well. Your garden needs at least six hours of full sun daily for best results. Next, loosen the soil well.
Then, add 2 to 3 inches of compost. Mix it in for healthy plants.
Choose raised beds about 6 to 12 inches deep to keep roots happy and soil warm. Start small with common easy vegetables like lettuce and radishes to stay motivated. Water your plants deeply when the soil feels dry one to two inches down.
Plan your garden layout with 3-foot paths between beds for easy access and care. Use quick-maturing seeds to enjoy your harvest sooner, usually within 25 to 60 days. Avoid common mistakes by hardening off transplants slowly to prevent shock before planting outdoors.
Key Takeaways
- Pick a garden spot with at least 6 hours of full sun daily.
- Mix 2 to 3 inches of compost into the top 6 to 12 inches of soil.
- Build raised beds 6 to 12 inches tall for better soil and root health.
- Use 3-foot-wide walkways between beds for easy watering and weeding access.
- Plant quick-growing vegetables like lettuce, radishes, beans, or spinach first.
- Water when soil is dry 1 to 2 inches below the surface for best growth.
How to Start a Vegetable Garden from Scratch

To start your vegetable garden, first pick the right spot for it. Then choose what type of garden to create. Plan your garden layout carefully before planting.
These first steps set you up for a smooth growing season. A small, well-planned garden fits your space and skills, helping you get productive quickly.
Choosing Your Garden Type
Decide if you want an in-ground bed, raised bed, or container garden before you start. Each type fits different spaces and skill levels. Beginners like raised beds because they control soil well.
These beds also drain water properly. Prices usually range from $80 to $250.
In-ground gardens cost less, about $20 to $80. But need more work and good soil.
Containers fit balconies or patios with $30 to $100 startup cost. They give you great soil control but require regular watering.
Choose raised beds if you want low weed problems and easier maintenance. In-ground works best if you have a large backyard. Containers suit small spaces but need more frequent watering.
Selecting the Ideal Garden Location
Choose a place that gets direct sun for 6 to 8 hours daily. Most vegetables thrive with plenty of sunlight. Avoid areas shaded by trees or tall buildings.
Pick a place with well-draining soil or use raised beds or containers to control drainage. A flat area works best for even watering and easy access. Keep your garden near a water source to make watering simple.
Make sure the spot is easy to reach. You’ll be spending time planting, weeding, and harvesting. Avoid locations with poor soil or flooding risks.
Planning Garden Size and Layout
Start with a small garden, like one 4×8-foot raised bed or a 10×10-foot in-ground plot. This size lets you manage plants easily and learn quickly. Avoid over-planting or you might get overwhelmed.
Leave pathways at least 18 to 24 inches wide so you can move around. Stagger rows or use raised beds to keep plants tidy and easy to reach. Group plants by type or sunlight needed for a simple plan.
Use this step-by-step to set up your garden layout:
- Choose your garden type based on space and budget.
- Pick a sunny, well-drained spot near water.
- Measure your desired garden size, start small.
- Mark pathways for easy access around beds or rows.
- Plan plant groups by their light and water needs.
- Prepare the soil or fill raised beds with quality mix.
- Set up supports or irrigation if needed.
- Check spacing to avoid overcrowding plants.
When and How to Plant Seeds and Transplants
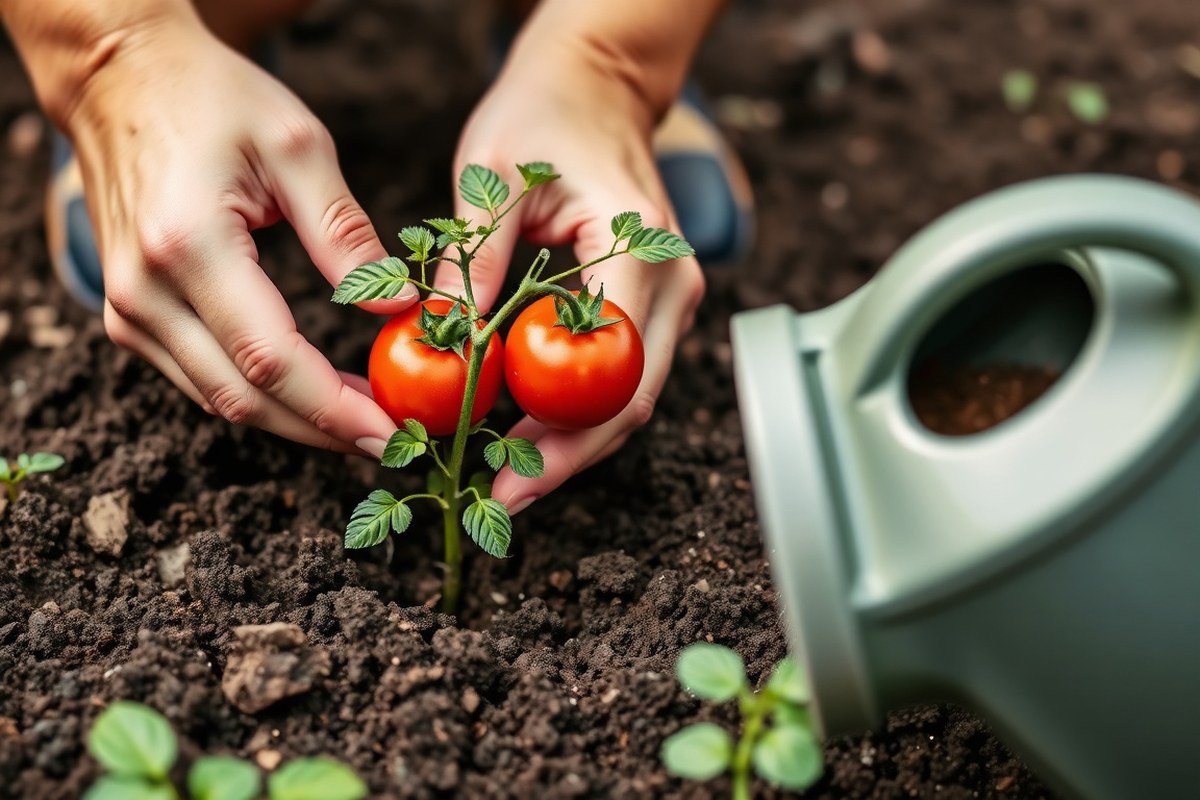
Plant seeds outdoors once the soil temperature suits the vegetable. Harden off seedlings before moving them outside. Some crops grow better from seed, while others do well as transplants.
Starting Seeds Indoors and Outdoors
Sow seeds outside after the last frost date and when soil is warm enough. Cool-season vegetables like peas and lettuce can go out early. Plant heat-loving seeds like beans and cucumbers when soil reaches 60°F to 70°F.
Start indoors 6 to 8 weeks before the last frost for tomatoes, peppers, and eggplants. Use seed trays and good seed-starting mix. Keep seeds moist and warm for best germination.
Sow new seeds every 2 to 3 weeks to maintain steady harvests. This keeps your garden producing over a longer period. Thin seedlings as they grow to avoid overcrowding.
Planting Transplants Correctly
Move seedlings outdoors gradually over 5 to 7 days to harden them off. Start by putting them in shade for a few hours. Then add sunlight slowly.
Introduce wind bit by bit. Avoid planting outside until nighttime temperatures stay above 50°F.
Plant transplants deep enough to cover their roots and firm the soil gently around them. Water well after planting to settle the soil and reduce shock. Mulch plants to keep roots moist and cool.
- Place seedlings outside in shade for 2 to 3 hours day one.
- Increase outdoor time by 1 to 2 hours daily over the week.
- Expose plants to morning sun but shield from harsh afternoon rays.
- Gradually reduce shelter from wind and rain during the hardening period.
- Plant transplants in the garden on the final day after sunset.
- Water transplants immediately and regularly for the first week.
Never plant young seedlings outside abruptly; sudden exposure causes shock and poor growth.
Vegetables by Seed or Transplant
Direct sow root crops like carrots, beets, and radishes for stronger roots. These vegetables do better growing straight in garden soil. Beans, peas, cucumbers, and squash also thrive from seed outdoors.
Use transplants for tomatoes, peppers, and eggplants to get a head start. These warm-season crops grow slowly from seed and need a longer season. Buying nursery plants saves time and increases success.
Onions and celery often need indoor seed starting or transplants in cooler climates. Planting young plants in spring helps ensure they mature before frost. Consider your local climate when deciding which method fits best.
Preparing and Testing Your Garden Soil
Test your soil to check nutrient levels and pH before planting. Add compost and fertilizer based on those results. Loosen soil 8 to 12 inches deep to allow roots to grow well.
Conducting Soil Tests and Interpreting Results
Use a soil test kit or send samples to a lab. This helps you learn your soil’s nutrient and pH levels. Knowing this lets you choose the right amendments.
Cooperative extension services often offer affordable testing, usually costing $10 to $20. Testing shows whether your soil is acidic, neutral, or alkaline, which affects vegetable growth.
Soil pH below 5.5 means it’s too acidic, locking out nutrients. Add garden lime (calcium carbonate) to raise pH in this case. Keep pH between 5 and 7 for most vegetables to grow well.5 and 6.0, add a small amount of lime for crops that prefer slightly acidic soil.
Ideal vegetable garden pH is 6.0 to 7.0, requiring no adjustment. Keep pH around 7 for leafy greens and some beans to thrive.0 to 7.5, your soil is slightly alkaline.
It often tolerates many crops. Add elemental sulfur to lower pH if it’s above 7.5, which can cause iron and manganese deficiency.
Amending Soil with Compost and Fertilizers
Adding organic matter like compost, aged manure, or worm castings improves soil drainage and nutrient supply. Compost also supports beneficial microbes that help plant roots. Mix the organic matter well with your native soil for a dark, crumbly texture.
Use balanced fertilizer with equal nitrogen, phosphorus, and potassium. This works if your soil test shows missing nutrients. It gives plants what they need to grow.
Follow package directions closely, since too much fertilizer can harm plants and soil life. Use soil test results to choose the right fertilizer type and amount.
Soil Preparation Techniques
Use a garden fork or tiller to loosen soil. Work to a depth of 8 to 12 inches. This prepares the soil for planting.
This helps plant roots spread easily and improves air and water movement. Avoid working soil that’s too wet, which can cause clumping and damage structure.
Double-digging involves digging and loosening two layers of soil, mixing in compost between layers. It creates loose, deep beds but requires more effort. No-dig adds compost on top without breaking soil.
It keeps soil life safe but takes longer to improve soil. This method is gentle on soil layers.
Prepare garden beds 2 to 3 weeks before planting. This allows soil to settle and soak up amendments. Proper prep helps plants grow strong.
For root vegetables like carrots, soil needs to be 10 inches deep. This gives roots space to grow well and straight.
Follow these steps to prepare your soil properly:
- Collect soil samples from different garden spots about 4 to 6 inches deep.
- Send samples to a lab or use a home test kit following instructions.
- Check test results for pH and nutrient levels to identify soil needs.
- Spread 2 to 3 inches of compost over the soil surface.
- Apply fertilizer if the test shows specific nutrient deficiencies or imbalances.
- Loosen soil 8 to 12 inches deep using a garden fork or tiller.
- Mix compost and fertilizer thoroughly into the loosened soil.
- Wait 2 to 3 weeks for soil to settle before planting your vegetables.
Choosing Sunlight and Location for Best Growth
Vegetables need plenty of sunlight to grow well. Most require at least 6 to 8 hours of direct sun daily. Tomatoes, peppers, cucumbers, and squash thrive when they get this much light.
Your spot gets 4 to 6 hours of sun? Choose leafy greens like lettuce, spinach, and kale.
Herbs like cilantro and parsley also do well in this light. With less than 4 hours, your options shrink to very shade-tolerant plants like mint and chives.
Pick a garden location where sunlight hits both in the morning and afternoon. Check your chosen spot at different times to confirm it gets enough sun. Avoid areas shaded by trees, buildings, or fences during those peak hours.
Besides sunlight, choose a flat or gently sloping area for your garden. Slopes can cause water runoff, washing away soil and nutrients. Level ground also helps water soak in evenly, which your plants will appreciate.
Accessibility matters too. Locate your garden near a water source for easy irrigation. Choose a spot close to your home or walkway to make daily care simpler.
Carrying heavy watering cans or tools far adds extra hassle. This might make you skip plant care more often. Keep your gardening supplies close to your plants.
Start by observing the sunniest part of your yard for several days. Aim for a spot with full sun, at least 6 hours daily if possible. This sets your garden up for healthy, productive growth with most vegetables.
You don’t have much sunlight? Grow shade-tolerant greens and herbs instead. This way, you can still enjoy fresh veggies despite less sun.
Change your garden size or move it based on available flat space. Make sure your chosen spot gets enough sunlight. This helps your plants grow better.
Selecting Vegetables Ideal for Beginners and Small Gardens
Choose vegetables that grow fast and don’t need much space. Leafy greens like spinach and leaf lettuce sprout and mature in about 30 days. Radishes also grow quickly and fit well in containers or small raised beds.
Vegetables labeled “bush,” “compact,” or “dwarf” suit small spaces perfectly. Tomatoes, peppers, and beans have these small varieties. They make container growing easier since their roots and vines stay manageable.
- Spinach and leaf lettuce: ready in 30-40 days, good for cool seasons
- Radishes: mature in 25-30 days, easy in containers
- Bush beans: compact plants, harvest in 50-60 days
- Dwarf tomatoes and peppers: space-saving, fruits in 60-70 days
- Green onions: grow fast, take little space, harvest within 50 days
- Baby carrots: smaller, mature in about 60 days, fit in raised beds
- Herbs like basil or cilantro: quick growth, useful for cooking
Match your vegetable choices to the season and climate. Cool season crops do well in 40-75°F temperatures.
These include spinach, lettuce, broccoli, and cabbage. Warm season crops like tomatoes and peppers need soil above 60°F and warmer air.
Raised beds from 4×4 feet to 4×8 feet offer excellent control over soil quality. They help beginners avoid poor native soil.
For containers, choose pots at least 12 inches deep and wide. Make sure containers have drainage holes to avoid root rot.
Keep an eye on watering, containers dry out faster than in-ground beds.
Starting with these fast, compact vegetables reduces frustration. You’ll see results in weeks instead of months. This keeps you motivated while keeping your garden space manageable and productive.
Watering, Fertilizing, Mulching, and Weeding Your Garden
Vegetable plants need consistent watering to grow well. Water deeply around the base to keep roots moist. During hot, dry weather, water every 1 to 2 days.
In cooler or rainy conditions, watering 2 to 3 times a week is enough. Mornings are the best time to water so plants absorb moisture before the heat.
Use a watering can, hose, or soaker hose to hydrate plants. Soaker hoses save time by delivering water directly to roots. Avoid wetting leaves too much to prevent diseases.
Water about 1 inch per week, more in heat, less in cool weather. Check soil moisture with your finger; it should feel damp, not soggy or dry.
Fertilizing helps plants get nutrients they need to grow. Many pre-packaged fertilizers are made for vegetable gardens. Follow package instructions for how much and how often.
Usually, you’ll feed plants every 3 to 4 weeks during the growing season. Too much fertilizer can harm plants or cause leafy growth with few vegetables.
Mulching around plants has many benefits. It helps hold soil moisture, reduces watering needs, and keeps weeds down. Apply mulch after planting and watering well.
Organic mulches like straw or shredded leaves work best and break down into soil. Keep mulch a few inches away from plant stems to avoid rot.
Weeds compete with vegetables for water, light, and nutrients. Remove weeds often by hand-pulling or using a hoe. Mulch helps stop most weed seeds from sprouting.
Keep your garden clean to save water and fertilizer for your crops. Regular weeding means less work later and healthier vegetable plants.
Managing Pests and Common Vegetable Garden Issues
Common pests in vegetable gardens include aphids, cucumber beetles, tomato hornworms, and slugs. These pests can chew leaves, suck plant juices, and spread disease. Diseases like powdery mildew and blight harm plants in gardens.
They often show white spots or brown patches on leaves. Watch your plants closely for these signs.
Preventing pest problems starts with healthy soil and good garden habits. Healthy plants resist attacks better, so test and improve your soil annually using compost.
Rotate your crops yearly to stop pests and diseases from building in the soil. You can also encourage beneficial insects, like ladybugs and lacewings, that eat harmful pests.
- Use row covers early to block insects from reaching young plants.
- Handpick visible pests like hornworms off plants daily.
- Water at soil level to avoid wet leaves, cutting fungal risks.
- Remove diseased leaves immediately to stop spread.
- Plant pest-repellent herbs such as basil or marigold near crops.
- Keep your garden tidy by clearing debris and weeds.
- Use sticky traps to catch flying pests like whiteflies.
Pest damage can get bad or spread very fast. Natural sprays like neem oil help control harmful bugs. These sprays avoid using harsh chemical pesticides.
Use neem early morning or late evening to protect pollinators. Avoid broad-spectrum pesticides unless absolutely necessary, because they kill good bugs too.
Call a professional if pests or disease hide deep in roots. Some pests, like squash vine borers, can be invasive. Experts can handle these tough garden problems safely.
Professionals can identify the issue and suggest safe treatment plans. Always follow pesticide label instructions and check local regulations before use.
Companion Planting and Crop Rotation Benefits
Companion planting means growing certain plants close to help each other. Some plants keep pests away, while others attract useful pollinators. You might plant tomatoes next to basil because basil can improve tomato flavor and reduce pests.
It’s smart to learn what plants fit well together before planting your garden. For example, onions and carrots do well near each other.
Beans add nitrogen to the soil, which helps leafy greens nearby. Using companion plants can boost your garden’s health and yields with little extra effort.
Crop rotation protects your soil and stops pests from building up year after year. Growing the same vegetable in the same spot can drain nutrients or increase disease risk. Instead, change plant families in each spot every season or year.
Planning rotation means grouping your vegetables by type, such as legumes, roots, and leafy greens. Move each group to a new area for the next garden season. This helps keep soil fertile and breaks pest life cycles.
Here’s a companion planting table with common vegetables and their good partners. Use it to plan which plants to pair or rotate.
| Vegetable | Good Companion Plants | Benefit |
|---|---|---|
| Tomato | Basil, Carrots, Onions | Improves flavor, reduces pests |
| Carrot | Onion, Lettuce, Peas | Repels carrot flies, adds nitrogen |
| Beans | Corn, Cucumbers, Radishes | Fixes nitrogen, deters beetles |
| Leafy Greens | Beans, Radishes, Onions | Improved soil nutrients, pest control |
| Onions | Carrots, Beets, Lettuce | Keeps aphids, mites away |
Start your rotation by dividing your garden space into areas for three or four crop types. Each season, move the group to a new area. Write down how your plants grew this season.
Use these notes to plan changes next time. This helps your garden grow better each year.
Rotating crops also helps maintain beneficial soil microbes important for nutrient uptake. Without them, your yields can drop noticeably.
Remember to add organic mulch after planting. It keeps moisture longer, reducing watering by up to half.
Mark your beds clearly and track which vegetable grew where to avoid confusing your rotation schedule.
Harvesting Vegetables: When and How to Pick
Vegetables show clear signs when they’re ready to pick. Tomatoes, for instance, turn fully colored and feel slightly soft to the touch. Tomatoes picked slightly underripe will ripen indoors and stay safe from pests.
Zucchini should measure 6 to 8 inches long. The skin should be soft enough to nick with a fingernail. Overgrown zucchini become tough and lose flavor.
Check cucumbers for firm, dark green skin. Slicing types should be 6 to 8 inches long.
Avoid yellowing cucumbers because they’re overripe and bitter. Green beans are ready when pods look plump but seeds haven’t started bulging.
Using the right tools helps keep your harvest clean and plants healthy. Always use sharp garden scissors or pruners to cut vegetables free. This avoids damaging the plant, allowing it to keep producing.
Try to pick in the morning when veggies are firm and full of moisture. Avoid pulling vegetables off the plant by hand, as this can tear stems. Save your harvest in a basket or shallow container to prevent bruising.
To stretch your vegetable harvest longer, pick regularly and selectively. Crops like zucchini and green beans grow fast. So picking every 2 to 3 days stops them from becoming oversized.
Pull only ripe vegetables and leave others to develop more. This selective harvesting encourages your plants to produce more.
For example, picking ripe beans while leaving others to grow means more beans over time. Regular checking and picking also reduce the chance of pests or diseases attacking old, overripe vegetables.
Common Beginner Mistakes and How to Fix Them
One common mistake is planting too many vegetables at once. This overwhelms you and stresses the plants. Start small with just a few easy crops like tomatoes, peppers, or cucumbers.
Poor soil quality causes weak plants and attracts pests. Raised beds help if your soil is bad. Build beds at least 6 to 12 inches high to encourage strong root growth.
Watering mistakes are frequent. Many beginners water lightly every day, but that keeps roots shallow.
Instead, water deeply 2 or 3 times a week. Check soil moisture 2 inches below the surface before watering.
- Plant only a few crops the first season
- Use raised beds to improve poor soil
- Water deeply, not lightly, to encourage deep roots
- Check soil moisture before watering
- Choose warm-weather crops from starter plants
- Watch plants regularly for early pest signs
- Give plants room to grow to avoid crowding
Recover poor soil by adding compost or aged manure yearly. Avoid heavy tilling that breaks soil structure. Mulch to retain moisture and suppress weeds.
For watering, test soil moisture with your finger or a probe. Water only when the soil is dry 1 to 2 inches down.
Building good garden habits takes time. Check plants every few days. Monitor watering and pests early to fix problems fast.
Keep notes on what works each season to improve your setup. Slow and steady progress beats rushing into a big garden too soon.
Step-by-Step Action Plan to Get Your Garden Growing
Follow this simple plan to start and maintain your vegetable garden. Each step helps you know if you’re on the right track.
- Before you start: Test your soil with a home kit. You can also send a sample to a lab. This helps you know what your soil needs. Healthy soil has balanced pH and nutrients.
- Week 1: Choose a sunny spot with 6 to 8 hours of sun daily. Clear the area of any weeds before planting. Check for no shade or wet spots.
- Week 2: Add compost or organic matter to your soil. Loosen the soil using a garden fork. This helps roots grow better. Soil should feel crumbly and drain well.
- Week 3: Plant seeds or transplants for beginner vegetables like lettuce or tomatoes. Follow seed packet depth and spacing instructions.
- Week 4 and ongoing: Water your garden regularly, about 1 inch per week. Soil should stay moist but not soggy.
- After 6 weeks: Spread mulch like straw or leaves around your plants. This keeps weeds down and moisture in the soil. Check mulch thickness is 2 to 3 inches.
- Every 2 weeks: Fertilize with a balanced, vegetable-friendly fertilizer. Watch for leaf color and plant growth for signs of need.
- Throughout the season: Inspect plants for pests and use companion planting or organic controls if needed. Healthy leaves and no holes show success.
Frequently Asked Questions
What Type of Garden Bed Is Best for Small Spaces?
Raised beds or container gardens work well in small spaces. They keep soil manageable and simplify watering and maintenance.
How Much Sunlight Do Most Vegetables Need Daily?
Most vegetables require a minimum of 6 hours of direct sunlight each day. Without enough sun, plants may grow poorly and yield less produce.
Can I Grow Vegetables Indoors Without Natural Sunlight?
You can grow vegetables indoors using grow lights. Choose LED or fluorescent lights for best results and place them close to plants.
How Often Should I Rotate Crops in My Vegetable Garden?
Rotate crops every season or year to prevent soil nutrient depletion. Changing plant families helps reduce pest and disease buildup.
What’s the Best Way to Keep Garden Soil Healthy Long-Term?
Add compost and organic matter yearly to enrich soil. Avoid compacting soil by stepping only on designated paths.
Can I Save Seeds from My Vegetable Harvest for Next Year?
Yes, but only from open-pollinated or heirloom varieties. Hybrid seeds may not produce true-to-type plants.
Before You Go
Growing your own vegetables is doable with little daily care and attention to soil and water. Start by testing your soil this weekend to know what it needs. Keep checking your plants often to catch small problems early and enjoy fresh veggies all season.