How to Grow Calla Lily Plants: A Complete Guide for Blooming Success
Knowing how to grow calla lily plants means starting with warm conditions. Plant the rhizomes after the soil reaches 65°F, usually in spring. This warmth helps the roots settle and new shoots to emerge smoothly.
Choose a spot that gets plenty of indirect sunlight and has well-drained soil. Calla lilies prefer soil that is not too wet. You want it to be not too dry either.
Mixing in some organic matter helps the soil. Avoid heavy clay or waterlogged areas to prevent root rot.
Space your plants about 1 foot apart. Plant rhizomes 1.5 to 2 inches deep.
Give them room to grow up to 3 feet tall, depending on the variety. Watch for frost; these lilies can’t handle temperatures below 25°F well.
Key Takeaways
- Plant calla lily rhizomes after last frost when soil warms to 65°F or higher.
- Set rhizomes 1.5 to 2 inches deep, spacing each about 1 foot apart.
- Pick a location with indirect sunlight and well-drained soil.
- Avoid planting where soil stays wet or has heavy clay.
- Calla lilies grow between 1 and 3 feet tall, based on variety.
- Temperatures below 25°F can kill calla lilies, so protect them if cold.
When and How to Plant Calla Lily Bulbs

Plant calla lily rhizomes outdoors once the soil temperature reaches about 70°F (21°C). This usually happens after the last frost, between February and June depending on your climate. In cooler areas, start rhizomes indoors about a month earlier to get a head start.
Calla lily rhizomes look like bulbs and need to be firm and healthy before planting. Store them in a cool, dry place if not planting immediately. Avoid rhizomes that feel soft, shriveled, or moldy to prevent poor growth or rot.
Plant rhizomes about 1.5 to 2 inches deep, placing them with the pointed end up. Space each rhizome roughly 1 foot apart to allow room for growth. Proper depth protects roots and encourages strong shoots.
Here are clear steps to plant calla lily rhizomes:
- Check soil temperature with a soil thermometer to ensure it’s at least 70°F (21°C).
- Pick firm, healthy rhizomes and soak them in warm water for an hour to hydrate.
- Dig holes 1.5 to 2 inches deep and 12 inches apart in well-draining soil.
- Place each rhizome in a hole with the shoot side facing up.
- Cover rhizomes with soil and gently press to remove air pockets.
- Water thoroughly to settle soil and help rhizomes start growing.
- Keep soil moist but not soggy until shoots appear, usually in a few weeks.
Choosing the Right Location and Soil for Calla Lilies
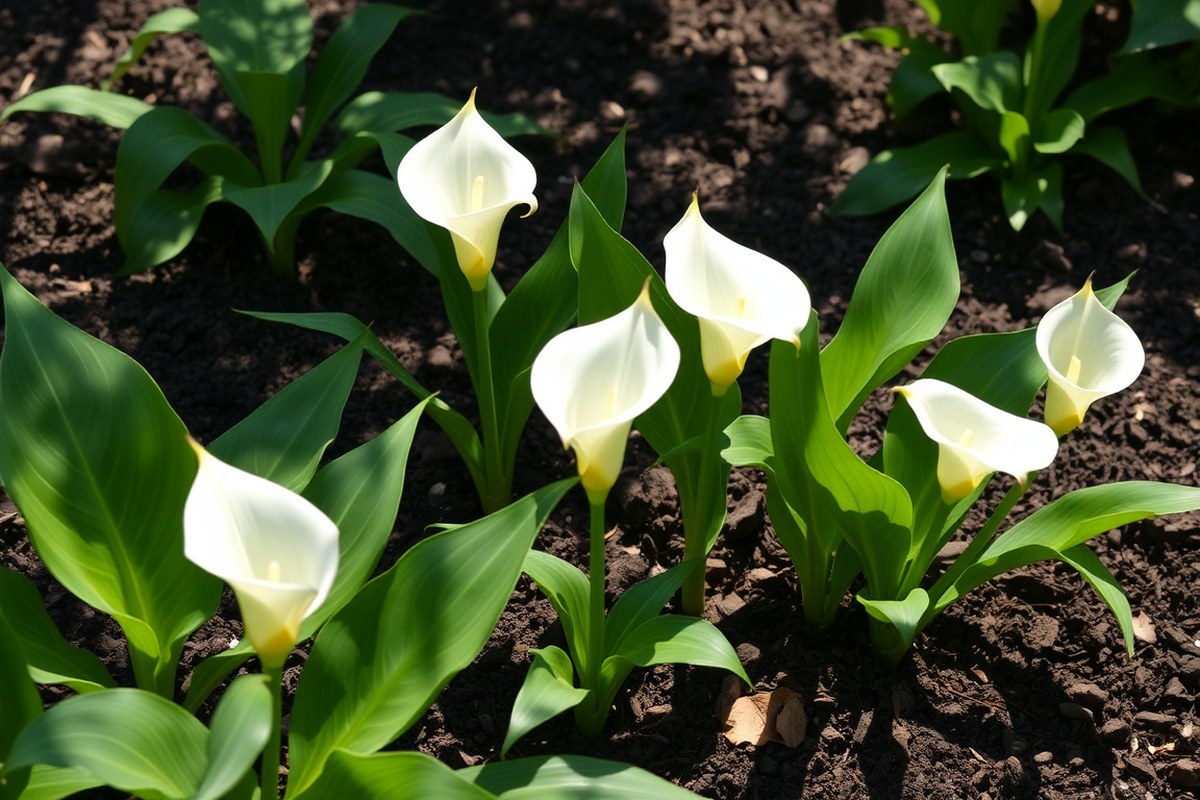
Calla lilies thrive best in soil that drains well but stays moist. Aim for soil rich in organic matter like compost or leaf mold. A pH between 5.6 and 6.5 suits them well, keeping the soil slightly acidic and helping nutrient uptake.
You can check your soil’s pH with a home test kit. These kits usually cost less than $15. They also help you test soil texture.
After testing, add peat moss or sulfur to lower pH if needed. Add compost or aged manure to your soil.
This helps improve drainage and enrich the soil. It works well if your soil feels heavy or clay-like.
These plants prefer full sun to partial shade, about 4 to 6 hours of sunlight daily. In cooler zones with milder summer sun, full sun benefits calla lilies more. In hotter climates, a spot with afternoon shade protects them from leaf scorch and drying out.
Choose spots with good air circulation to reduce disease risk. Plant them away from dense shrubs or crowded beds that trap heat and moisture.
Calla lilies grow 1 to 2 feet tall. So allow enough room around them for airflow and future growth.
Drainage matters a lot. Avoid low spots where water pools after rain. Your garden soil stays soggy?
Try raising beds or using containers. They keep the bulbs safe from rot and encourage healthy roots.
Check soil moisture often; soggy soil invites root rot, which kills your calla lilies.
Decide planting sites based on your local climate. In USDA zones 8 to 10, plant outdoors where they’ll stay year-round.
Use warmer, sunny places with gentle shade by afternoon. Cooler areas need indoor overwintering or digging up bulbs to store.
Keep calla lilies separate from plants needing very different conditions. Most prefer consistent moisture, so mixing with drought-tolerant plants won’t work well. Pick companions with similar light and soil needs for healthy growth and richer blooms.
Popular Calla Lily Varieties Compared
Popular calla lily varieties differ mainly in size, bloom color, hardiness, and flowering time. Choosing the right type depends on your garden zone and what look you want. Here’s a clear comparison to help you pick the best fit.
Zantedeschia Aethiopica (Common Arum Lily)
This variety is the hardiest, surviving in zones 8 through 10. It grows 24 to 40 inches tall. It often makes a bold statement.
You can plant it in beds or containers. The flowers are classic white.
They bloom up to 8 weeks in spring. They keep blooming through summer too.
Common arum lilies prefer partial shade and moist soil, which helps keep them lush. Their reliably strong growth and bright white flowers make them popular for many garden styles.
Zantedeschia Elliottiana (Golden Arum)
Golden arum callas add color in zones 8 to 10. They grow well in the same areas as common arum. They brighten your garden with yellow hues.
They usually grow 18 to 24 inches tall. They are smaller but still striking.
Their yellow blooms stand out nicely. Their flower color adds warmth and stands out even in mixed plantings.
These lilies bloom in late spring to early summer, lasting about 6 to 8 weeks. They work well for gardeners wanting bright, sunny tones.
Plant them in flower beds or containers. They bring warm colors to your space.
Zantedeschia Rehmannii (Pink Calla)
This variety is known for delicate pink to reddish blooms. Many gardeners love it for cutting gardens. It adds a soft touch to flower arrangements.
It generally grows 18 to 30 inches tall, fitting well in smaller spaces or mixed borders. Its hardiness is similar, suitable mainly for zones 8 to 10 when protected from frost.
Pink calla flowers bloom in mid to late summer. They add color after spring bulbs finish blooming.
They keep your garden lively longer. Careful watering helps keep the colors vibrant and the foliage healthy.
Use the table below for a quick side-by-side look at these popular calla lily types.
| Variety | Height (inches) | Bloom Color | Hardiness Zone | Bloom Period |
|---|---|---|---|---|
| Zantedeschia aethiopica | 24, 40 | White | 8, 10 | Spring to Summer (6-8 weeks) |
| Zantedeschia elliottiana | 18, 24 | Yellow | 8, 10 | Late Spring to Early Summer (6-8 weeks) |
| Zantedeschia rehmannii | 18, 30 | Pink to Red | 8, 10 (needs frost protection) | Mid to Late Summer |
These types work well in USDA zones 8 to 10, the sweet spot for calla lilies. The common arum lily suits gardeners wanting taller plants with classic white flowers.
Golden arum fits small gardens needing a sunny splash. Pink calla lilies appeal to growers who want color and cutting-quality flowers.
Watering, Fertilizing, and Seasonal Care Tips
Calla lilies need consistent moisture during their growing season. Water them enough to keep the soil evenly moist but not soggy. In containers, check the soil every day, watering when the top inch feels dry.
Outdoors, rain can reduce how often you need to water callas. After plants settle in, watering should be less frequent. Keep an eye on soil moisture to avoid overwatering.
Stop watering as much when flowers fade and leaves yellow. This happens because the plants go dormant. Cutting back water helps them rest properly.
Fertilize calla lilies about once a month while they grow actively. Use a mild liquid fertilizer with equal nitrogen, phosphorus, and potassium. Look for numbers like 10-10-10 or 20-20-20 on the label.
Feed callas during their growing season only. This helps the roots, foliage, and blooms stay healthy and strong.
Avoid fertilizing during dormancy to prevent stressing the plants and encourage root rest. Container-grown lilies especially benefit from this monthly feeding since nutrients wash out quicker from pots.
To keep foliage healthy for better blooms, maintain regular watering without letting the soil dry completely. Inspect leaves for yellowing or spots, which can mean overwatering or pests. Remove faded flowers and aging leaves to help the plant focus energy on new growth.
To boost growth, raise humidity by misting or grouping pots together. This helps keep the smooth, sword-shaped leaves healthy. Higher humidity supports the plant’s natural charm.
Recognizing and Managing Common Pests and Diseases
Calla lilies often face pests like aphids, slugs, spider mites, and whiteflies. These insects cause leaf damage, yellowing, and stunted growth. Mildew, a common fungal disease, appears as powdery spots on leaves and can weaken your plant.
Dealing with these pests and diseases requires early action. For aphids and whiteflies, spraying the leaves with insecticidal soap or neem oil helps.
Apply in the morning or late afternoon. These treatments are gentle on beneficial insects and safe for your garden.
- Slugs leave slimy trails and chew holes in leaves.
- Aphids are small, green or black bugs that cluster on stems or leaves.
- Spider mites make tiny webs and cause speckled, dry leaf patches.
- Whiteflies are tiny white flying bugs found under leaves.
- Mildew appears as white or gray powdery spots on leaves.
To handle slugs, place iron phosphate slug bait around your plants. This method is nontoxic for pets and wildlife. You can also handpick slugs early in the morning.
Removing mulch near plants helps reduce their hiding spots. But keep some mulch to protect soil moisture.
Mildew needs a fungicide spray containing sulfur or copper. Follow the label instructions carefully and reapply every 7 to 10 days if needed.
Good air circulation helps prevent mildew, so avoid crowding plants too close. Water lilies at the base to keep leaves dry, reducing fungal risk.
Always test chemical treatments on one leaf first to watch for damage before wider use.
Using organic methods first avoids harsh chemicals and protects other garden life. Chemical controls can work faster but may harm beneficial insects or nearby plants. Rotate different treatments, avoid overuse, and watch your plants closely for signs of pest return.
How to Propagate Calla Lilies Successfully
Calla lilies grow best when you propagate by dividing rhizomes or growing from seeds. Dividing rhizomes is easier and faster for beginners. Seed growing takes longer but can produce new varieties.
Dividing Established Rhizomes
This is the simplest way to get new calla lily plants. Mature plants develop large rhizomes underground. Splitting them gives you several smaller plants ready for spring planting.
Divide rhizomes after the foliage dies back in fall or early spring. Avoid any signs of soft rot on the rhizomes. This method produces identical plants quickly.
- Dig up the rhizomes carefully to avoid damage.
- Brush off excess soil and let them dry for a day.
- Use a sharp knife to cut rhizomes into pieces with 1, 2 growth buds each.
- Discard any soft, mushy, or rotten parts.
- Dust cuts with fungicide or cinnamon powder to prevent infection.
- Plant each piece in well-draining soil after frost danger passes.
- Water lightly until new growth appears, then increase watering.
Growing from Seeds
Growing from seeds takes the longest time but helps create new calla lily varieties. Collect seeds after the bloom fades and seed pods mature. Seeds need warmth and patience to sprout.
Seedlings grow slower than rhizome divisions and may take 2 to 3 years to bloom. This method is for gardeners who want to experiment and breed new colors or shapes.
- Harvest seeds from mature seed pods in late summer or fall.
- Soak seeds in warm water for 24 hours to soften the seed coat.
- Plant seeds in seed-starting mix about ¼ inch deep.
- Keep soil moist and maintain temperature around 70°F.
- Expect germination in 3 to 6 weeks under these conditions.
- Transplant seedlings to pots once they develop a few leaves.
- Move plants outdoors after all frost risk has passed and soil warms.
Separating and Replanting Rhizomes
Sometimes rhizomes cluster into dense clumps needing separation for better growth. Separating also helps prevent disease by removing damaged sections. This is similar to dividing but focuses on plants still in the ground.
Carefully loosening and splitting dense rhizome clumps in early spring gives each plant room to spread. Take care to avoid injury that can invite bacterial soft rot, a common disease.
- Loosen soil around the clump with a garden fork.
- Lift the clump gently, keeping the root ball intact.
- Break apart rhizomes by pulling or cutting with a clean knife.
- Remove any bruised or rotten rhizomes immediately.
- Dust the cuts with fungicide to reduce infection risk.
- Replant separated rhizomes 12 to 18 inches apart in fertile soil.
- Water after planting and keep soil evenly moist while new roots form.
Overwintering Calla Lilies Indoors and Outdoors
In colder climates, you need to dig up calla lily rhizomes before frost. Store them properly indoors at around 55ºF. In warmer zones, you can leave them in the ground for winter.
Digging Up Rhizomes Before Frost
Wait until the calla lily leaves turn yellow and die back. This signals the rhizomes have matured and are ready to be dug up. Plan to start digging before the first frost hits to avoid damage.
Follow these steps to lift your rhizomes carefully and prepare them for storage:
- Cut foliage down to ground level after it yellows.
- Loosen soil around the plant with a garden fork or spade.
- Lift the clump gently, avoiding bruising the rhizomes.
- Shake off excess soil but do not wash yet.
- Check for any signs of rot or damage and discard affected parts.
- Trim any remaining roots to reduce moisture loss.
- Label the rhizomes with the variety and date for next season.
Storing Rhizomes Properly for Winter
Rhizomes need a cool, dry spot to stay dormant through winter. Ideal temperatures are between 50 to 55ºF and away from freezing. Avoid damp areas that can cause rot or mold growth.
After digging, rinse off stubborn soil gently and let rhizomes dry in a shaded, well-ventilated area. This drying step takes 1-2 weeks and helps prevent fungal problems.
Store dried rhizomes in peat moss, sawdust, or vermiculite inside a breathable container. Check on them monthly to ensure they stay firm and dry. Discard any soft or shriveled rhizomes to stop disease spread.
Overwintering Calla Lilies in Warm Zones
If you live in USDA zones 8 to 10, calla lilies survive outdoors through mild winters. You can keep rhizomes planted in the garden as long as frost is rare or mild.
In these zones, provide partial shade and mulch around plants for extra cold protection. Bring potted calla lilies indoors before temperatures drop near freezing to avoid damage.
Container-grown callas can grow indoors year-round in bright light. Water them moderately during winter dormancy to keep rhizomes healthy without encouraging rot.
Preventing Common Growth Problems and Planting Mistakes
Calla lilies often suffer from common planting mistakes that stunt growth or stop blooming. Overwatering is a top cause; the bulbs rot if soil stays soggy. Water only when the top 1 inch of soil feels dry to avoid root decay.
Another frequent error is giving calla lilies too much or too little light. They thrive in bright, indirect sunlight for about six hours daily. Too much direct sun can burn leaves, while too little light slows flower production.
Poor soil drainage also leads to problems. Calla lilies need soil that drains well but retains moisture. Adding organic matter like compost improves soil structure and prevents water pooling.
- Plant bulbs 3 to 4 inches deep with the growing tip up.
- Set plants in a spot with bright, indirect sunlight for 6 hours daily.
- Water when the top inch of soil feels dry; avoid soggy soil.
- Use well-draining soil amended with compost or peat moss.
- Remove yellow or damaged leaves to reduce disease risk.
- Feed with a balanced liquid fertilizer every 4 to 6 weeks during growth.
Watching your plants closely helps catch growth issues early. Slow or no blooming often means your calla lacks enough sunlight or nutrients.
Moving the plant to a brighter area or improving fertilizing may fix this. Yellow leaves with wet soil means you need to water less right away.
Healthy callas send out new shoots in about two weeks. They bloom two to three months after planting. Sometimes calla lilies fail to bloom because they are still establishing roots.
Patience helps, plus steady care and the right environment. Adjust watering and light based on each plant’s response.
Water calla lilies deeply but infrequently to prevent bulb rot and ensure strong blooms.
Step-by-Step Action Plan for Growing Calla Lilies
Follow these steps to start growing calla lilies and keep them healthy. Check each step to see how well your plants respond.
- Before you plant: Choose a spot with partial sun and well-draining soil. Test the soil by squeezing a handful; it should crumble easily without sticking.
- Week 1: Plant bulbs 3 inches deep in spring. Space bulbs 6 inches apart. Do this after the frost risk ends. They should feel firm and plump when pressed.
- Week 2: Water gently to moisten soil but avoid soggy areas. Soil should stay damp but not waterlogged when you touch it.
- Month 1: Begin feeding with a balanced fertilizer every 3 weeks. Leaves should look vibrant and new shoots appear.
- Month 3: Watch for pests like aphids or fungal spots to act fast. Leaves should remain green and free from sticky residue.
- Late season: Start reducing watering when leaves yellow to prepare the plant for dormancy. Bulbs will firm up as growth slows.
- After frost: Lift bulbs if in cold zones and store in a dry, cool place. Bulbs should remain dry and firm without soft spots.
Frequently Asked Questions
How Long Do Calla Lily Flowers Typically Bloom?
Calla lily flowers usually bloom for 8 to 12 weeks. Warmer temperatures and proper care can extend the bloom time.
Can Calla Lilies Grow Well in Containers?
Yes, calla lilies grow well in containers with good drainage. Use a rich potting mix and keep soil consistently moist.
What Temperature Range Is Ideal for Calla Lily Growth?
Calla lilies grow best with daytime temperatures around 70°F (21°C). They dislike frost and can be damaged below 25°F.
How Often Should Calla Lilies Be Fertilized During the Growing Season?
Fertilize calla lilies every 4 to 6 weeks with a balanced fertilizer. Too much fertilizer can cause more leaves than flowers.
Are Calla Lilies Toxic to Pets or Humans?
Calla lilies contain calcium oxalate crystals and are mildly toxic if ingested. Keep them out of reach of pets and children.
Can Calla Lilies Survive in Shaded Garden Areas?
Calla lilies tolerate partial shade but need some sunlight to bloom well. Full sun suits them best in cooler climates.
Before You Go
Calla lilies reward steady care with beautiful blooms and lush leaves. Start by planting bulbs correctly and watching soil moisture closely. Keep a pest eye and adjust water through the seasons for best results.