How to Replant Tulip Bulbs for Best Blooms: A Complete Step-By-Step Guide
Knowing how to replant tulip bulbs helps you get great blooms. Do it right for the best spring flowers. Proper planting also keeps bulbs healthy.
Plant them in early fall so roots develop before winter’s cold. That gives bulbs enough time to store energy for bright flowers next season.
Pick a sunny spot with good drainage for tulips. Dig holes 6 to 8 inches deep to fit the bulbs. Leave 4 to 6 inches between bulbs to allow space and airflow.
Before planting, cure bulbs for a few days in a cool, dry place. Also, watch soil temperature, it should stay above 50°F when you put bulbs in the ground. This helps bulbs avoid rot and boosts their chances for strong roots.
Key Takeaways
- Plant tulip bulbs in early fall for 10 to 12 weeks of root growth.
- Dig holes 6 to 8 inches deep for average-sized bulbs.
- Space bulbs 4 to 6 inches apart to prevent crowding and disease.
- Select a sunny, well-draining location for best bulb health.
- Cure bulbs 3 to 5 days in a cool, dry place before planting.
- Plant bulbs when soil temperatures remain above 50°F for root development.
When and How to Replant Tulip Bulbs for Best Results
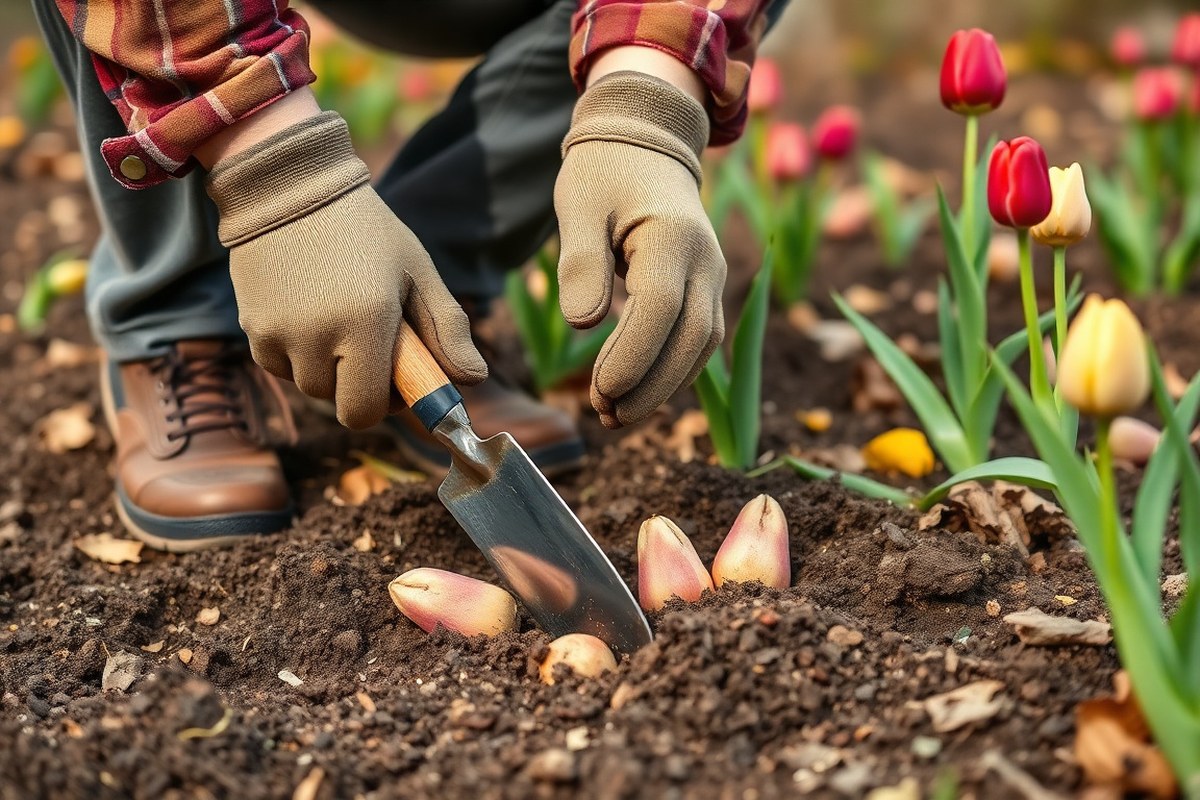
Replant tulip bulbs in early fall for the best results. Aim for about 10 to 12 weeks before the first hard frost arrives. This timing gives your bulbs enough warmth to grow roots before winter sets in.
Never dig up tulip bulbs while their leaves are still green. Wait until the foliage naturally dies back. This shows the bulbs stored enough energy for healthy blooms the next spring.
You can replant tulips right after digging them up if conditions are right. Plant them as soon as possible in soil that stays above 50°F. When soil is too cold, dry, or frozen, bulbs won’t root well. They may also rot without proper conditions.
Here’s an easy step-by-step guide for replanting tulip bulbs. Follow this timing to help them grow strong.
- Wait for the foliage to turn brown and dry. This usually happens in late spring or early summer. It shows the bulbs are ready.
- Dig up bulbs carefully: Use a garden fork to lift bulbs with minimal damage.
- Clean and cure bulbs. First, remove any soil from the bulbs. Next, let them dry in a cool, shaded spot for a week.
- Choose planting site: Pick soil with good drainage and full to part sun exposure.
- Replant bulbs 6 to 8 inches deep. In colder areas, plant them a bit deeper. This helps protect them from frost.
- Space bulbs about 4 to 6 inches apart: This prevents overcrowding and encourages healthy growth.
- Water bulbs lightly after planting: This helps settle soil and start root growth.
- Mulch with 2 to 3 inches of organic material: Mulch keeps soil temperature stable through winter.
Planting too early or late can hurt your tulips. Early planting when soil is hot may cause rot. Too late and bulbs might not root well, risking weak or no blooms next spring.
In colder climates, plant bulbs before the first strong frost but after soil cools below 60°F. This balance promotes root growth without risk of decay. Keeping planting timing in mind helps you enjoy vibrant tulips each year.
Choosing the Best Location and Preparing the Soil
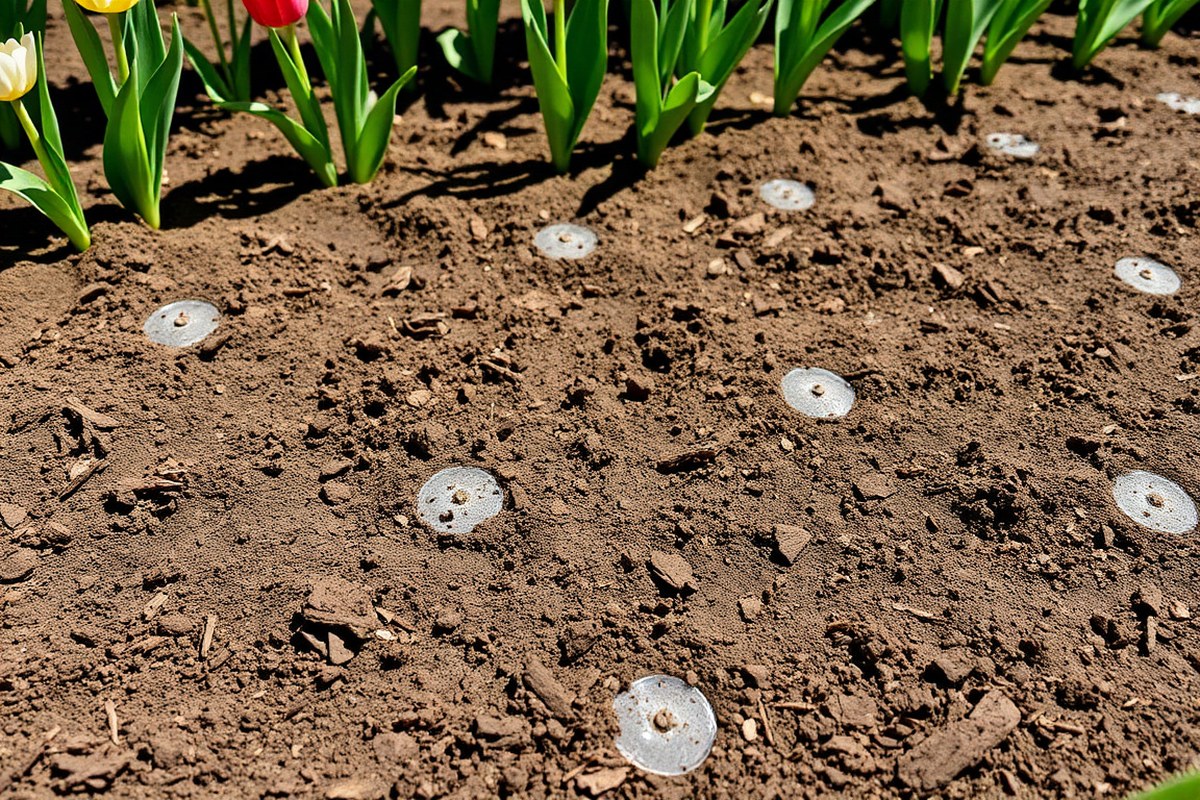
Pick a spot where tulips get full sunlight, around six hours daily. They need bright light to bloom strong and healthy. Pick a spot away from thick tree roots and heavy shade.
These areas shade bulbs or take their nutrients. Avoid places like that for planting.
Tulips like loose, sandy, or loam soil that drains well. Soil that holds too much water causes bulbs to rot over the winter. Your soil is clay or stays soggy.
Plant in raised beds or add compost. Compost soaks up water and loosens the soil.
Mix 2 to 3 inches of compost or well-aged manure into the soil before planting. This feeds the tulips and improves drainage simultaneously. Dig your soil about a foot deep.
Turn it over well. Remove rocks and debris to make a smooth bed.
Avoid low spots or places where water pools after rain. Standing water encourages bulb rot and fungal diseases. You can’t ditch or grade your garden?
Use containers or raised beds instead. Fill them with well-draining soil to keep bulbs safe.
Check your soil drainage by digging a hole 12 inches deep. Fill it with water. Watch how quickly the water drains out. Good drainage means the water should drain within two hours.
Good soil feels crumbly and lets water pass through without puddling. Heavy soils benefit from adding up to 50% compost, then mixing thoroughly. A bag of soil amendment costs just a few dollars.
It helps your bulbs stay healthy for a long time. This small cost is worth it.
Tulips also prefer neutral to slightly acidic soil with a pH near 6 to 7. Most garden soils fall in this range. But a simple soil test can confirm and help you adjust if needed.
You usually don’t need lime or sulfur for tulips. Only add them if your soil test shows a need. Most soils are fine without them.
How Deep and Far Apart to Plant Tulip Bulbs: Size and Location Guide
Plant tulip bulbs about three times as deep as their height. Most bulbs need 6 to 8 inches of soil above them for good root growth. Adjust spacing depending on your garden setup.
Plant bulbs closer in pots. Space them wider in mixed borders or windy spots.
Depth Recommendations by Bulb Size
Measure your tulip bulb’s height to find the right planting depth. Use a garden trowel or bulb planter. Dig a hole about three times the bulb’s size.
Make sure it’s deep enough for the bulb. For typical bulbs, that means 6 to 8 inches deep in loose, well-draining soil.
Smaller bulbs need less depth. But never less than 4 inches to protect from frost or drying out.
Larger bulbs require deeper planting to anchor and access moisture. Digging accurately prevents bulbs from drying or rotting and sets you up for strong growth.
| Bulb Size | Planting Depth |
|---|---|
| Small (1 to 1.5 inches tall) | 4 to 5 inches |
| Medium (1.5 to 2.5 inches tall) | 6 inches |
| Large (2.5 to 3 inches tall or more) | 7 to 8 inches |
Dig each hole deep enough so the bulb tip points upward with plenty of soil above. Press soil gently to remove air pockets. Proper depth reduces pests and protects bulbs over winter.
Spacing Guidelines for Different Settings
Space bulbs at least 3 to 4 inches apart in pots. This gives roots and soil room. Proper spacing helps bulbs grow well.
Use pots at least 6 inches deep to fit bulbs without crowding. In garden beds, space bulbs 4 to 6 inches apart.
This helps keep blooms healthy. Roots need enough room to grow too.
In mixed borders, leave 5 to 7 inches between bulbs. This prevents roots from competing. It helps bulbs get nutrients and water.
This spacing also helps air move around the plants, reducing disease risks. Adjust spacing for crowded pots or heavy plantings to avoid weak or small flowers.
| Planting Site | Recommended Spacing |
|---|---|
| Containers (6-inch deep pot) | 3 to 4 inches apart |
| Standard Garden Beds | 4 to 6 inches apart |
| Mixed Borders with Other Bulbs/Perennials | 5 to 7 inches apart |
Keeping bulbs properly spaced helps your tulips bloom fully season after season. Avoid planting too close to stop overcrowding and weak flowers.
Special Considerations for Wind and Shade
In windy spots, add 1 to 2 inches extra spacing between bulbs. More space reduces stem breakage from wind pushing stems together. This lets each tulip grow straighter and stronger.
Shaded areas slow photosynthesis, so plant bulbs with slightly wider spacing there too. Extra room helps bulbs capture more light and moisture to grow well. Avoid planting near spots with standing water to prevent bulb rot.
Inspecting, Cleaning, and Curing Tulip Bulbs Before Planting
Start by checking tulip bulbs for firmness and look. Clean off dirt and old leaves gently. Cure bulbs in a cool, dry spot to keep them healthy until planting.
Assessing Bulb Firmness and Appearance
Feel each bulb carefully. Healthy bulbs are firm and plump, without soft spots. The papery brown skin, called the tunic, helps protect against disease.
Check for any dark or mushy areas. Rotten or shriveled bulbs won’t bloom well and should be thrown away. Some peeling of the outer skin is normal and fine.
Removing Old Foliage and Dirt
Gently rub off dirt with your fingers or a soft brush. Avoid washing bulbs with water, as this can speed up rot. Remove any dried or green leaves clinging to the bulbs.
Foliage should die back naturally before separation. Pulling green leaves too soon weakens the bulb’s energy reserves needed for next year. Clean bulbs help prevent fungal growth during storage.
Curing Process and Optimal Conditions
Dry bulbs for about 5 to 7 days in a well-ventilated, shaded space. Temperatures between 60°F and 70°F work best for curing tulip bulbs. This step hardens the bulb’s outer skin and reduces chances of rot.
After curing, store bulbs in a cool, dark, and dry place until fall planting. Ideal storage temperatures range from 50°F to 60°F to keep them dormant but healthy. Avoid stuffing bulbs close together; allow airflow to prevent mold.
- Handle bulbs gently to avoid bruising.
- Feel bulbs for firmness and check the papery skin.
- Discard bulbs with soft spots or mold signs.
- Brush off dirt without using water.
- Remove any remaining dead or green foliage gently.
- Place bulbs in a shaded, ventilated spot to dry 5-7 days.
- Store bulbs in a cool, dark, and dry location at 50-60°F.
- Keep bulbs loose, not packed tightly, to prevent moisture buildup.
Proper Storage Conditions to Keep Tulip Bulbs Healthy
Keep tulip bulbs in a cool area between 45 and 50°F (7 to 10°C). This temperature range slows their growth and stops early sprouting. Don’t place bulbs in areas that are too warm or cold to prevent drying or rotting.
Humidity should be moderate, about 50 to 60 percent. Too much moisture creates rot, and too little causes bulbs to dry. Store bulbs in a spot with good airflow to keep moisture balanced and reduce mold risks.
Airtight containers or sealed plastic bags trap moisture and cause rot. Use breathable holders like mesh bags, paper bags, or cardboard boxes instead. These allow air to circulate and keep bulbs dry.
Store bulbs for no longer than six months before planting again. Plant too late, and bulbs may sprout weakly or suffer damage. Mark the storage date to track how long they’ve been kept.
Inspect bulbs before storing. Remove any soft or moldy ones to stop contamination. You can sprinkle healthy bulbs with fungicide powder for disease control.
Cinnamon works well too for added protection during storage. These treatments help keep bulbs healthy until planting time.
Keep bulbs away from pests by storing them in a dry, high place. Rodents and insects like to chew bulbs if they find them easily. Cover stored bulbs loosely with a cloth to block pests without cutting airflow.
Never store tulip bulbs in sealed plastic bags. The trapped moisture causes rot and kills bulbs.
Bulbs stored in a garage or basement need regular temperature checks. Also watch humidity levels to keep them healthy. This helps prevent damage while they sit in storage.
A small thermometer and hygrometer cost less than $20 and help avoid problems. Adjust location if conditions stray from ideal.
For small numbers of bulbs, use paper bags with holes punched in them. For larger amounts, a cardboard box lined with dry peat moss or sawdust works well. Be sure the bedding stays dry and replace it if damp.
Replanting Tulip Bulbs in Containers Versus Ground Soil
Planting tulips in containers needs different care than garden soil. Pots require careful attention to depth, spacing, drainage, and watering. Knowing these differences helps your tulips grow strong and bloom well.
Selecting the Right Container
Choose a container that is at least 8 inches deep for tulip bulbs. A wider pot lets you plant several bulbs with enough space between. Use pots with drainage holes to avoid water buildup that can rot bulbs.
Plastic or clay pots work well, but clay drains faster. Your pot needs holes for drainage.
Drill some before you plant. Picking the right size fits the number of bulbs you want and prevents crowding.
Planting Depth and Spacing for Pots
Plant tulip bulbs about 6 inches deep in containers, just like in garden soil. However, bulbs in pots need a bit more space to avoid overcrowding.
So leave 2 to 3 inches between them. This spacing helps air circulate and keeps bulbs healthy.
In garden beds, bulbs are usually 4 to 6 inches apart. In pots, tighter spacing can cause poor growth or disease. Giving each bulb room means stronger stems and better flowers.
| Planting Factor | Garden Soil | Container Planting |
|---|---|---|
| Recommended Depth | 6 inches | 6 inches |
| Spacing Between Bulbs | 4 to 6 inches | 2 to 3 inches |
| Soil Depth Loosening | 10 inches | Not needed |
| Drainage Requirements | Natural with soil | Drainage holes essential |
| Watering Frequency | Moderate, after soil dries | More frequent, check soil often |
Garden soil needs loosening about 10 inches deep before planting. Containers don’t require loosening but good draining mix is a must. These small details affect bulb health and bloom success.
Watering and Drainage Differences
Water tulips in pots when the top inch of soil feels dry. Container soil dries faster than garden soil, so check often. Overwatering can cause bulbs to rot in pots due to limited drainage.
Garden beds usually handle water better because soil drains naturally. Add drainage holes to your container. Put a layer of gravel at the bottom.
This helps water flow and stops soggy roots. This setup prevents soggy roots and keeps bulbs healthy.
Aftercare Specific to Containers
Tulips in pots need more attention after planting. Keep containers in a cool spot to mimic fall planting temperatures. Move pots to a sunny location once leaves appear for the best blooms.
Feed potted tulips with a balanced fertilizer lightly once foliage grows. Containers drain nutrients faster than garden soil. Monitor pots closely for pests or fungus, as they show problems quicker in limited space.
Watering, Feeding, and Aftercare for Replanted Tulips
Water newly replanted tulip bulbs once right after planting to settle the soil. Avoid soaking them again for at least two weeks.
Overwatering can cause bulbs to rot before they sprout. After the initial watering, give them about 1 inch of water weekly, depending on rainfall.
Use a balanced fertilizer with equal parts nitrogen, phosphorus, and potassium, such as a 10-10-10 blend. Apply it lightly at planting or wait until shoots appear to avoid burning the bulbs. You can mix fertilizer into the top inch of soil.
Do this once the leaves come up. Or sprinkle it around the base carefully.
Cover planting areas with wire mesh or garden cloth. This helps keep squirrels away from tulip bulbs. Protecting them stops digging and damage.
Plant bulbs 6 inches deep to reduce pest access. For rot prevention, ensure well-drained soil and avoid planting in waterlogged spots. Adding coarse sand or organic matter helps improve drainage.
Watch for green sprouts about 3 to 4 weeks after planting in cool climates. Warmer zones might see quicker growth.
Tulips typically bloom 10 to 12 weeks after planting if conditions stay right. Monitor leaves for yellowing or wilting, signs that bulbs may need less water or better drainage.
For container-grown tulips, water when the top inch of soil feels dry. Containers tend to dry out faster, so check moisture every few days.
Fertilize monthly with a water-soluble fertilizer during active growth. Adding a slow-release fertilizer at planting also helps maintain nutrients over time.
Keep a small checklist: water once at planting, then 1 inch weekly. Use balanced fertilizer at shoot appearance; cover to deter squirrels; ensure good drainage. Adjust watering for rain or heat spikes.
Notice sprouts in 3 to 4 weeks, blooms in about 3 months from planting. Regular checks help spot pest or rot problems early and keep tulips healthy.
Common Mistakes and How to Fix Them When Replanting Tulips
Tulips often fail to bloom because they were replanted too late or too shallow. Plant bulbs 6 to 8 inches deep. Do this after frost danger passes.
Make sure to plant at the right time. Early planting lets bulbs build strong roots so they bloom well the next season.
Overcrowding makes tulips compete for nutrients and sunlight, causing weak or no flowers. Check your tulip bed every year and thin out bulbs when needed. Dig up some bulbs and separate them.
Replant with 4 to 6 inches of space. Give each bulb enough room to grow.
Bulbs sprouting indoors too early use their stored energy faster, leaving little for spring growth outdoors. Avoid replanting bulbs outdoors the same year you force them inside. Instead, treat them like houseplants to recover before planting the next season.
Pests and diseases can weaken bulbs and stop blooming. Remove affected bulbs.
Don’t plant healthy bulbs in the same soil without improving it. Use clean soil, add compost, and rotate with other plants to reduce problems in the future.
- Wrong timing: Plant bulbs after frost threatens, not too early.
- Overcrowding: Space bulbs 4 to 6 inches apart to avoid competition.
- Poor storage: Keep bulbs cool, dry, and away from fruit to prevent rot.
- Sprouting too early indoors: Avoid replanting forced bulbs right away outdoors.
- Pests and diseases: Remove infected bulbs, improve soil before replanting.
Don’t plant bulbs overcrowded; it weakens flowers and invites disease.
Fix overcrowded beds by lifting bulbs after leaves die back. Let them dry for a week, then separate and replant at proper spacing.
Warm climate gardeners should chill bulbs in a fridge first. This is important if bulbs were previously forced indoors.
Recover bulbs affected by pests by cutting off damaged parts and applying a fungicide if needed. Avoid planting bulbs in the same spot yearly to reduce disease risk. Healthy bulbs feel firm and look plump, not shriveled or moldy.
Step-by-Step Action Plan for Replanting Tulip Bulbs
Follow these steps to dig up, store, and replant tulip bulbs for healthy blooms.
- Right after blooming: Carefully dig up tulip bulbs once foliage yellows. This means the bulb is ready to rest.
- Within 24 hours: Clean off soil and inspect bulbs for damage. Healthy bulbs feel firm without soft spots.
- Before storage: Cure bulbs in a dry, shady spot for 1-2 weeks. This helps them dry well and stay healthy. This toughens their outer skin.
- During storage: Store bulbs in a cool, dry place at 50-60°F. Make sure air can flow around them. Check them monthly for mold or dryness.
- 2 weeks before planting: Prepare your chosen location by loosening soil and adding compost. Make sure it drains well to prevent rot.
- Planting day: Place bulbs pointy side up, 6 to 8 inches deep. Space them 4 to 6 inches apart. Cover with soil and water lightly.
- After planting: Water bulbs once or twice a week if rain is scarce. Avoid overwatering, which can lead to rot.
- During growth: Fertilize with bulb-specific fertilizer once shoots appear. This helps feed the bulbs for next year’s blooms.
Frequently Asked Questions
Can You Replant Tulip Bulbs That Have Already Bloomed?
You can plant tulip bulbs again after they finish blooming. Proper care lets bulbs gather energy for a healthy bloom next spring. This makes your garden look good each year.
How Do You Save Tulip Bulbs for Next Year?
After blooming, let leaves die back naturally before digging up bulbs. Store them in a cool, dry place until fall planting.
Will Tulip Bulbs Multiply on Their Own?
Tulip bulbs can multiply slowly by producing small offset bulbs. But this often takes several years to see noticeable growth.
Can I Leave Tulip Bulbs in Pots for Next Year?
You can keep tulip bulbs in pots over winter if drained well. Make sure to provide cold conditions for proper dormancy.
How Do I Replant Tulip Bulbs Properly?
Plant tulip bulbs 6 to 8 inches deep in soil. Make sure the soil drains well.
Space the bulbs 4 to 6 inches apart from each other. Fall is the best time to plant.
Do Tulip Bulbs Need Fertilizing When Replanted?
Tulip bulbs benefit from a balanced fertilizer at planting. This supports root growth and vigorous flowering the following spring.
Before You Go
Planting tulip bulbs the right way helps ensure strong, colorful flowers next spring. Start by digging up bulbs as soon as leaves die back. Then, store and replant them carefully following these steps for best results.