How to Start Plants from Seeds: Simple Steps for Fast, Success-Proven Growth
Wondering how to start plants from seeds and get quick, healthy growth? Start with fresh seeds, the right containers, and a warm, bright spot. Most seeds germinate between 60 and 75 degrees Fahrenheit within two weeks.
Pick containers with good drainage and sow seeds at the depth the packet says. Use a light source near your seedlings to help them grow. Keep the light about 2 inches above the plants.
This helps seedlings grow strong and steady. Water gently but keep the soil moist, not soaked.
Warm-weather plants like tomatoes and peppers do better if you start them indoors. Sow seeds outside when soil temperature stays above 65 degrees. Nighttime temperatures should be above 50 degrees too.
This helps your seeds start well outdoors. Getting these details right will boost your success fast.
Key Takeaways
- Sow seeds indoors 6 to 8 weeks before you want to transplant them outside.
- Keep soil temperature between 65 and 75 degrees for the best germination.
- Use grow lights for 12 to 16 hours daily to simulate sunlight during winter.
- Choose containers with drainage holes to prevent seed rot.
- Water seeds gently to keep soil moist but avoid standing water.
- Start heat-loving seeds indoors, like tomatoes, peppers, and eggplants.
How to Start Plants from Seeds Step-by-Step

Starting plants from seeds needs some simple steps to get going right. You want healthy seedlings without wasting seeds or time. The key is to know when to plant seeds.
Also, learn how deep to sow them. Care for seeds right after planting to help them grow.
Here’s a step-by-step process to help you sow seeds correctly in containers or trays. This method works if you start indoors or outdoors. Follow each step carefully to see better germination and strong seedlings.
- Check the seed packet. It shows how many weeks before last frost to start indoors. It also tells you the right soil temperature for sowing. For example, tomatoes like warmer soil, around 70°F.
- Fill your container with seed-starting mix. Use soil that drains well but holds moisture. Containers need at least 2-3 inches of depth and drainage holes.
- Moisten the soil. Water it evenly but not too wet. The soil should feel damp but not soggy before you plant seeds.
- Plant seeds at the recommended depth. Generally, sow seeds 2 to 3 times deeper than their size. Tiny seeds go on the surface or just barely covered; larger seeds go deeper.
- Space seeds properly. Don’t crowd them. Plant several seeds per cell or container section if thinning later. More seeds mean better chances but avoid heavy crowding.
- Cover seeds lightly. Use fine soil or vermiculite. Avoid compacting the soil, which can block sprouts.
- Label your containers. Write the seed type and date. This avoids confusion as seedlings start growing.
- Place containers in a warm, bright spot. Maintain soil temperature in the ideal range for germination. For example, peppers need about 75°F soil warmth to sprout well.
Following these steps helps you balance moisture, warmth, and seed depth for good growth. Many gardeners sow extra seeds because 65 to 80 percent usually germinate. Fewer seedlings survive to maturity.
Starting seeds carefully lowers the chance of failure. It also saves money compared to buying seedlings. You get more control over growth this way.
Choosing Seeds and Containers for Beginners

Choose seeds that are easy to grow and forgiving for beginners. Good options include lettuce, radishes, marigolds, and beans.
These seeds sprout quickly and don’t need special treatments. So you get faster, clearer results.
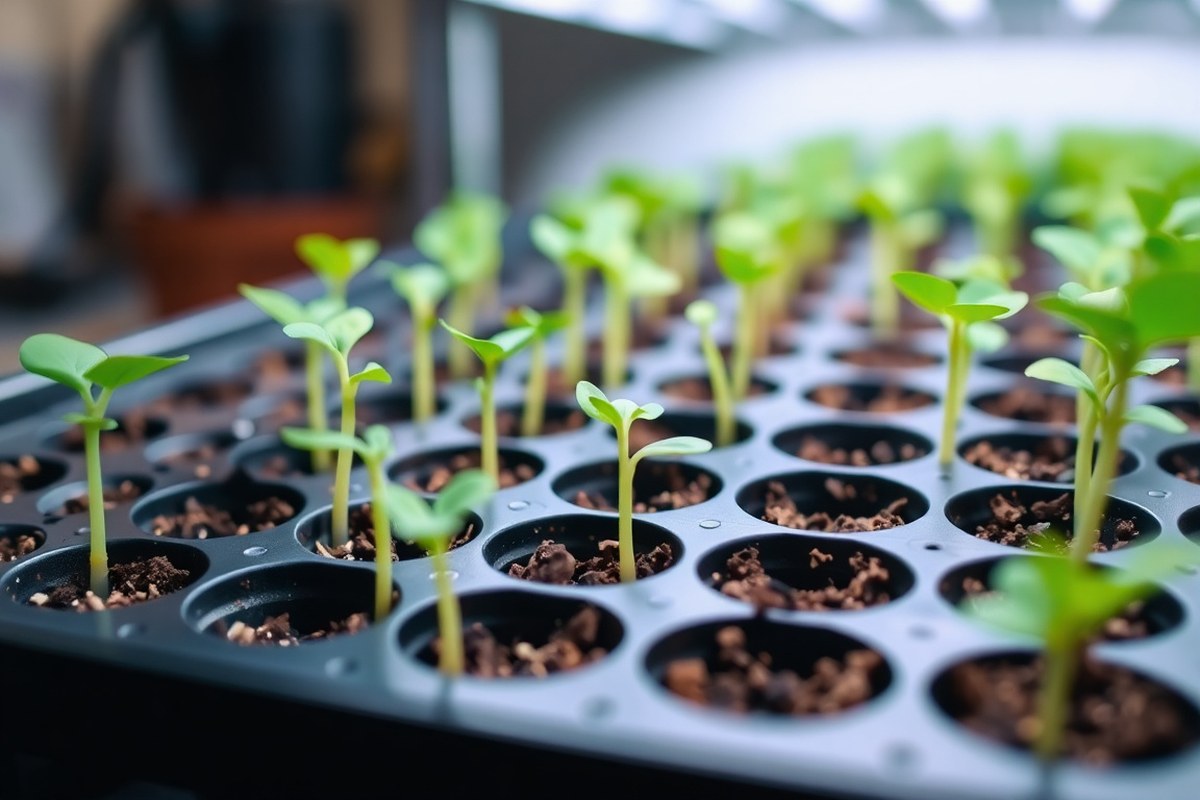
Pick containers that drain well and are at least 2 to 3½ inches deep. You can use peat pots or plastic trays for starting seeds. You can also use clean yogurt cups with holes in the bottom.
These options work well for growing plants from seeds. Just make sure each container is cleaned before use to avoid diseases.
Plant one seed per container if seeds are large, like beans. Use 2-3 seeds for smaller ones, like lettuce. This approach reduces thinning work later and helps seedlings develop strong roots.
| Container Type | Depth | Drainage Requirement | Seed Amount | Notes |
|---|---|---|---|---|
| Peat Pots | 2, 3.5 inches | Must have drainage holes | One large or 2, 3 small seeds | Biodegradable; plant directly outdoors |
| Plastic Cell Packs | 2, 3.5 inches | Drainage holes required | One large or 2, 3 small seeds | Reusable if sanitized |
| Repurposed Containers (e.g., yogurt cups) | 2, 3.5 inches | Drainage holes added by you | One large or 2, 3 small seeds | Low to no cost; sanitize before use |
| Soil Blocks | Block size varies | Self-draining | One seed per block | No container waste, needs special soil mix |
Starting seeds indoors helps you control temperature and light. It lets you sow weeks before outdoor soil warms up. You can find your ideal sow date by counting back from your last frost date.
Choose containers that fit your space and seed types. Avoid them if roots show through drainage holes, potting up might be needed. Clean containers and use fresh seed-starting mix for best health.
Make sure every seed container drains well; soggy soil kills seedlings fast.
When and Where to Sow Seeds: Indoors vs Outdoors
Start seeds indoors if your plant needs a longer growing season. Use indoor sowing for plants like tomatoes, peppers, and eggplants. These plants need 6 to 8 weeks indoors first.
Start them 6 to 8 weeks before your last frost. Then move them outside after that period.
Sow seeds outdoors when the soil and air are warm enough for those seeds to sprout. This often means waiting until after the last frost date. Plants like beans, carrots, and peas usually do well when sown directly outside.
These seeds don’t like cold soil. So wait until the temperature stays above 50°F (10°C) for best results.
Knowing your local frost dates is key. Look up your zone’s average last frost date. Use tools like the University of Minnesota Extension’s seed guide.
The guide helps you find the right date. Count backwards from your last frost date by the weeks needed indoors. This tells you when to start your seeds inside.
Follow this for the best timing. Say your last frost is May 1.
If the plant needs 6 weeks inside, start seeds mid-March. This keeps your timing on track.
Temperature matters a lot. Seeds need the right warmth to sprout. Most seeds germinate best between 65°F and 75°F soil temperature.
Use a seedling heat mat to keep soil warm if your indoor air is cool. Bringing seedlings indoors at night protects them from temperatures below 50°F (10°C). Cold nights can slow seed germination and damage young plants.
Your climate also guides decisions. In warmer zones, many seeds can go directly into the ground earlier in spring.
Cooler climates benefit more from indoor starts to lengthen the growing season. Check seed packets for planting depth and timing advice tailored to your region.
Choose where to start seeds based on available light and temperature control. A sunny windowsill or grow light setup indoors can keep seedlings strong for indoor starting.
Outdoor sowing works best in well-prepared garden beds, free of weeds and with loose, moist soil. Poor timing or cold soil often leads to weak seedlings or failed germination.
Creating Ideal Conditions: Light, Temperature, and Watering
Seedlings need bright light, warm temperatures, and careful watering to grow strong. Use grow lights or find a sunny spot with about 15 hours of light daily. Keep the soil warm, moist but not soggy, to avoid weak or dying seedlings.
Lighting Needs: Natural vs Grow Lights
Seedlings typically need around 15 hours of bright light each day. Natural sunlight works well if you have a south-facing window that gets enough light.
In late winter or early spring, natural light may fall short. So grow lights are often necessary.
Use fluorescent or LED grow lights about 3 inches above the seedlings. Raise the lights as plants grow to keep the distance steady. Set a timer for 12 to 16 hours to keep the light consistent every day.
- Check seed packets for light requirements, some seeds need light to germinate
- Sow light-loving seeds on top of the soil, not buried
- Adjust grow light height as seedlings grow taller
- Using grow lights costs about $15 to $30 for a basic setup
- Turn off lights at night to give seedlings rest
- Check daily for leggy seedlings if relying solely on natural light
- Too little light causes tall, thin stems that may flop over
Bright, steady light prevents legginess and helps seedlings develop strong stems and leaves. Missing a day of light can stunt growth or cause thin plants.
Optimal Temperature Ranges for Germination
The ideal temperature depends on the seed type. But most seeds germinate well between 65°F and 75°F. Use a soil thermometer to check the soil temperature daily. This helps confirm if the warmth is consistent for steady germination.
If seeds need warmth to sprout, keep them in a heated seed mat or warm area like above a refrigerator. Cooler temperatures delay germination, leading to weak, stretched seedlings. High nighttime humidity also helps some seeds sprout faster.
- Use a soil thermometer to monitor temperature
- Keep soil between 65°F to 75°F for most seeds
- Use a heat mat costing about $20, $40 for warmth
- Raise humidity with a clear plastic cover or humidity dome
- Vent the cover daily to prevent mold growth
- Some seeds require cooler or room temperatures, check seed packet
- Too high temperatures over 85°F can kill seedlings or dry soil too fast
Controlling temperature speeds up germination and helps seedlings emerge healthy. Check seeds daily and adjust warmth as needed for the best start.
Watering Techniques for Seedlings
Water seedlings gently to keep the soil moist but not soggy. Overwatering causes root rot and damping off disease. Underwatering dries the soil, stunting growth and killing tiny roots.
Start by misting the surface or watering from the bottom. Using a spray bottle keeps moisture even without washing away seeds. After seedlings grow, try watering from the bottom by adding water to trays.
- Use a spray bottle or watering can with a fine nozzle
- Keep soil moist but not waterlogged
- Check daily, as soil can dry quickly or stay soggy
- Water from the bottom by placing trays in a shallow water bath
- Avoid watering leaves to prevent fungal diseases
- Let excess water drain to avoid soggy soil
- Use room temperature water to avoid shocking roots
Consistent, gentle watering helps seedlings grow steady roots and avoid diseases. Watch soil daily, especially in warm, dry indoor air, to adjust watering as needed.
Recognizing and Preventing Common Seedling Problems
Seedlings that grow tall and thin are called leggy seedlings. They get this way because of too little light or starting seeds too early. Use grow lights placed 2 to 4 inches above seedlings to stop legginess.
Also, don’t start seeds too early, the cooler indoor temperatures can make them stretch too much. Keep the light on seedlings for 12 to 16 hours each day.
This helps them grow strong and stocky. Avoid leaving them in the dark too long.
Another common problem is damping off, a fungal disease that kills seedlings quickly. It shows as seedlings wilting or shriveling at the base and falling over.
Overwatering and poor air circulation help fungus grow. Let soil dry slightly before watering and use a fresh seed-starting mix that drains well.
Good air circulation lowers disease risk. You can run a small fan nearby to keep air moving gently. Once seeds sprout, remove covers that trap moisture and heat.
Spot a seedling with damping off? Remove it and nearby soil immediately.
This prevents the disease from spreading to other plants. This stops fungus from spreading to other seedlings.
Keep grow lights close and remove covers once seedlings appear to prevent leggy growth and disease.
Another cause of leggy seedlings is weak nutrients in the soil. After the first set of leaves appears, feed seedlings with a diluted liquid fertilizer.
Choose a balanced fertilizer and apply every week or two. Healthy seedlings are shorter, thicker, and darker green, showing they grow well.
Starting with fresh seed-starting soil is key. Old soil holds pathogens and becomes compacted, hurting young roots.
New mix costs about $10 to $15 for a bag that lasts several seed trays. Well-drained soil prevents waterlogging, which can cause rotted seeds or weak growth.
How and When to Transplant Seedlings Successfully
Seedlings are ready to transplant once roots grow strong. They should have a few sets of true leaves too.
Transplanting at this stage helps them grow bigger and healthier without stressing the plant. Handling seedlings gently and preparing them properly reduces the chance of transplant shock.
Signs Seedlings Are Ready to Move
Look for two or three sets of true leaves on most seedlings. True leaves are the second leaves that appear after the first seed leaves. These show the seedling is strong enough to handle transplanting.
The roots should fill the seed tray or pot but not be root-bound. Roots circling tightly mean you’ll need to loosen them gently.
This helps the plant grow well after transplant. Avoid transplanting seedlings too early to prevent stunted growth.
Step-by-Step Transplanting Process
Follow these steps to transplant seedlings carefully and give them room to grow. Use a larger pot with a soilless mix or plant them in a prepared garden bed.
- Water seedlings a few hours before transplanting to keep roots moist.
- Prepare the new soil or container by loosening it and moistening slightly.
- Gently lift seedlings by their leaves, not the stem, to avoid damage.
- For root-bound seedlings, gently loosen roots without breaking the ball. This prevents stress when you transplant.
- Place each seedling into its new hole or pot, keeping the soil level steady.
- Firm the soil gently around the seedling without pressing hard on the roots.
- Water the seedlings lightly to settle the soil and provide moisture.
- Keep seedlings out of harsh sun and wind for a couple of days after transplanting.
Avoiding Transplant Shock
Transplant shock happens when seedlings get stressed after being moved. Handling roots carefully and reducing root disturbance prevent this commonly seen problem.
Harden off seedlings by slowly exposing them to outdoor conditions over a week. Start with a few hours in a shaded, protected area and increase exposure each day.
Using biodegradable pots can help, as you plant the entire pot with the seedling inside. This keeps roots intact and cuts down on stress. Avoid synthetic fertilizers early on to support organic growth and healthy seedlings.
Hardening Off: Preparing Seedlings for Outdoor Life
Hardening off is the process of slowly getting seedlings used to outside weather. It helps prevent shock when you move plants from indoors to your garden. Do this over 1 to 2 weeks, adding more time spent outside each day.
Why and When to Harden Off
Seedlings grown indoors face gentler conditions than outside. Direct sun, wind, and cooler night temperatures can stress them. Hardening off toughens plants gradually so they survive well outdoors.
Start hardening off about seven days before planting seedlings in your garden. The timing depends on when your area’s weather is good for planting. Typically, seedlings need 1 to 2 weeks to adjust fully.
Daily Hardening Off Routine
Begin by placing seedlings outdoors in a shaded spot for just one hour. Bring them inside afterward to protect them from harsh conditions. Each day, increase their outdoor time by one hour.
Reduce watering a bit during this period to help seedlings adapt to drier garden soil. Check plants daily for wilting or sunburn signs. If you spot problems, slow the process and give plants more shade.
Follow these steps to harden off your seedlings:
- Choose a sheltered, shaded place outside with mild sun and no wind.
- Set seedlings outdoors for 1 hour on day one, then bring them back inside.
- Add an extra hour outside each day, aiming for 6 to 8 hours by week two.
- Gradually move seedlings to stronger sunlight and cooler temperatures during the day.
- Reduce watering slightly to mimic outdoor soil drying between waterings.
- Keep an eye on leaves and stems for stress signs like wilting or browning.
- After 1 to 2 weeks, plants should handle full sun and outdoor conditions well.
Common Mistakes to Avoid
One big mistake is rushing the process by leaving seedlings outside too long at first. This can cause shock, leaf burn, or slow growth. Take it slow and patient.
Also, don’t forget to protect seedlings from wind and direct midday sun early on. Sudden exposure to harsh weather can harm tender plants. Use shade cloth or bring plants inside if weather turns bad.
Watch watering carefully and avoid overwatering. Seedlings used to indoor moisture may struggle if soil stays too wet outside. Let soil dry out a bit between waterings during hardening off.
Seed Storage and Reuse: Maximizing Seed Viability
Store seeds in a cool, dry, and dark place to keep them viable. Use airtight containers like glass jars or sealed plastic bags to stop moisture from entering. Label each container with the seed type and date to track how fresh the seeds are.
Ideal storage temperatures range between 32°F and 41°F, such as in a refrigerator’s vegetable drawer. Avoid storing seeds near heat or in direct sunlight. Heat lowers sprouting chances.
Keep seeds in cool, dark places. Check them every few months for any signs of mold or moisture.
Seed viability depends on the seed type and age. Most vegetable seeds stay good for 1 to 5 years if you store them right. Older seeds may sprout slower or have lower germination rates.
Test seeds by soaking 10 of them in water. Count how many start to sprout. This saves you from planting poor seeds.
You can reuse seed-starting containers but clean them first. Wash plastic trays or pots in hot, soapy water, then rinse well. To kill germs, soak containers in a 10% bleach mix.
Wait 10 minutes. Let containers dry completely before reuse.
Seed-starting soil is best fresh but can be reused cautiously. Remove old roots and debris before reusing soil. Spread soil on a baking sheet.
Heat it at 180°F for 30 minutes. This kills disease organisms but may cost electricity and time.
Keep moisture in reused soil even. Avoid clumping or chunks to help tiny seeds grow evenly. Mix reused soil with fresh seed-starting mix.
Use half and half to improve nutrients and texture. This helps your seedlings grow better. Avoid reusing soil if previous seedlings had diseases or pests, as problems can return.
Always dry and label seeds before storage to prevent mold and confusion. Clean seed containers to keep future seedlings healthy.
Step-by-Step Action Plan
Follow these simple steps to get your seeds growing strong. Each step helps you check that your plants are on track.
- Before you start: Choose seeds for your zone and containers that drain well. Healthy seeds and good containers set you up for success.
- Day 1: Plant seeds in damp soil at the right depth listed on the packet. Check soil moisture stays even but not soggy.
- Days 2-7: Keep soil warm and provide 12-16 hours of light daily. Seedlings should sprout within this time if warmth and light are right.
- Week 2: Thin seedlings so they don’t crowd each other. Taller, stronger seedlings mean this step worked well.
- Weeks 3-4: Start watering less often but deeper to build root strength. Look for firm stems and steady growth.
- After 4 weeks: Begin hardening off seedlings by moving them outdoors an hour a day. Healthy seedlings will handle this and keep growing.
- Week 5: Transplant seedlings to bigger pots or outside after full hardening off. New roots and strong leaves show successful moves.
Frequently Asked Questions
Can You Start Seeds Directly on a Windowsill?
Yes, you can start seeds on a windowsill. It needs at least 6 hours of sunlight. This spot helps your seeds grow strong.
Use a south-facing window for the best light. Rotate containers regularly to keep seedlings growing straight.
What Is the Best Soil Mix for Seed Starting?
A lightweight, sterile seed-starting mix works best because it drains well and retains moisture. Avoid regular garden soil, which can hold too much water and carry diseases. You can find mixes labeled specifically for seeds.
How Long Do Seeds Typically Take to Germinate?
Most seeds germinate within 7 to 14 days, but this varies by plant type. Warmth speeds the process, so keep seeds at the right temperature. Check seed packets for specific germination times.
Should You Cover Seeds with Plastic While They Germinate?
Covering seeds with plastic can keep humidity high and speed germination. Remove the cover as soon as seedlings emerge to prevent mold. Make sure the plastic doesn’t touch the sprouts.
Do All Seeds Need Light to Germinate?
No, some seeds need light to germinate, while others need darkness. Small seeds usually require light, so just press them onto the surface. Check the seed packet for each plant’s preference.
Can You Save Seeds from Hybrid Plants Grown in Your Garden?
You can save seeds from hybrids. But offspring may not be true to the parent plant.
Hybrids result from specific crosses and seed traits can vary widely. For consistent results, buy new hybrid seeds each year.
Final Thoughts
Starting plants from seeds takes patience and careful steps. Try sowing seeds today with the right setup and watch your garden grow. Share your progress with a gardening friend to keep motivated.