What Do Celosia Seeds Look Like? A Complete Guide with Visuals & Growing Tips
What do celosia seeds look like? They are tiny, oval, and usually brown to black. Each seed resembles a small grain, often smooth with a slight sheen.
Their size makes them easy to overlook. So handling them gently helps avoid losing any.
Plumed celosia seeds tend to be smaller and finer than cockscomb seeds. Cockscomb seeds might look plumper with a slightly textured shell. Knowing these differences helps you identify the seeds correctly during harvest or purchase.
Healthy mature seeds form only 4 to 6 weeks after flowers bloom fully. Immature seeds appear pale, shriveled, or soft and won’t sprout well. Harvest seeds once the flower heads dry completely for best results.
Celosia seeds are packed tightly inside the flower heads. You might need gentle rubbing or shaking to release them. Storing seeds in a cool, dry place keeps them viable longer for planting season.
Key Takeaways
- Celosia seeds are small, oval-shaped, and vary from brown to black in color.
- Plumed celosia seeds are finer and smaller than cockscomb varieties.
- Only fully matured seeds turn dark, firm, and develop a slight shine.
- Immature seeds look pale, soft, and won’t germinate properly.
- Wait 4 to 6 weeks after flowering before harvesting seeds for best results.
- Handle seeds gently to avoid losing the tiny grains during collection.
What Do Mature Celosia Seeds Look Like?
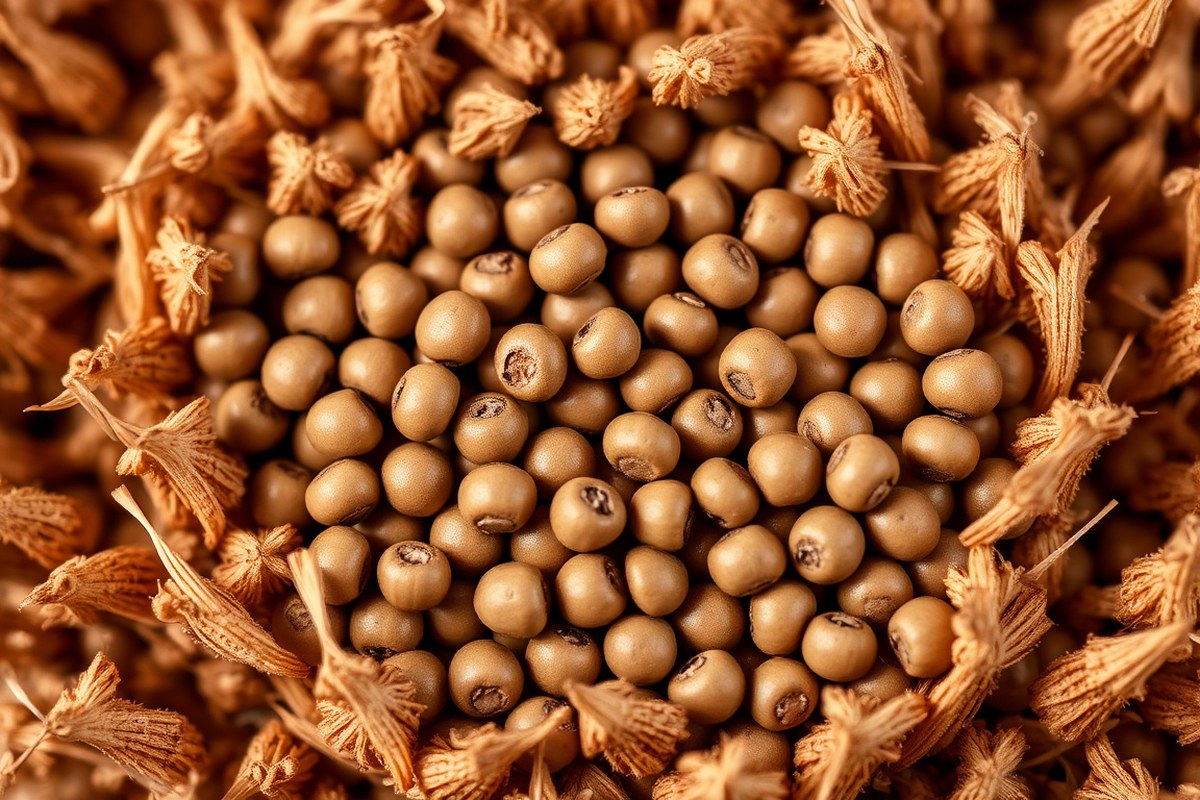
Mature celosia seeds are tiny, generally the size of poppy seeds or slightly bigger. They are round and smooth, resembling tiny shiny black beads. Their small size means you might need a close look or magnifier to see details clearly.
Inside the seed pods, mature seeds collect densely, filling the dried brown flower heads. These pods open easily once the flower dries, revealing a mass of seeds packed tightly together.
The dark seeds stand out against the light brown seed head. This color difference helps you spot mature seeds fast.
The seeds’ color is usually a deep black or dark brown, their surface shiny and reflective. This glossiness stands out against the dried, dull pod material.
Young seeds look green or pale without shiny coatings. Mature seeds have a clear shinier outer layer.
Celosia seeds measure about 1 to 2 millimeters wide. They are small and scatter easily when moved.
Their round shape lets them roll or fall out of the seed head with little effort. Collecting them gently into a paper envelope or container prevents them from slipping away.
Different celosia varieties keep a similar seed size and shape. But colors and pod texture might slightly vary.
Plumed celosia seed heads are airy and spike-like, letting seeds appear loosely packed. Cockscomb varieties have denser, crested seed pods, holding seeds tightly inside.
How to Identify Immature and Non-Viable Celosia Seeds
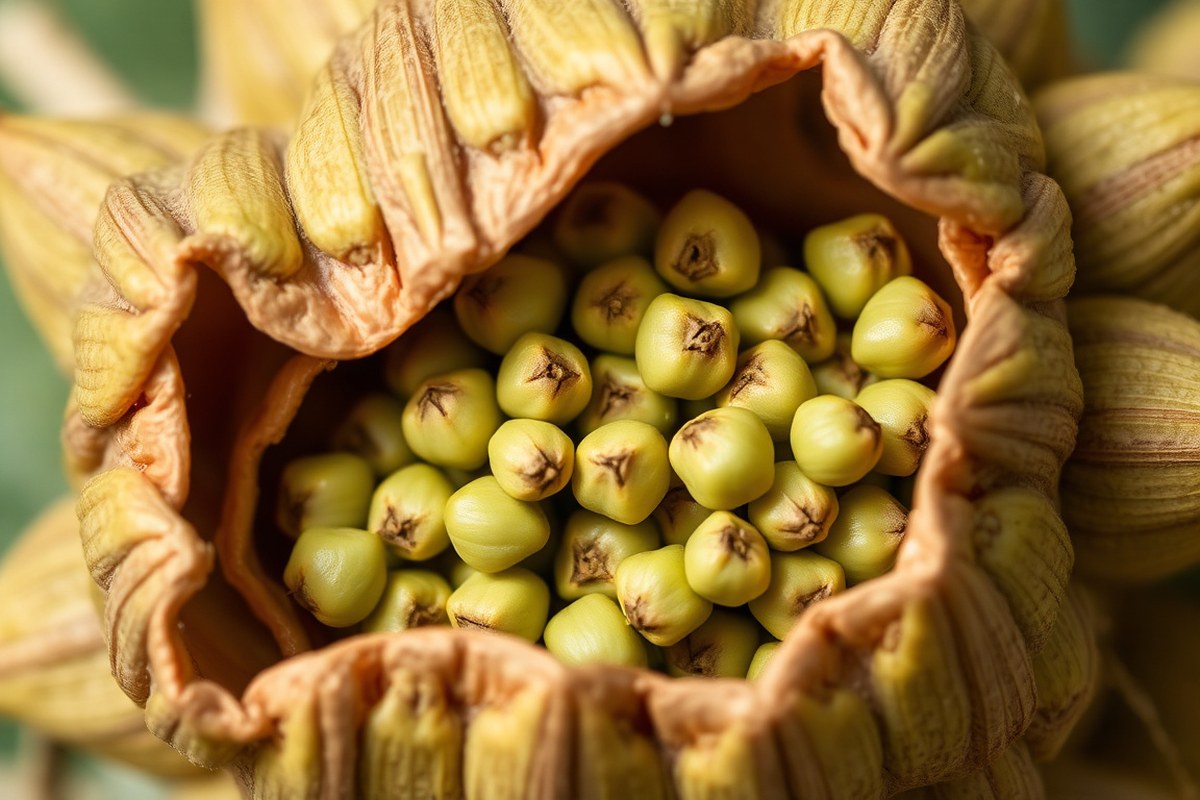
Immature celosia seeds look smaller and lighter in color than mature ones. They often lack the hard, glossy coat that mature seeds have. These seeds may feel soft or fragile when you gently press them between your fingers.
Non-viable seeds show several clear signs. They tend to be misshapen or shriveled. Their color ranges from pale brown to yellowish.
Healthy seeds look deep black and firm. These differences help you spot good seeds. This difference helps you avoid using seeds that won’t sprout well.
Seed color and texture show how mature the seeds are. Mature seeds are tiny, black, and hard.
Immature seeds are lighter and softer. Non-viable seeds often lose that glossy finish and look dull or dry.
Here’s a table to compare the stages of celosia seeds by visible characteristics. It’s a quick reference when you sort through seeds before planting.
| Seed Stage | Color | Texture | Size |
|---|---|---|---|
| Immature | Light brown to pale | Soft, fragile | Smaller than mature seeds |
| Mature | Deep black | Hard, glossy coating | Full, plump |
| Non-Viable | Pale yellow to brown | Dull, shriveled | Smaller or misshapen |
Feel the seeds to check their hardness. Ripe seeds resist gentle pressure without cracking. Performing simple float tests can also help identify viable seeds.
Drop seeds in water. Seeds that sink usually germinate better. Floating seeds are often immature or dead.
Keep in mind that improper storage and early harvest increase the chance of non-viable seeds. Let your celosia flowers mature fully on the plant for the best quality seeds. Harvest carefully because celosia seeds are very light.
They can blow away easily in the wind. Handle them gently to keep them safe.
Harvest blooms before seeds release but after full maturity to prevent losing light seeds to wind.
When and How to Harvest Celosia Seeds Successfully
Harvest celosia seeds when flower heads turn completely brown and dry. This shows the seeds have matured and are ready. Cut the seed heads carefully to avoid losing or damaging the seeds.
Determining Seed Maturity by Visual Clues
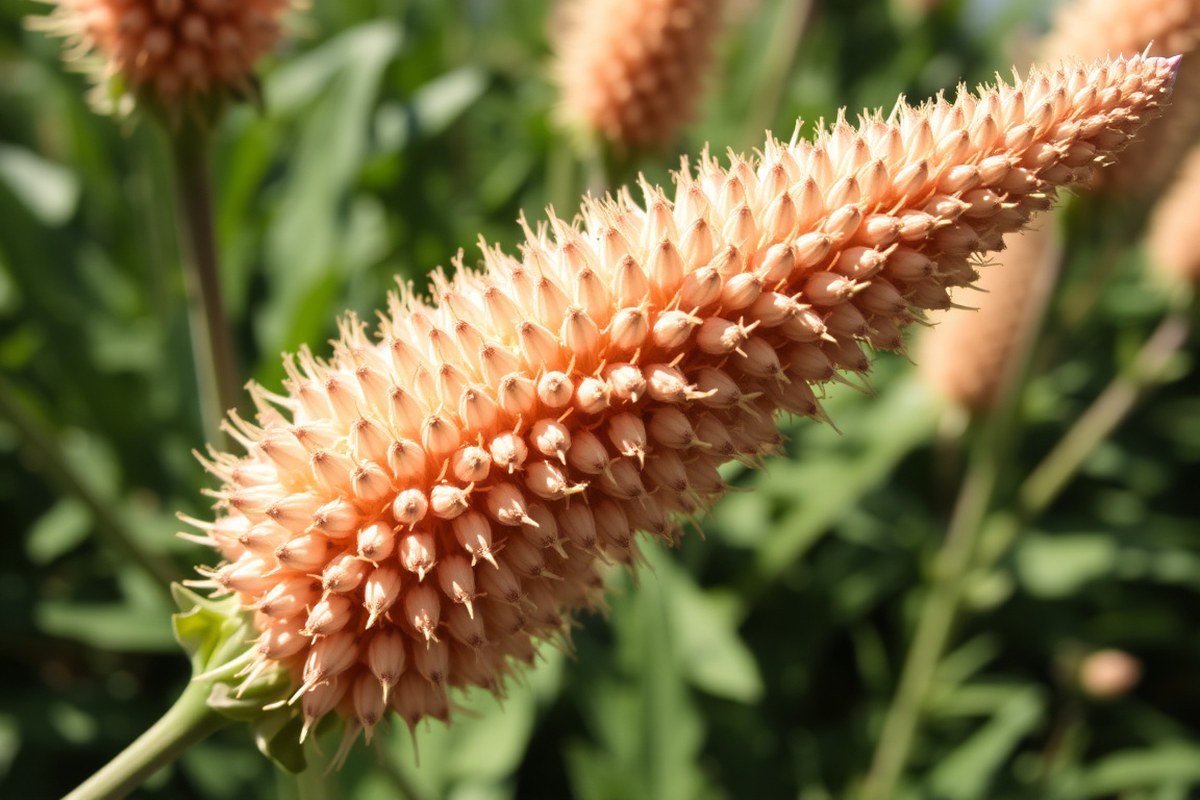
Celosia seeds are ready to harvest when the flower heads turn brown and dry. At this stage, the blooms lose their bright color and feel papery. Leaves will often dry up near the flowering tops, signaling seed ripeness.
Immature seeds stay light-colored and may feel soft or greenish. Wait until the seed heads are firm and fully dry before cutting. Picking too early results in poor seed yield or non-viable seeds.
Essential Supplies for Seed Harvesting
Use sharp garden scissors or pruning shears to cut flower heads or entire stems. These tools make clean cuts without crushing the seeds. Have brown paper bags or clean envelopes ready to hold the seeds before separating them.
Wear gloves if the plant is bristly or sticky to protect your hands. Besides tools, a tray or piece of cardboard can catch falling seeds during the process. Avoid plastic bags, which trap moisture and can cause mold.
Step-by-Step Harvest Process
Follow these steps to get mature celosia seeds safely and efficiently. Taking your time and working gently avoids seed loss or damage. Use a well-lit, dry workspace for best results.
- Check the flower heads: ensure they are brown, dry, and papery
- Cut the mature flower heads or entire stems with sharp scissors
- Place the cut pieces into a brown paper bag to prevent seed loss
- Bring the bag indoors to a dry, warm area for further drying if needed
- Gently shake or rub the flower heads inside the bag to release seeds
- Collect the seeds at the bag’s bottom, avoiding chaff and debris
- Store the cleaned seeds in a cool, dry place until planting time
How to Separate Celosia Seeds from Seed Heads and Chaff
Basic Cleaning Steps for Celosia Seeds
After harvesting, let the seed heads dry for a few days. This makes the seeds easier to separate from the chaff without damage. Gently crush the dry seed heads over a tray or paper to release the seeds.
Use light pressure when crushing to avoid breaking the tiny, delicate seeds. Spread the crushed material thinly to let it dry completely if still moist. Dry seeds separate more easily and store better.
Manual Techniques for Separating Seeds from Chaff
Hand separation works well if you have small amounts of seeds. Blow gently across the crushed seed mix to lift off lighter chaff. You can also use your fingers or a soft brush to pick out larger bits.
Here are some simple manual tools and actions to clean seeds:
- Use a bowl or tray to catch seeds while shaking or tapping heads
- Blow gently to remove lightweight husks and dust
- Employ a fine-toothed comb or brush to sift out debris
- Work over white paper for visibility
- Repeat the process in small batches for best control
Manual cleaning lets you handle the seeds carefully. It prevents cracking or crumbling but takes more time and patience with bigger harvests.
Using Sieves to Speed Up Cleaning
Sieving is a popular method for larger quantities. Use a kitchen sieve with holes smaller than most chaff but larger than the seeds. Shake or tap the seeds through it gently so small debris falls through.
Stacking sieves or using a colander with different hole sizes helps separate sizes efficiently. This method removes dust and separates seeds from parts of the head faster than hand picking. Just avoid shaking too hard to keep seeds whole.
Mechanical Seed Cleaners and Their Use
Machines designed for seed cleaning use shaking and blowing to remove chaff. These work well for big seed harvests but cost several hundred dollars. Some garden centers rent equipment or offer cleaning services.
They can clean seeds thoroughly but risk damaging delicate seeds if not adjusted properly. If using machines, set to the lowest vibration and weakest airflow for celosia seeds. Test a small batch first to check results.
Best Practices for Storing Cleaned Celosia Seeds
Once cleaned, store seeds in airtight containers. A small glass jar or zip-lock bag works fine. Label them with the date and flower type to keep track.
Keep seeds in a cool, dry area away from sunlight. This preserves viability for years. Avoid mixing seeds with leftover chaff or moist debris that can lead to mold.
Best Conditions for Storing Celosia Seeds to Maintain Viability
Celosia seeds need to be completely dry before storing to avoid mold. After harvest, spread seeds on a paper towel. Keep it in a warm, dry spot.
Let them dry for several days. Make sure they feel dry and brittle before placing them in storage containers.
Use airtight containers like glass jars or sealed plastic bags to keep moisture out. Store containers in a cool, dark spot.
Keep temperatures between 40°F and 50°F (4°C to 10°C). Avoid areas where humidity is high, which can cause the seeds to spoil.
Seeds stored under these conditions usually remain viable for 1 to 3 years. Protecting seeds from moisture and light helps keep them dormant until you plant. Avoid frequent opening of containers, which lets moisture in and reduces seed life.
Lower temperatures slow seed metabolism, which preserves viability longer. A common error is storing seeds in warm, humid places. Kitchens are a bad spot.
This causes seeds to lose germination early. You can also use desiccant packs in your containers to control humidity.
Don’t store celosia seeds without thorough drying; even slight moisture spoils them quickly.
Years of seed viability depend on how well you control moisture and temperature. At around 70°F during storage, seeds might last less than a year.
Cooler places near 40°F keep seeds good for up to 3 years. This works well for most gardeners.
How Long Do Celosia Seeds Remain Viable and When to Replant
Celosia seeds generally remain viable for about two to three years when stored properly. The quality of your storage can make a big difference. Seeds kept dry and cool last longer than those stored in warm, humid places.
To check if older seeds are still good, try a simple germination test. Place 10 seeds on a moist paper towel in a warm spot.
Check after seven days to see how many have sprouted. Use fresh seeds when fewer than half of them germinate.
| Storage Condition | Expected Seed Viability |
|---|---|
| Room Temperature (68, 72°F), Dry | 1, 2 years |
| Refrigerated (35, 41°F), Dry | 2, 3 years |
| Freezer (-4°F), Dry, Airtight | 4+ years |
Seeds older than three years usually see a sharp drop in how many sprout. Use a germination test to check if older seeds will work. Toss them out or buy new if germination is below 50%.
Consider starting seeds indoors to give plants a head start. This helps especially if you live where the growing season is short. Good storage combined with timely testing means you can plan your planting without surprises.
Does Celosia Reseed Itself Naturally in Gardens?
Celosia can reseed itself naturally in gardens, but this depends on the climate. In zones below 9, celosia acts as an annual. Frost kills the plants.
It rarely seeds itself in these areas. In tropical zones, celosia grows as a perennial.
It drops seeds that grow back. The plants return year after year.
To help self-seeding, leave flower heads on the plant. Wait until they dry out. They should turn brown first.
This gives the seeds time to mature fully. After seeds fall, thin the seedlings carefully.
Keep 6 to 12 inches between young plants. This stops crowding later.
Preventing unwanted self-seeding just means removing the spent flower heads before they release seeds. Pick the dry heads regularly during fall to stop too many seedlings from sprouting. This helps control where the plants appear and keeps your garden tidy.
Celosia seed germination benefits from warm soil, typically above 70°F. So natural reseeding works best in mild or warm climates. In cold zones, collect seeds after frost kills the plants. Sow them indoors in spring.
This helps new growth. This lets you grow new plants without losing your favorite varieties.
Letting celosia reseed cuts down on seed costs and effort. Patience is key to watch seedlings spread naturally. Use good garden habits to control their growth.
Manage them well. Many gardeners save their own seeds.
They find this gives the best results. The celosia stays vibrant each year.
Visual Differences Between Plumed and Cockscomb Celosia Seeds
Plumed and cockscomb celosia seeds have clear visual differences that help you identify them. Plumed seeds tend to be smaller and more elongated. Cockscomb seeds look rounder and slightly larger, which matches the shape of their flower heads.
Seed Size and Shape Comparison
Plumed celosia seeds are usually narrow and cylindrical. They are about 1.5 to 2 millimeters long. This slim shape fits their light, airy flower type.
Cockscomb seeds are more oval or pear-shaped and range from 2 to 2.5 millimeters. The rounder form relates to the boldness of their blooms. This difference can help separate seeds when sorting or buying.
| Feature | Plumed Celosia Seeds | Cockscomb Celosia Seeds |
|---|---|---|
| Shape | Narrow, cylindrical | Oval, pear-shaped |
| Average Size | 1.5-2 mm long | 2-2.5 mm long |
| Texture | Smooth surface | Slightly bumpy surface |
| Seed Head Style | Airy, plume-like | Bold, sculptural cockscomb |
These size and shape details make it easier to spot which seed type you have. You should use this table to sort mixed packets before planting. Sorting helps plant the right types together for better garden design.
Color and Texture Differences
The seed colors of both types run from light brown to dark brown. Plumed celosia seeds tend to have a lighter, more uniform brown color. Their smooth, shiny surface reflects light evenly.
On the other hand, cockscomb seeds often show darker brown tones with tiny ridges or bumps. This rougher texture ties to the thicker petals of cockscomb blooms. Look closely with a magnifying glass to see this difference.
Handle seeds gently and avoid mixing varieties by mistake during storage.
Keeping seeds separated lets you track which varieties perform best in your garden. Both seed types dry fully before harvest, but plumed seeds usually feel more fragile. This affects how carefully you handle and store them.
Impact on Planting and Growth
Seed appearance reflects growth style and plant size. Plumed celosia seeds grow into slender plants.
These plants range from 6 inches to over 3 feet tall. Their airy seed shape fits their open, plume-like flower clusters.
Cockscomb seeds grow into broader, bushier plants that usually reach 2 to 3 feet tall. The seeds’ rounder shape matches their thick, sculpted flower heads. This bulkier growth makes them ideal for vertical garden accents.
Seed type also guides how to space plants. Plumed celosia needs less space since it grows more upright. Cockscomb benefits from wider spacing to highlight its showy flowers.
Step-by-Step Action Plan for Harvesting and Saving Celosia Seeds
Follow these steps to get healthy celosia seeds ready for your garden. You’ll know it’s working when seeds look dry, plump, and free from chaff.
- Late Summer: Wait until the flower heads start to brown and dry on the plant. This means seeds are mature and ready.
- Harvest Day: Cut dry seed heads carefully with scissors or pruners. Aim for heads that are fully brown and crispy.
- Seed Separation: Rub the seed heads gently over a bowl. This shakes out the seeds and chaff. Use your fingers to separate any clumps.
- Cleaning: Blow lightly or use a fan to remove lighter chaff from seeds carefully. Avoid losing tiny plumed seeds in the process.
- Storage Prep: Place clean seeds in a paper envelope or breathable container. Label with the date and celosia type for tracking.
- Storage: Store seeds in a cool, dry, and dark place. Ideal temperatures stay near 40 to 50°F to keep seeds fresh.
- Replanting Check: After 1 year, test germination by planting a few seeds indoors. This tells you if seeds are still good.
Frequently Asked Questions
How Do You Get Seeds from Celosia?
You harvest celosia seeds by letting flower heads dry on the plant. Once dry, gently shake or crush the flower heads to release the tiny seeds inside. Collect them in a container and remove any leftover flower debris for better seed storage.
How Many Years Are Celosia Seeds Good For?
Celosia seeds stay viable for about two to three years if kept in cool, dry conditions. Proper storage in airtight containers away from heat helps maintain their germination potential. Using fresh seeds within the first two years gives the best growth results.
Is Celosia Easy to Grow from Seed?
Yes, celosia is easy to grow from seeds both indoors and outdoors. Starting seeds indoors 4 to 6 weeks before the last frost lets you get earlier blooms. Just keep the soil moist and warm for faster germination.
Does Celosia Reseed Itself?
Celosia can reseed itself in the garden if flower heads are left to mature. However, it does not spread aggressively. In mild climates, seeds that fall on the ground may sprout.
This happens the next season without you planting again. No extra effort is needed for new plants to grow.
What Do Celosia Seeds Feel Like When Mature?
Mature celosia seeds feel tiny and smooth, almost like very small beads. They have a shiny black or dark brown color. This makes them easy to spot among dried flower parts.
You’ll find seeds standing out clearly on the flower debris. This texture helps you know when seeds are ready to collect.
Can You Save Celosia Seeds from Cut Flowers?
Yes, you can get seeds from celosia cut flowers if they have developed fully before cutting. Look closely for small, shiny seeds at the base of the flowerhead. Dry them gently to save for planting next year.
Before You Go
Celosia seeds are small but easy to tell apart if you look closely. Harvest them when dry and store properly to keep their sprouts healthy. Start saving seeds this year for a colorful garden next season.