When to Plant Wheat: A Complete Guide to Optimal Timing and Best Practices
The best wheat planting time varies by wheat kind and climate zone. Plant winter wheat 6 to 8 weeks ahead of the initial fall frost.
This timing helps the plants establish roots before cold weather sets in. Start planting spring wheat once soil temperature hits 40°F and the soil is easy to work.
Timing matters because wheat seeds need soil at least 50°F to germinate well. Planting too late reduces yield and increases risks like winterkill. Checking soil temperatures and forecast dates before sowing helps avoid these problems.
Test your soil temperature about 2 inches deep for the most accurate reading. Prepare a firm, well-tilled seedbed to promote even seed sprouting. Good soil contact boosts germination and helps the wheat get a strong start.
Key Takeaways
- Plant winter wheat 6 to 8 weeks before the first fall frost.
- Sow spring wheat once soil reaches 40°F at 2 inches depth.
- Check soil temperature early to time your wheat planting right.
- Till soil well to create a firm seedbed for even germination.
- Soil must be at least 50°F for wheat seed germination.
- Delaying spring wheat planting needs slightly higher seeding rates.
Best Time to Plant Winter and Spring Wheat
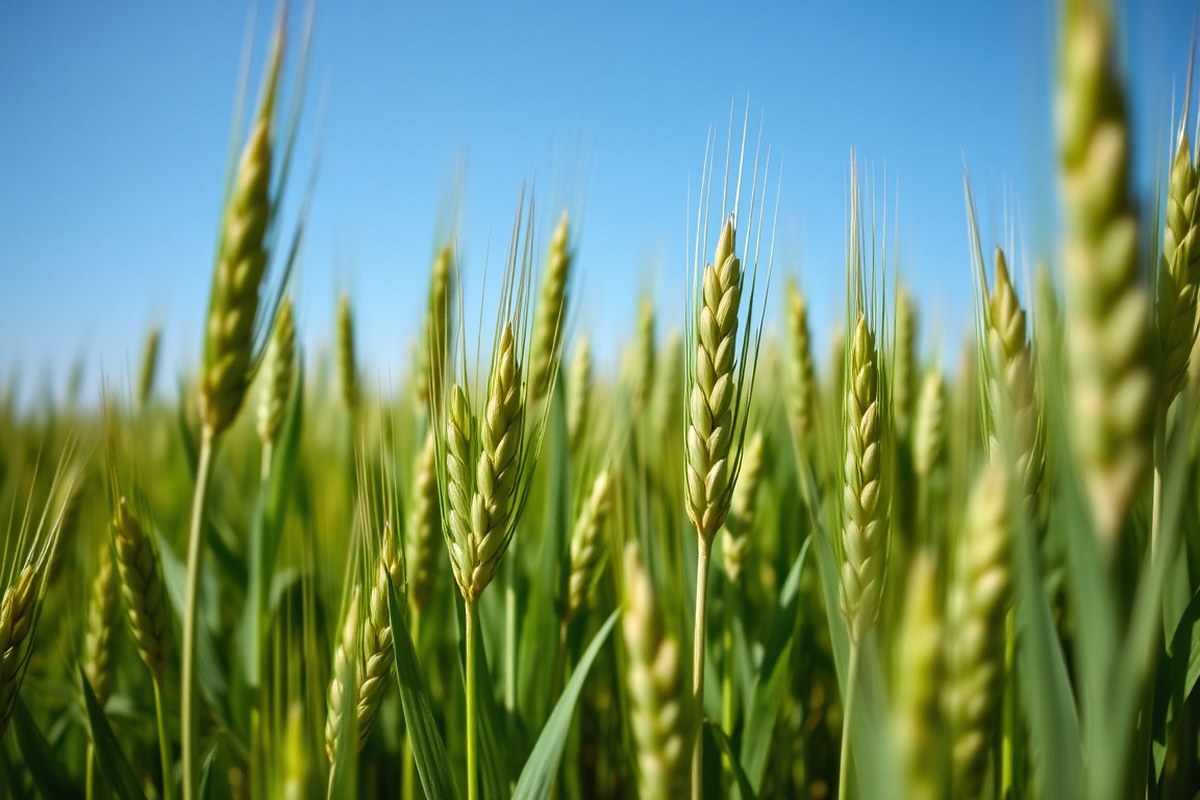
Winter wheat should be planted about six to eight weeks before the first expected fall frost. Aim for soil temperatures below 80°F but above 54°F at 2 inches deep. This timing is usually mid-September to early November.
It gives wheat time to grow roots. The plant also develops tillers before it sleeps in winter.
Planting winter wheat too late results in fewer fall tillers, which lowers overall yield. The crop needs a cold period, called vernalization, to trigger spring growth.
The soil must be workable. Moisture should be adequate in the seed zone for the best start.
Spring wheat should be planted once soil warms to about 40°F. Check this temperature at 2 inches deep. You can start planting as soon as this happens. This typically happens from late March through early May, depending on your location.
The key is ensuring the soil is dry enough to work without compacting. So choose a day without recent heavy rain.
Spring wheat doesn’t need vernalization and matures faster, usually in about 120 days. Planting after early May lowers yields by about 1% every day. This comes from the University of Minnesota.
Try to plant as soon as possible to avoid yield loss. That makes hitting the soil temperature window important to avoid losing harvest potential.
Knowing your area’s average first and last frost dates helps set the planting schedule. For winter wheat, count back six to eight weeks before the first fall frost. For spring wheat, start planting after the last spring frost and when soil temperatures reach 40°F. This balance between frost risk and soil warmth ensures healthy seedling growth and a strong yield.
How Soil Temperature and Conditions Affect Wheat Germination

Wheat seeds need soil temperatures between 54°F and 77°F for good germination. Moisture is just as key; the soil can’t be too dry or too soggy.
Around 50-60% of the soil’s water holding capacity is best. It helps seeds sprout and roots grow fast.
Soil that’s workable means it’s neither too wet nor too hard for planting tools. Squeeze a handful of soil to check moisture. If it holds shape but crumbles easily, it’s ready.
Use a soil thermometer to track soil temperatures. Watch moisture after rain or watering. This helps you plant at the right time.
- Check soil temperature at 2-inch depth daily until reaching 54°F or higher.
- Test moisture by squeezing soil; it should crumble, not stick or powder.
- Avoid planting if soil is muddy or if water puddles persist.
- Use a soil thermometer for accuracy instead of guessing.
- Perform a soil ribbon test: a short ribbon means workable soil.
- Adjust planting time based on moisture, wait if soil is too dry or too wet.
Wheat sprouts start within about seven days at soil temps near 55°F. A half-inch seed depth keeps seeds where moisture is accessible but stops them from drying out. Seed planted too deep can delay emergence; too shallow risks drying out fast.
Plant wheat only when soil is warm and moist enough. Dry or cold soil slows sprouting and lowers stands.
Workable soil and correct temperature speed seedling growth and help wheat survive winter. Planting in soil colder than 54°F causes slow or uneven germination. Keep an eye on soil conditions before planting to give your wheat the best start possible.
Regional Planting Dates and Climate Variations for Wheat
Wheat planting dates vary widely by region due to climate differences. Plant at the right time for your area’s frost and soil heat. This prevents poor growth or dying in winter.
Check your local dates before planting. Use the regional guide below and adjust based on your local conditions.
Midwestern Planting Windows
In the Midwest, spring wheat is common. Plant between late March and late April. Start as soon as fields are dry enough for machines.
Avoid planting in wet soil. Planting later than mid-May slows growth and cuts yields.
The region’s cool springs limit when you can start planting. Soil temperature and frost risk guide these windows. You want soil around 40°F or higher for good germination.
Southern Plains Timing
Winter wheat dominates the Southern Plains. Planting ranges from late September to mid-November depending on the spot. Areas used for grazing often plant 4 to 6 weeks earlier.
This region’s longer growing season allows more flexibility. However, warmer fall soil temperatures mean you can plant later without risking poor establishment. Watch for first hard frost to avoid winterkill.
Northern and Pacific Northwest Considerations
The Northern Plains plant hard red spring wheat starting late March. You can plant as soon as the ground is workable. Mid-May is the practical cutoff.
In the Pacific Northwest, winter wheat grows well with September to October planting. The region has wetter, cooler falls so early planting helps with root development before winter.
| Region | Wheat Class | Optimum Planting Window | Local Notes |
|---|---|---|---|
| Northern Plains (ND, MT, MN, north SD) | Hard Red Spring | Late March to late April | Plant as soon as fields support equipment. Mid-May is latest. |
| Central Plains (KS, NE, eastern CO) | Hard Red Winter | Sept 10 to Oct 20 | Northwest counties start ~Sept 25; southern locations later. |
| Southern Plains (OK, TX Panhandle) | Hard Red Winter | Late Sept to mid November | Grazing fields planted 4, 6 weeks earlier than grain only. |
Local frost dates strongly influence when you plant. Check your area’s average first and last frost dates. Plant winter wheat about 6-8 weeks before expected frost to allow root growth before cold.
Adapting to Short Growing Seasons
For short seasons, pick faster-maturing varieties and plant at the earliest feasible date. Avoid late spring planting that shortens grain fill and lowers yield.
You can shift the planting window slightly by watching your soil temperature. Aim for above 40°F for spring wheat and above 50°F for some winter wheat varieties. Monitor weather forecasts closely.
Seeding Depth, Rate, and Spacing for Optimal Wheat Growth
Plant wheat seeds at a depth of 1 to 1.5 inches. This depth ensures enough moisture for germination and protects seeds from birds or drying out. Avoid planting deeper than 1.5 inches, since seeds may struggle to emerge, especially in heavy soil.
Seeding rates differ depending on wheat type and goals, like grain or forage. For winter wheat, rates generally range from 1.1 to 1.3 million seeds per acre.
Soft red winter wheat does well with about 1 to 1.5 million seeds per acre. Soft white winter wheat yields best near 120 pounds (about 2 bushels) of seed per acre.
Spring wheat needs about 25 to 30 seeds per square foot. Plant them 1 inch deep. Increase your seeding rate by 10 to 20 percent when planting late.
This helps improve growth. Plant grazing wheat four to six weeks before grain wheat. Use a higher seeding rate for thicker forage.
Spacing between seeds and rows also changes by use. Sow seeds about 1 inch apart within rows. For grain production, keep rows 6 to 12 inches apart.
Plan to intercrop or companion plant? Make the rows about 8 inches wide. This fits all plants well.
| Wheat Type / Goal | Seeding Rate | Planting Depth | Row Spacing |
|---|---|---|---|
| Soft Red Winter Wheat (grain) | 1,000,000 – 1,500,000 seeds/acre | 1 – 1.5 inches | 6 – 12 inches |
| Soft White Winter Wheat (grain) | 120 pounds (2 bushels)/acre | 1 – 1.5 inches | 6 – 12 inches |
| Winter Wheat in Texas (general) | 30 – 40 pounds/acre | 1 – 1.5 inches | 6 – 12 inches |
| Spring Wheat | 25 – 30 seeds/sq ft | 1 inch | 6 – 12 inches |
| Intercropping or Companion Plants | Adjust regular rate | 1 – 1.5 inches | About 8 inches |
| Forage Wheat | Higher than grain wheat, plant 4-6 weeks early | 1 – 1.5 inches | 6 – 12 inches |
Prepare a firm seedbed to keep seed depth consistent. Use a seed drill or carefully calibrated spreader for accurate seeding rates. Uneven depths or rates may cause patchy growth or reduce yields.
Planting wheat too shallow can dry out seeds or attract birds. Too deep slows emergence and wastes seed. Adjust seeding rates if you plant after the best date to maintain stand density.
Effect of Planting Timing on Wheat Growth and Yield
Planting date strongly affects wheat germination speed, tillering, maturation, and yield. Early planting lets seeds germinate quickly and develop strong roots. Spring wheat tillers start forming 2 to 3 weeks after germination.
This helps tillers grow strong. More tillers support more grain heads.
Late planting slows down this process and shortens the growing season. Winter wheat typically takes 7 to 8 months to mature after planting.
Spring wheat needs about 120 days. Delays push growth stages into warmer months, raising heat stress risk and reducing grain quality.
Yield drops approximately 1 to 3.Yield drops 5 bushels per acre for each delayed planting day. The loss varies depending on location. Try to plant on time.
North Dakota State University says spring wheat loses 1% yield daily past best planting. Delays reduce yield potential fast. Plant early for best results.
If your yield is 50 bushels per acre, a 10-day delay cuts 5 bushels. Yield loss adds up quickly. Don’t wait too long to plant.
Increasing seeding rates helps offset losses from late planting. Each day delayed requires boosting seed amounts by about 1 percent, up to around 1.8 million seeds per acre for spring wheat. That means adding roughly 1 percent more seed per day delays to maintain stands.
Early growth is critical. Gentle, frequent watering encourages fast emergence and root development. Avoid overwatering during growth and late stages.
Too much water weakens stems. Weak stems cause lodging when wheat falls over.
Raise your spring wheat seeding rate by 1% daily after best planting date. This helps cut yield loss. Planting late needs more seeds.
Planting too late narrows the time wheat has to mature before harvest. Winter wheat planted after early November often yields less, even if harvest is still possible. Delayed wheat faces slowed germination and less tillering, which lowers the number of productive heads.
The cost of planting late isn’t just lower yield but also poorer grain quality. Test weight can drop due to heat stress during grain fill. Using specific planting windows stops many problems.
It keeps wheat development steady. This helps from sprouting to harvest.
How to Prepare Soil Before Planting Wheat
Preparing soil well helps wheat seeds sprout strong and grow healthy. You want loose, moist soil with enough nutrients but not too much fall growth. Fall and spring wheat need slightly different care to start right.
Tillage and Soil Testing
Good soil starts with testing to find pH and nutrient levels. Wheat likes soil between 6.0 and 7.0 pH.
So adjust lime or sulfur before planting. Test soil about a month before your planned planting date to give amendments time to work.
After testing, till well to break up clumps and remove old plant material. Tilling helps roots spread and aids water drainage, which wheat prefers.
Fall tilling happens after harvest and before frost hits. Spring tilling should be done when soil dries enough to avoid compaction but before planting.
Fertilizer Application Timing
Timing your fertilizer depends on wheat type. Spring wheat usually gets all needed fertilizer at or just before planting. This gives young plants good nutrition right when they start growing.
For winter wheat, apply some fertilizer in fall. Add more fertilizer in spring as the wheat greens up.
Avoid too much nitrogen in fall to prevent excess growth that raises freeze risk. Use soil tests to guide amounts, typically balanced nitrogen, phosphorus, and potassium.
Weed Control Before Planting
Clear weeds before planting to reduce competition for water and nutrients. Use herbicides or mechanical removal well before planting day. Early weed control helps the small wheat seedlings get a good start without stress.
For winter wheat, control weeds after the previous crop and before fall planting. Spring wheat needs weed control as soon as you prepare the seedbed. Staying ahead with this step improves final yields.
Moisture Management Strategies
Wheat seeds need moist soil to germinate but not waterlogged ground. Avoid heavy rains or irrigation right after tilling; let soil settle first. Aim for planting into soil holding steady moisture at two-inch depth.
Fall planting for winter wheat often relies on natural rain. For spring wheat, watch soil temperature closely. Wait until the soil is 40°F at 2 inches deep.
Check soil moisture too. Good moisture management reduces risk of poor emergence or disease.
Follow these steps to prep soil well for either wheat type:
- Test soil 4-6 weeks before planting to check pH and nutrients.
- Adjust soil pH with lime or sulfur as soil test advises.
- Till soil thoroughly after testing to break clods and remove residues.
- Apply fertilizer based on testing and wheat type timing.
- Control weeds with herbicide or cultivation before planting.
- Time tilling when soil is dry enough to avoid compaction.
- Monitor soil moisture and temperature, plant when ideal conditions occur.
Risks and Adjustments: Late Planting and Winterkill Prevention
Planting wheat too late raises the risk of frost damage and winterkill. Winter wheat needs 6 to 8 weeks to establish before the first hard frost.
Planting after that shortens development time, leading to weak plants that may not survive winter. Planting late leads to thinner stands and lower wheat yields.
Winterkill happens when winter wheat can’t handle freezing temps due to poor growth or damage. Choose hardy wheat varieties to lower your risks. Plant early enough for roots and crowns to grow strong.
Avoid planting closer than 60 days before your area’s first frost to allow enough growth. Keep an eye on weather forecasts to prevent seeding just before a frost or heavy rain.
Here’s a checklist to lower risk with late planting:
- Plant at least 6 weeks before first hard frost
- Use winter-hardy varieties suited to your region
- Target about 1 inch seeding depth for late-sown wheat
- Monitor soil moisture carefully to aid germination
- Avoid planting right before frost or heavy rain
- Apply balanced fertilizer to support early growth
- Thin stands can be reinforced with later overseeding if needed
Once you pass your last safe date, the chances of winterkill rise sharply. Planting too late? You might want to wait for spring wheat.
Winter wheat planted after the recommended window often struggles with pest and disease pressure too. Insect pests like wheat stem maggot grow when plants are stressed. Stress often comes from planting too late.
Following the timeline and risk checklist helps you decide when not to plant. It prevents expensive losses from frost damage or pest infestations.
Late planting demands more care, like choosing the right depth, variety, and monitoring weather closely. This extra effort pays off by improving your wheat’s chances to survive and grow strong.
Special Considerations for Spring vs Winter Wheat Planting
Spring and winter wheat differ mainly in planting time, growth period, and water needs. Winter wheat is planted in fall and needs cold exposure to develop properly. Spring wheat is planted in spring and grows faster to harvest in the fall.
Vernalization and Dormancy in Winter Wheat
Winter wheat requires vernalization, which means it needs cold temperatures to trigger flowering. It must experience temperatures near freezing during early growth to break dormancy. This cold period helps the wheat enter its reproductive stage in spring.
Without enough cold, winter wheat won’t head properly and yields will drop. The plant also goes dormant over winter, pausing growth until the ground warms. This dormancy protects it from cold damage.
Spring Wheat Growth Cycle and Timing
Spring wheat skips vernalization and grows fully from planting until harvest in one season. It is usually sown in early spring after the soil warms to around 50°F (10°C). Growth takes about 90 to 120 days until the fall harvest.
The shorter growth period requires faster development. Spring wheat also tends to be more sensitive to dry conditions because it lacks winter hardening. This means timely watering matters more for spring wheat.
Water and Temperature Needs Comparison
Both wheat types need 12 to 15 inches of water each season. This equals 30 to 38 cm of water for the whole season. Water is important for healthy wheat growth.
Weekly water needs range from 1 to 2 inches, depending on soil and climate. Winter wheat’s cold conditioning helps it handle water shortages better than spring wheat.
Temperatures also differ. Winter wheat grows slowly in cool fall and early spring weather.
Spring wheat grows quickly in warmer spring and summer temperatures. These differences affect water use and timing of irrigation.
| Aspect | Winter Wheat | Spring Wheat |
|---|---|---|
| Planting Season | Fall | Spring |
| Vernalization Needed | Yes (near freezing temps) | No |
| Growth Period | About 240, 270 days (including dormancy) | About 90, 120 days |
| Water Required | 12, 15 inches during season (tolerates shortages better) | 12, 15 inches during season (more sensitive to drought) |
| Temperature Range | Cool in fall and early spring | Warmer spring and summer temps |
| Harvest Time | Summer | Fall |
Understanding these factors helps you choose the right wheat type for your climate. Adjust watering and schedule based on each wheat’s needs.
Harvest Timing Differences
Winter wheat is usually harvested in early to mid-summer after it completes growth in spring. The longer growing period allows it to develop fully before summer heat. Spring wheat harvest occurs in late summer to fall after a shorter growth period.
Early harvest of winter wheat avoids high temperatures and drought stress. Spring wheat harvest comes later in the year. You must watch the weather carefully.
This helps avoid losses from frost or dry spells. Planning harvest around these timelines maintains grain quality and yield.
Spring wheat needs close attention to watering since it lacks winter hardiness against drought.
Step-by-Step Action Plan for Planting Wheat
Follow these steps to plant wheat at the best time. Each step helps ensure good germination and growth.
- Two weeks before planting: Test your soil temperature. Aim for 50°F or higher for spring wheat and 40°F or higher for winter wheat. Use a soil thermometer to check at a 2-inch depth.
- One week before planting: Prepare your soil by tilling lightly. Remove weeds and debris. Check soil moisture, it should be damp but not soggy to encourage seed contact.
- Planting day: Set your seeding depth to 1 to 1.5 inches. Use a seeding rate between 90 and 120 pounds per acre. Adjust it based on seed size and soil fertility. Space rows 6 to 7 inches apart.
- First week after planting: Monitor soil moisture. Water lightly if dry to keep the seedbed moist. Seeds should start sprouting within 7 to 10 days.
- Two to three weeks after planting: Check for uniform emergence. Plants looking uneven might need extra watering or soil changes soon. Do this before they get stressed.
- Before winter (for winter wheat): Fertilize with nitrogen to support tillering. Make sure plants have developed 3 to 5 leaves to reduce winterkill risks.
- Early spring (for winter wheat): Watch soil temperature rise past 40°F to resume active growth. Adjust watering based on rainfall and soil moisture.
- Post-emergence: Scout for pests and diseases regularly. Treat early to protect your wheat yield from damage and stress.
Frequently Asked Questions
How Long After Planting Does Wheat Usually Take to Germinate?
Wheat usually germinates within 7 to 10 days after planting. Soil temperature and moisture both strongly affect germination timing.
Keeping the soil warm helps speed it up. Also, make sure the soil stays moist to help seeds sprout.
Can You Plant Wheat in Poor Soil Conditions?
You can plant wheat in poor soil but yields will likely drop. Adding organic matter and balanced fertilizer beforehand improves soil health and supports better wheat growth.
What Is the Ideal Rainfall Amount After Planting Wheat?
Wheat needs about 1 inch of rain per week after planting for best growth. Rain might not be enough during early growth stages.
You should add irrigation to prevent stress. Watering is important to support young wheat plants.
How Do You Know If Wheat Planting Was Successful?
Look for evenly spaced, green seedlings about a week after planting. Patchy growth or weak plants may signal poor seed-soil contact or dryness during germination.
Can Wheat Be Planted Multiple Times in the Same Field Each Year?
Usually, wheat is planted once or twice a year depending on the variety and region. Overplanting can deplete soil nutrients and increase disease risk.
Does Planting Wheat Earlier Than Recommended Improve Yield?
Early planting can help wheat establish well before frost but risks winterkill if too early. Stick to local planting windows to balance growth and safety.
Before You Go
Plant your wheat when soil temperature and moisture are just right. Using the right seeding depth and rate helps ensure strong sprouts. Start by checking your soil temperature today to plan your planting timing smartly.