How to Install Garden Sprinkler System: A Complete Step-by-Step Guide
Learning how to install garden sprinkler system can save you money and time. You can set it up yourself with some planning and the right tools. Start by designing a layout that fits your garden’s size and shape.
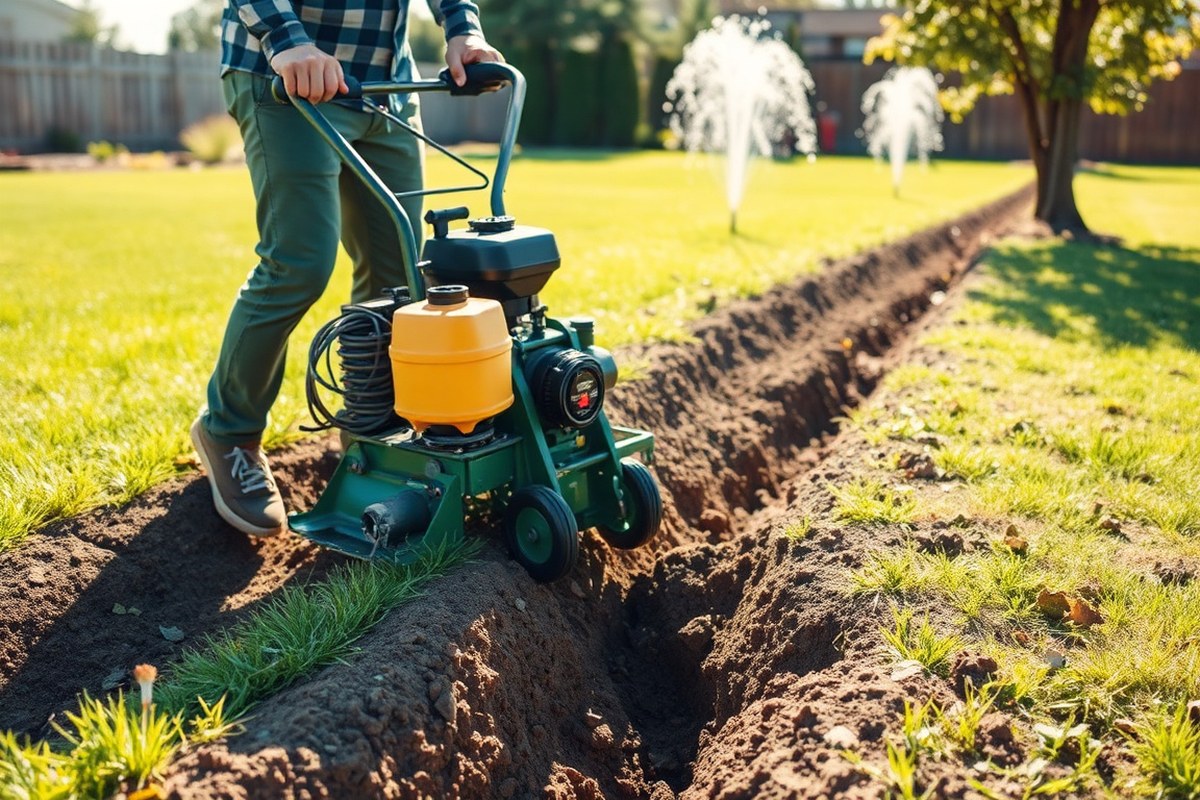
Check your water pressure to ensure the system will work efficiently. Measure flow rate so your zones don’t overload the water supply. Dig trenches carefully with a trenching machine.
Make them 6 to 12 inches deep. Line trenches with landscape fabric.
Installing pipes, valves, and sprinkler heads correctly prevents future leaks or water waste. Make sure you wait a couple of hours before adding water pressure to new PVC pipes. Proper planning and careful installation mean better watering and less water wasted in your garden.
Key Takeaways
- Design your sprinkler layout based on your garden’s shape and plant zones.
- Measure water pressure and calculate flow rate to avoid overloading zones.
- Dig trenches 6 to 12 inches deep and line with landscape fabric.
- Use a gas-powered trencher for consistent trench depth and easier digging.
- Install valves and manifold before connecting pipes and sprinkler heads.
- Wait at least 2 hours after gluing PVC before pressurizing the system.
How to Plan and Design Your Sprinkler System Layout

Designing a sprinkler system starts with dividing your yard into zones based on watering needs. Lawns, garden beds, and trees all require different amounts of water. Group areas that share sun exposure, soil type, and slope to avoid watering conflicts.
Choosing the right sprinkler heads depends on the type of area you’ll water. Spray heads suit small lawns or garden patches.
Rotary heads cover larger grassy areas better. Bubblers work well for flower beds or shrubs, delivering water slowly and directly.
Sprinkler heads should be spaced so their spray overlaps. For example:
| Sprinkler Head Type | Best Use | Spacing Range |
|---|---|---|
| Spray Heads | Small lawn sections, garden beds | 6 to 15 feet apart |
| Rotary Heads | Large lawn areas | 15 to 30 feet apart |
| Bubblers | Flower gardens, shrubs | Placed individually at plant base |
Factors like soil type and sun affect how much water your zones need. Sandy soils drain fast and require frequent watering. Clay soils hold water longer, so space watering out.
South-facing slopes dry quicker than shaded spots. Watch for low areas that hold water; install drain elbows if needed.
Planning your layout pays off by saving time and water. Follow these steps:
- Measure your entire yard and draw to scale.
- Divide the yard into zones based on plant type and sun exposure.
- Choose sprinkler heads that fit each zone’s size and shape.
- Map head locations so sprays overlap to avoid dry spots.
- Plan pipe runs from water source to valve locations and heads.
- Check soil type and slope; adjust zones or watering amounts accordingly.
- Label each zone with its water needs to set timers later.
How to Measure Water Pressure and Calculate Flow Rate
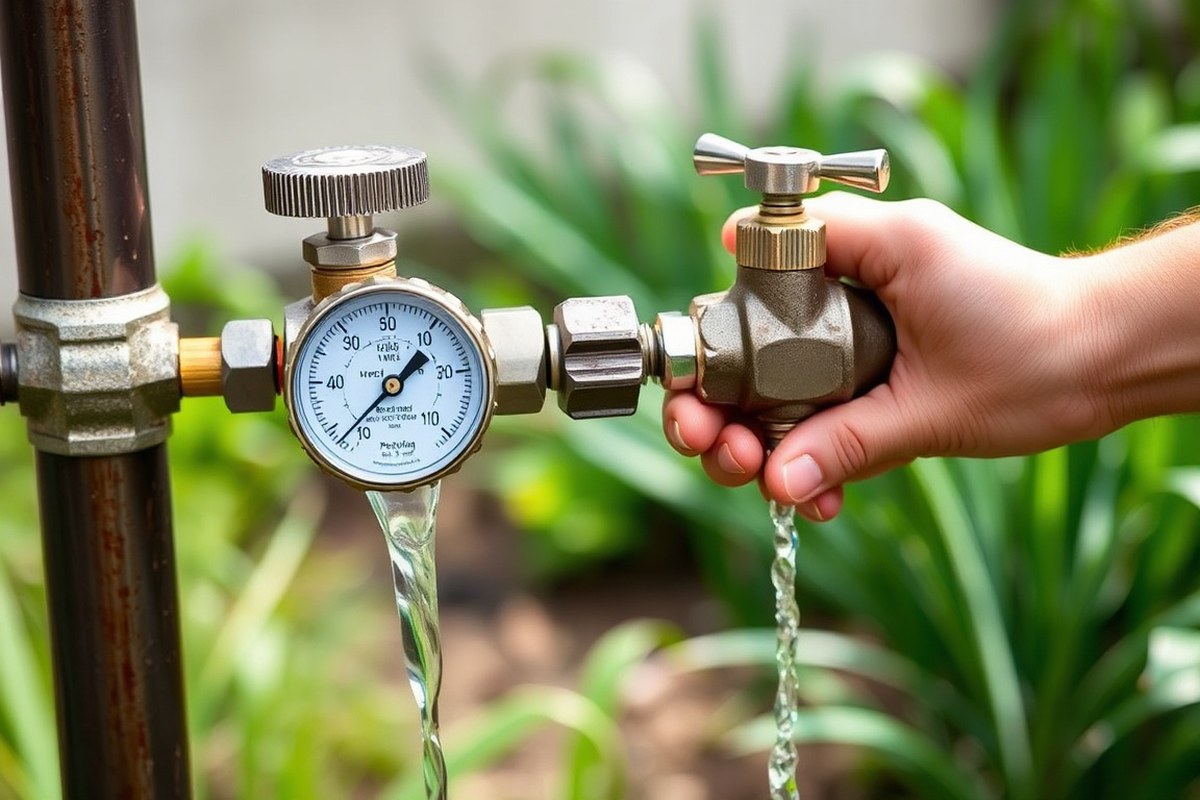
Start by measuring static water pressure with a pressure gauge. Attach it to a faucet or hose bib near your water supply. Make sure no other water runs in the house while testing.
Check the pressure using pounds per square inch (PSI). This keeps the reading steady and accurate.
Next, measure dynamic water pressure while running water from that faucet or hose bib. This shows the pressure under normal system conditions.
Compare this to the static pressure to find the pressure drop when water flows. Large drops can lower sprinkler performance.
To find gallons per minute (GPM), grab a bucket and timer. Put a 5-gallon bucket under the faucet. Turn the faucet to full and time how fast it fills.
Divide 300 by the seconds it took to fill. For example, 30 seconds equals 10 GPM (300 ÷ 30 = 10).
Flow rate is important because sprinklers handle only so many gallons. Going over the limit can cause poor watering. Knowing your flow helps you plan zones right.
Each zone should not exceed this maximum to avoid low pressure or uneven watering. Your water meter size and pipe diameter set limits. But testing actual flow and pressure confirms what your system can do.
Add the GPM ratings of heads you want in one zone. This total shows how much water this zone needs. It helps you divide your system properly.
Keep this total under your measured maximum flow. Suppose your max flow is 10 GPM. Don’t have three sprinklers needing 4 GPM each on one zone.
That adds up to 12 GPM and will overload the system. Instead, split them into two zones.
Watch for pressure losses in the system. They can happen in valves, long pipes, or many heads working at the same time.
This reduces the water pressure at the sprinklers and cuts how far and evenly water sprays. Larger mainline pipes and proper zone planning help avoid these losses.
Don’t measure pressure by attaching gauges to plastic heads or electric valves. Use a metal faucet or hose bib instead. This gives you the right pressure reading.
What Tools and Materials Are Needed for Installation
For garden sprinkler pipes, 1-inch Schedule 40 PVC is a solid choice for main lines. Use 1-inch polyethylene pipe rated for 100 PSI on lateral lines. These pipe types balance cost, durability, and pressure needs well.
You can also use 1 1/4-inch pipe for many heads or zones. This size handles more water and pressure. It’s good if your system is large.
Look for zone valves like the Hunter PGV-101, which fits 1-inch pipes and has flow control. Spray nozzles such as Hunter MP Rotator MP3000 offer even coverage with water efficiency. You need 14-gauge UF irrigation wire with seven strands.
This wire connects valves to the controller well. It ensures proper controller function.
You’ll need a trenching shovel or a mechanical trencher. Dig trenches about 6 to 8 inches deep with these tools. They make trenching easier and faster.
A pipe cutter can trim PVC or polyethylene cleanly so fittings seal well. You’ll need a PVC primer and solvent cement to bond PVC joints securely.
- Measuring tape and marking flags for pipe layout
- Adjustable wrench and pliers for fittings
- Pipe cutter or fine-toothed saw
- Hand shovel or rented trenching machine
- PVC primer and solvent cement
- Wire strippers and electrical tape for wiring
- Safety gloves and eye protection
Considering renting a trencher can save money unless you have many trenches to dig. Trenchers rent for about $60 to $90 per day.
Buying one can cost over $1,000. For a small or average lawn, hand tools work fine but take longer.
Valve manifolds group zone valves together, simplifying valve wiring and maintenance. Always check for local permits before starting your installation.
Safety gear like gloves and eye protection keeps you safe during digging and pipe cutting. The right tools and materials make your installation more straightforward and your system lasting longer.
| Pipe Material | Size | Cost per Foot | Notes |
|---|---|---|---|
| Schedule 40 PVC | 1 inch | $0.85 | Strong, durable, good for main lines |
| Polyethylene (PE) | 1 inch | $0.45 | Flexible, good for lateral lines |
How to Safely Dig Trenches and Prepare the Site
Digging trenches for your sprinkler system needs careful planning. You must find utilities before digging. Dig trenches 8 to 12 inches deep.
Make them 4 to 6 inches wide. Finally, prepare the soil so the pipes lay flat and secure.
Call 811 to Locate Utilities Before Digging
Before touching the ground, call 811 to arrange utility marking. Local utility companies will identify underground gas, water, and electrical lines for free. This step prevents damage, fines, and injury.
Make the call at least 2 to 3 business days before digging. Wait for all utility companies to mark their lines with spray paint or flags. Never guess where lines run.
Select Proper Trench Depth and Width
Trenches should be 8 to 12 inches deep. This depth fits supply pipes, sprinkler heads, and risers without risk of damage. Measure from the pipe’s top to the soil surface.
Trench width depends on pipe size. Usually, 4 to 6 inches is enough for most garden sprinkler pipes. Wider trenches may be needed for large pipes or wiring.
Dig Trenches Safely Using Hand Tools or Machines
You can dig trenches by hand with a shovel or rent a trenching machine. Hand tools work best for small areas or tight spots. Machines speed up the job for large yards.
Rent a gas-powered trencher if you have over 100 feet to dig or compact soil. It can cut trenches at 4 to 12-inch depths in an hour. Ask a local rental supplier about availability and cost.
Follow this safe digging checklist:
- Call 811 and wait for utility markings.
- Mark your planned trench layout on the ground.
- Wear gloves, sturdy boots, and eye protection.
- Dig main lines first, followed by branch lines.
- Use correct shovel technique: dig straight down and clear loosened soil.
- Keep bystanders away from the trenching area.
- Avoid digging near utility markers or obvious obstacles.
- Stop digging and reassess if you hit a hard object.
Prepare Trenches for Pipe Installation
Clear loose rocks and roots from trench bottoms. Uneven soil can kink or damage pipes. Smooth the trench base with a hand rake or shovel.
Put a 1- to 2-inch layer of sand at the trench bottom. Use fine soil if your ground is hard or rocky.
This bedding cushions the pipes. Make sure the trench slopes slightly for drainage if needed.
Double-check sprinkler head spots along trench lines. Adjust digs now to avoid digging twice later. Leave enough space at the ends of trenches for connections and valves.
How to Install Pipes, Valves, and Valve Manifold
Start by choosing a valve manifold that matches your zone count and water flow needs. Proper pipe assembly with solvent welds and crimp clamps prevents leaks and saves headaches. Bury your main line 12 to 18 inches deep.
Keep the valve manifold in a valve box. Make sure the valve box is easy to reach.
Install the Valve Manifold in a Gravel-Lined Box
Pick a valve manifold with one valve per watering zone based on your design plan. Assemble the manifold above ground before lowering it into the valve box. Dig the hole 2 to 3 inches wider than the box.
Put 2 to 3 inches of gravel at the bottom. This helps water drain properly.
Place the assembled manifold inside the box, maintaining a minimum 12-inch depth from the surface. Make sure the valve box top sits level with the ground. This makes it easy to open later.
Avoid having it stick up or sink down. Connect the valves securely and check valve tags or numbers match your zone layout.
Assemble and Lay Mainline Pipes and Laterals
Use 1-inch schedule 40 PVC for your main line. Run it from the water source to the valve manifold. This size handles good water flow.
Cut pipe lengths clean and square with a pipe cutter for solid fittings. Use two crimp rings on each side of fittings.
This locks pipes tight and stops leaks. Crimp rings hold up under water pressure.
Attach 90-degree elbows for pipes coming out of the valve box. These connect the main line to lateral zone lines. Keep pipe runs neat and secure.
Dig lateral pipe trenches 6 to 12 inches deep. Line them with landscape fabric to stop soil from getting in.
This keeps pipes clear and clean. Double-check each pipe label and valve zone before joining to avoid mixing zones by accident.
Connect Zone Valves and Test for Leaks
Assemble zone valves on the manifold before hooking them up to lateral pipes underground. Use PVC primer and solvent cement liberally on fittings to form watertight joints. After assembly, slowly turn on the water to test pressure.
Watch closely for drips or air bubbles in joints. Fix any leaks before burying pipes.
Check all joints, especially around clamped fittings and solvent welds, for leaks. Tighten clamps or reapply solvent where needed. Turn on each zone valve one at a time.
Check all connections for leaks while water is running. Catching leaks early saves time and trouble.
Pressure test before burying to avoid digging up leaks later, it saves time and effort.
Bury Pipes and Secure Valve Box
Bury the main line pipe 12 to 18 inches below ground. This depth protects pipes from damage above ground. It also avoids freezing in cooler weather.
Backfill carefully around pipes to avoid crushing or deforming them, especially at crimp clamp joints. Fill trenches with topsoil last, packing gently to prevent settling.
Once tested and buried, cover the valve box with its lid. Make sure the lid sits flush with the ground. This keeps the box safe and tidy.
This protects valves from the weather and keeps the area neat. Mark the valve box location on your property map.
Use a small visible marker at the spot too. This helps you find it fast later.
- Confirm exact number of zones to select a matching valve manifold.
- Dig valve box hole wider by 2, 3 inches, line it with gravel.
- Assemble valve manifold above ground, then lower into valve box.
- Cut 1-inch schedule 40 PVC pipes square and join with two crimp clamps each side.
- Connect main line to the water source, then to the valve manifold with tight clamps.
- Attach lateral pipes using 90-degree elbows to each valve’s outlet pipe.
- Prime and solvent weld all PVC joints securely to prevent leaks.
- Pressure test each connection by slowly turning water on to check for leaks before burying.
- Bury pipes 12, 18 inches deep and backfill carefully, then secure valve box cover.
How to Install Sprinkler Heads and Connect Wiring
Start by positioning sprinkler heads for full coverage and easy access. Connect each head with swing pipe to the main line or riser. Next, run wires from each valve to the timer, matching color codes.
Flush each system zone before installing the final sprinkler heads. Finally, attach remaining heads using flexible connectors and seal all joints tightly to prevent leaks.
Position and Install Sprinkler Heads Appropriately
Place sprinkler heads evenly around your garden to cover all areas. Space them so their spray patterns overlap slightly for even watering. Using swing pipe lets you fine-tune head positions and absorb ground movement to avoid damage.
Connect each sprinkler head to a 3/8-inch swing pipe or riser from the main line. Screw on the elbow fitting, then attach the sprinkler head securely. Avoid overtightening, which can crack plastic parts or cause leaks.
Run Wires from Valves to Controller Box
Strip ½ inch of insulation from each wire end before connecting to valves and the timer. Keep the common wire separate and use color-coded wires for each valve zone. Route wires carefully to avoid any damage during backfilling.
Connect each valve’s wires to the controller terminals using the matching zone code. Secure wires in the controller box and leave enough slack for future maintenance. Test connections by running short activation cycles after wiring.
Flush System Lines to Remove Debris
Flush pipes before attaching final sprinkler heads to clear dirt and small debris. Leave the last sprinkler head off each lateral line temporarily to provide an open discharge point. Run each zone for several minutes until water flows clean and steady.
Check for cloudy water or particles indicating continued debris presence. Repeat flushing if needed before final head installation. Flushing protects heads from clogs and damage caused by construction dirt or pipe residue.
Install Remaining Heads and Seal Connections
Once flushing finishes, attach and tighten the last sprinkler heads carefully. Use flexible swing joints to ease installation and protect heads from accidental impacts. Apply plumber’s tape or sealant on threads to prevent leaks at joints.
Run a final test by turning on each sprinkler zone. Check if all heads work properly. Look closely for any leaks during the test.
Adjust heads for proper spray coverage and check wiring remains firmly connected. Fix any leaks promptly to avoid future water loss and soil erosion.
- Position heads so spray patterns overlap slightly for full coverage.
- Connect heads to PVC pipe using 3/8-inch swing pipe and elbows.
- Strip wire insulation, match color codes, and connect valve wires to timer.
- Leave last sprinkler off each line temporarily to flush out debris.
- Run each zone until water runs clear with no particles visible.
- Attach final sprinkler heads with flexible connections and seal joints.
- Test each zone fully to confirm coverage, wiring, and no leaks.
How to Test, Program, and Maintain Your Sprinkler System
Start testing your sprinkler system by turning on one zone at a time. Check each sprinkler head for even coverage and watch for leaks or broken parts.
Water sprays unevenly or pools? Adjust the head angle or clear clogs.
Programming the controller or timer matters for saving water and keeping plants healthy. Use the manual to set current time, date, and the watering days. Assign each zone a runtime based on plant needs, usually 10 to 30 minutes each.
Smart controllers skip watering on rainy or cool days. They help save water. This can cut waste by 15 to 30 percent.
Adjusting sprinkler head angles and pressure prevents run-off and wet spots. Turn heads to direct water where plants grow, not on sidewalks or driveways. Check pressure with a gauge.
30 to 50 psi usually works well for most gardens. Too high pressure causes misting and waste, too low makes dry patches.
- Turn on zones one by one to check coverage and leaks
- Set controller time, date, and watering schedule per zone
- Adjust angles so water hits plants, not hard surfaces
- Keep water pressure between 30 and 50 psi for best results
- Clean or replace clogged or broken sprinkler heads
- Review settings seasonally to match weather and plant growth
- Check wiring and valves yearly to avoid leaks and failures
Routine maintenance keeps your system working right and saves money on water bills. Seasonal checks include cleaning heads, inspecting pipes for leaks, and testing valves. Winterizing your system drains water to avoid freeze damage.
Watch for signs like soggy spots or patchy grass. These often mean a leak or blocked head.
Troubleshooting common issues feels easier with regular checks. A zone won’t turn on? Check the valve wiring and power first.
Low flow over many heads usually means too many heads on one zone. It can also mean pressure dropped in the system. Reducing heads or splitting the zone can fix this without extra water waste.
Common Installation Mistakes and When to Call a Professional
Common mistakes include poor pipe connections, wrong sprinkler head placement, and incorrect wiring. Fix leaks by tightening fittings or replacing damaged parts. Adjust heads to prevent dry spots or puddles.
Uneven coverage often happens when heads are too far apart or have different spray patterns. Move heads closer or swap them for models that match your yard’s needs.
Wiring errors show as valves that don’t open or close. Check all connections and test each valve separately.
Before digging, check local codes and zoning rules. Many areas require permits for in-ground irrigation systems to protect underground utilities. Call the local utility or city office to find specific rules and get required inspections.
- Using PVC cement incorrectly, apply only to clean, dry pipes and fittings
- Not measuring water pressure, causing poor system performance
- Failing to mark sprinkler head zones for easy troubleshooting
- Ignoring soil type, which affects water absorption and runoff
- Starting wiring before securing valves, leading to tangled or exposed wires
- Skipping a final system test, which delays identifying leaks or blockages
- Installing heads flush with the ground, which invites damage
Calling a pro is smart if your yard is over 10,000 square feet. Big yards or tricky landscaping need more expert skill. This helps make sure the job is done right.
They handle permits and inspections quicker and avoid costly errors. A pro can also manage tough soil or strict local code demands.
Always locate underground utilities before digging to avoid serious damage or fines.
Sprinkler components vary, so follow manufacturer instructions closely. Good prep work and steady pace save headaches later. Fix small leaks quickly to keep your lawn healthy.
Adjust sprinkler heads soon after installation. This saves water and stops your system from wasting energy.
Step-by-Step Action Plan
Follow these steps to install your garden sprinkler system with confidence. Check each step to see your progress clearly.
- Before you start: Draw your sprinkler layout on paper. Make sure all zones cover your garden evenly without overlapping excessively.
- Day 1: Measure water pressure using a pressure gauge. Confirm it meets your system needs, usually between 30 and 50 psi.
- Day 2: Gather all tools and materials. Double-check you have pipes, valves, sprinklers, wiring, and a timer.
- Day 3: Dig trenches along your planned layout. Your trenches should be about 6 to 12 inches deep and free of sharp rocks.
- Day 4: Lay pipes and connect valve manifold. Tighten fittings and test for leaks by turning water on briefly.
- Day 5: Install sprinkler heads and run wiring to the timer. Check they pop up and rotate smoothly by briefly turning water back on.
- Day 6: Program your timer according to your plants’ water needs. Run a full system test to confirm each zone works without issues.
- After 2 weeks: Check for dry spots or puddles. Adjust sprinkler heads or timer settings to improve coverage and avoid water waste.
Frequently Asked Questions
Do I Need a Permit to Install a Garden Sprinkler System?
You might need a permit depending on your local rules. Check with your city or county building department first.
This helps you avoid fines. It also stops work from getting paused.
Can I Use My Home’s Existing Water Supply for the Sprinkler System?
Yes, most systems tap into your home’s water supply. Install a dedicated shut-off valve for your sprinkler system.
This lets you fix it without cutting all water. It’s easier and faster that way.
How Deep Should I Dig Trenches for Sprinkler Pipes?
Trenches typically need to be about 6 to 12 inches deep. This depth protects pipes from lawn equipment and freezing temperatures in most climates.
What Type of Pipe Is Best for Underground Sprinkler Systems?
Polyethylene (poly) pipe is common for sprinkler systems because it’s flexible and durable. It handles pressure well and resists cracking from ground movement.
How Can I Avoid Clogging in Sprinkler Heads?
Flush the pipes before connecting sprinkler heads to clear debris. Also, install drain valves or elbows where water can collect and cause clogs.
Can I Install a Sprinkler System Myself If I Don’t Know Electrical Work?
You can install pipes and heads. But call an electrician or pro for control box wiring. Mistakes can cause damage or safety risks.
Final Thoughts
Installing a garden sprinkler system takes careful work but gives big rewards. Start by drawing out your plan and measuring your water pressure today. With that done, the rest flows easier, and your garden will thank you.