How to Make Soil Acidic Naturally at Home: 8 Proven Methods That Work
Wondering how to make soil acidic naturally at home? The easiest way is to add natural products like elemental sulfur or organic mulches.
These ingredients gently lower the pH over time without using harsh chemicals. This process helps plants that prefer acidic soil thrive and improves nutrient availability.
Start by checking your soil’s current pH with a simple test kit. Once you know the level, you can decide how much sulfur or peat moss to add. Keep in mind that sulfur works slowly, sometimes taking months, so patience is key.
Using organic materials like coffee grounds or pine needles can also help lower pH naturally. Avoid quick fixes that might shock plants or harm soil health. The goal is a steady, lasting change in soil acidity that supports a healthy garden.
Key Takeaways
- Test your soil pH before adding any acidic amendments.
- Elemental sulfur lowers pH gradually and lasts longer in soil.
- Use 10 to 20 pounds of sulfur per 1,000 square feet based on soil type.
- Add 2-3 inches of peat moss and till 6-8 inches deep to acidify soil.
- Coffee grounds with pH around 6.5 gently acidify soil for sensitive plants.
- Split sulfur applications 1-2 months apart for safe, effective pH reduction.
1. How to Make Soil Acidic Naturally at Home
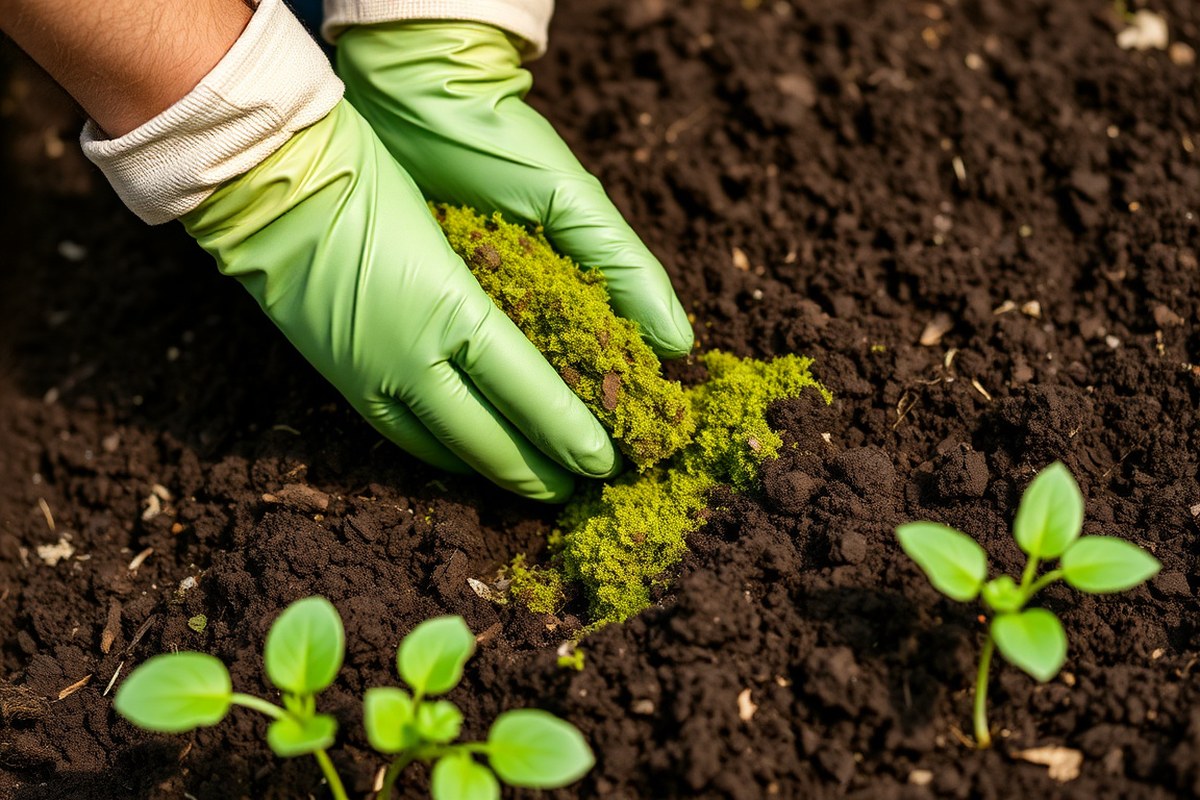
Lowering your soil’s pH naturally helps acid-loving plants grow better. You can use organic materials like peat moss, coffee grounds, or sulfur. These options work safely but take time to show big changes.
Usually, it takes months to a few years. Be patient as the soil improves.
Peat moss is a popular choice because its pH ranges from 2.8 to 4.5. Adding it as mulch or mixing it in soil gradually lowers pH. Coffee grounds also add acidity.
But they work best alongside other methods since their effect alone is mild. Sulfur or iron sulfate changes pH faster and more strongly than organic matter. But both take several months to react fully in soil.
- Test your soil’s pH to know how much it needs to drop.
- Mix peat moss into the top 3 to 6 inches of soil for steady acidifying.
- Sprinkle used coffee grounds thinly over the soil or into compost for extra acid.
- Apply elemental sulfur or iron sulfate following product directions for stronger effects.
- Add a 2- to 4-inch layer of acidic mulch like pine needles or bark around plants.
- Water plants with rainwater instead of tap water to keep adding mild acidity.
- Repeat these steps annually or as needed based on your soil’s pH tests.
Acidifying clay soil can be tricky because dense soil holds alkaline minerals tightly. Adding peat moss helps but may need more time or combined treatments. Using sulfur speeds the process but still takes weeks to months for full effect.
Watch for plant health during changes. Avoid over-applying acidifiers as too low pH harms roots.
The cost varies: peat moss bags run around $5 to $10 each. Sulfur treatments cost $10 to $20 per 10 pounds. Peat moss and coffee grounds deliver steady results over time.
Sulfur changes your soil in three to six months. Watch how your plants respond to changes.
Adjust your routine as needed. Base changes on soil test results for best results.
2. How to Test Your Soil pH Before and After Adjusting
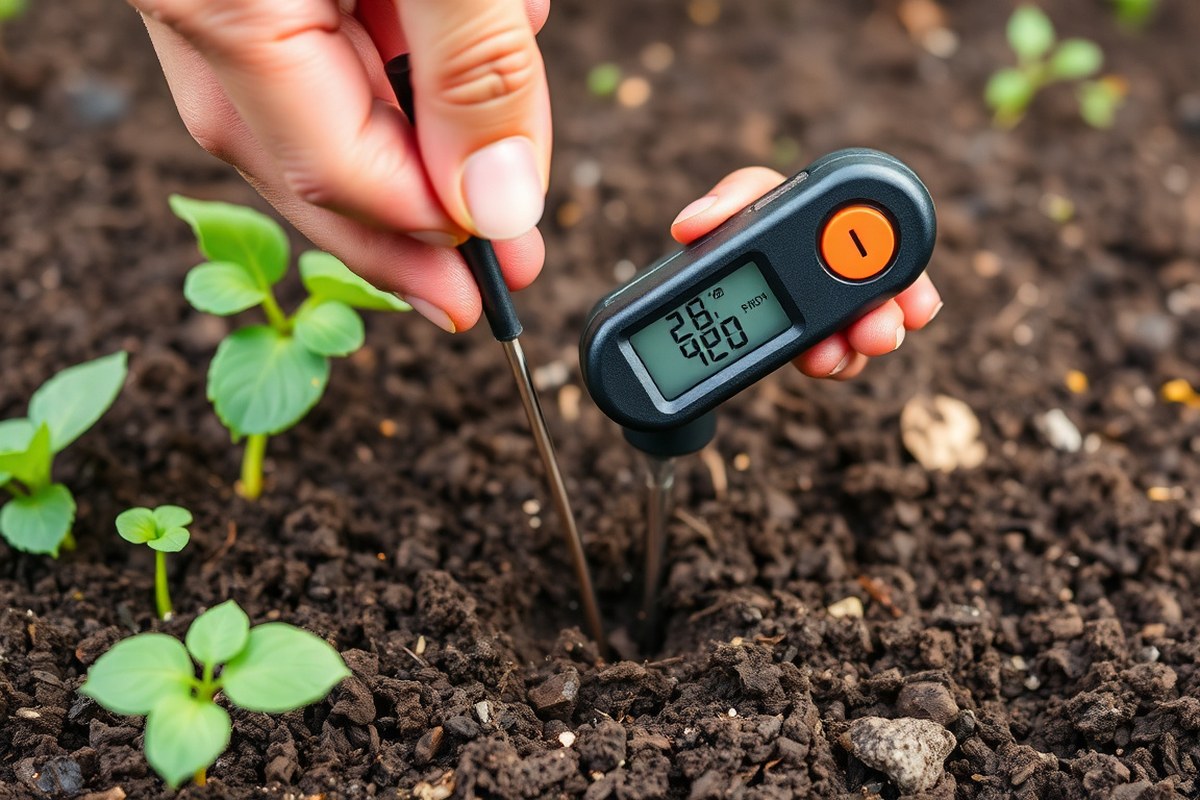
Testing your soil pH at home helps track acidity changes accurately. Use a soil test kit to get results within 60 seconds. Repeat tests during acidification to avoid over-acidifying your soil.
Popular Soil pH Testing Methods
Most home test kits use pH meters or test strips made for soil. These kits come calibrated to provide fast, reliable results in just one minute. They typically include a probe or scooper for soil sampling and color charts for reading pH.
A digital pH meter gives more precise numbers but costs around $20 to $50. Test strips are cheaper, often under $15, and reusable up to 40 times. Both are good enough for regular garden monitoring.
Laboratory tests offer detailed analysis but take longer and cost more, usually $10 to $30 each. Home testing strikes a balance ideal for most gardeners making gradual soil changes.
Step-by-Step Soil Sampling Guide
Proper sampling matters because soil pH can differ in the same yard. Test multiple spots to get an accurate average before and after acidifying.
- Choose spots evenly across your garden or planting area.
- Use a clean trowel or soil probe to take samples 4 to 6 inches deep.
- Mix the samples in a clean bucket to get a composite sample.
- Remove stones, roots, and debris from the mixed soil.
- Follow your test kit’s instructions to prepare the soil for testing.
- Use the pH meter or strips on the prepared soil as directed.
- Record your results and label the samples by location for future reference.
Wait at least 2 to 4 weeks between acidifying treatments before testing again.
Interpreting pH Readings for Garden Needs
Soil pH ranges from 0 (acidic) to 14 (alkaline); 7 is neutral. Most vegetables grow well between 6.0 and 7.5 pH. Acid-loving plants prefer a range of 4.5 to 6.0.
If your soil reads above 7, adding acidifiers like sphagnum peat or sulfur can lower the pH slowly. Keep testing to stay in the right range without harming plants or microbes.
Too acidic soil below 5 can harm roots and beneficial bacteria. Adjust in small steps, retesting regularly to find the best balance for your specific plants.
3. Choosing the Right Natural Acidifier for Your Soil Type
Soil texture changes how fast and well your soil becomes acidic. Sandy soils let acidifiers work fast because they drain well. They hold fewer minerals that can neutralize acids.
This helps acidifiers change pH quicker. Clay soils have fine particles that hold onto alkaline minerals tightly. So they resist acidification and take longer to change.
Loam soils, which are a mix of sand, silt, and clay, acidify at a moderate rate. These soils balance drainage and nutrient hold. Acidifiers work better here than in clay soils.
But they work slower than in sandy soils. Knowing your soil type will help you pick the right acidifier and how much to use.
The following table compares typical acidifier use for sandy, loam, and clay soils. These recommendations are based on soil texture.
They also consider acidifier amounts per 1,000 square feet. This helps lower pH in a meaningful way.
| Soil Type | Sulfur Amount (lbs/1,000 sq. Ft.) | Acidification Speed | Resistance |
|---|---|---|---|
| Sandy Soil | 10 | Fast | Low |
| Loam Soil | 13 | Moderate | Medium |
| Clay Soil | 20 | Slow | High |
Elemental sulfur is a good natural acidifier choice. It’s great for clay soils because it reacts slowly. It also lasts longer in the soil.
For sandy soils, using less sulfur speeds up acidification without overdoing it. Loam soils need a middle amount to balance cost and effect.
It’s harder to acidify clay because it often contains alkaline minerals that neutralize acids quickly. Expect to apply acidifiers more than once over a growing season. Check your soil pH every 3 to 6 months after applying and adjust as needed.
Knowing your soil texture means you can pick the right acidifier amount. Using too little in clay won’t lower pH enough. Too much in sandy soil can harm plants.
Test your soil first. Apply the right acidifier product. Then retest over time to get proper acidity for plants.
4. Elemental Sulfur and Iron Sulfate for Lasting Soil Acidity
Elemental sulfur and iron sulfate each acidify soil but at different speeds. Sulfur changes pH slowly and its effect lasts longer. Iron sulfate acts fast but fades sooner.
To lower soil pH from 7 to 4.5, apply around 2 pounds of elemental sulfur per 100 square feet. Choose iron sulfate if you need quick pH changes.
How Elemental Sulfur Lowers pH over Time
Elemental sulfur changes soil pH slowly because soil bacteria turn it into sulfuric acid. This process needs warmth, moisture, and good aeration to happen. Changes in soil acidity may take weeks to months.
Some cases might need up to a year to show results. Be patient as soil chemistry shifts gradually.
You can use sulfur on any soil type. Its slow effect means plants adjust to acidity gradually, avoiding shock. Applying sulfur well before planting lets this process finish by growing time.
Using Iron Sulfate for Faster Results
Iron sulfate lowers pH faster than elemental sulfur, usually working within 3 to 4 weeks. It also supplies iron, helping plants that show iron deficiency or chlorosis. Iron sulfate is pricier and doesn’t last as long in soil as sulfur does.
It takes more iron sulfate to lower soil pH compared to sulfur. Use this product when you want quicker acidity changes or need to fix iron problems fast. It’s suitable for existing plants but be careful not to overapply.
Application Tips and Precautions
Applying sulfur or iron sulfate correctly helps avoid plant stress or damage. Follow soil test recommendations for the right amount based on your current pH and soil type. Avoid heavy applications in cold, wet soils where bacteria work slowly.
Wear gloves and keep both products away from children and pets. Water the soil after application to start the chemical reaction.
But don’t overwater or cause runoff. Monitor soil pH over months to adjust doses gradually.
For best results, start with elemental sulfur if planting new beds, allowing months for acidification. Choose iron sulfate when plants need a faster boost or have yellowing leaves from iron deficiency. Follow these steps to apply elemental sulfur or iron sulfate safely:
- Test your soil pH to determine how much acidifier to add.
- Calculate the required elemental sulfur or iron sulfate amount.
- Spread the product evenly over the planting area.
- Water the soil lightly to activate the acidifying process.
- Apply sulfur again if soil pH is not low enough after months. For iron sulfate, try another dose if results don’t appear in weeks. Check your soil pH to decide on repeating applications.
- Wear gloves and avoid direct contact with skin or inhalation.
- Keep children and pets away from the treated area until dry.
- Retest soil pH periodically to track progress and avoid overacidification.
5. Using Organic Mulches and Amendments to Naturally Acidify Soil
Organic mulches like pine needles, coffee grounds, and peat moss slowly lower soil pH. They do this gently over time. This helps acid-loving plants thrive.
They slowly release acids as they break down. This process adds organic matter that helps acidify soil naturally.
Peat Moss Usage and Benefits
Peat moss is the decomposed remains of sphagnum moss from acidic bogs. It has a pH between 3 and 4.5, which makes it naturally acidic. Adding peat moss to soil will slightly lower pH while improving water retention.
To use peat moss, spread a 1 to 2 inch layer over your garden bed. Then, gently till it 6 to 8 inches deep. This mixes it well with your soil.
This mixes the peat moss with your existing soil for gradual acidification. You can also mulch around plants with peat moss to maintain acidity.
A 3-cubic-foot bag costs about $10 to $15. This amount covers 10 to 20 square feet of garden space. Avoid using excessive amounts since peat moss can compact over time and affect soil structure.
How Pine Needles and Wood Chips Affect pH
As pine needles break down, they release organic acids that lower soil pH. They don’t make soil very acidic quickly but help maintain mild acidity over months or years. Wood chips from pine and other acid-loving trees have a similar effect.
Add a 2 to 3 inch layer of pine needles or wood chips as mulch. Use this around acid-loving plants for best results. It keeps the soil steady and healthy.
Keep the mulch a few inches away from stems to avoid rot. Over time this mulch will also improve soil organic matter and moisture.
Use these mulches if your soil is neutral or slightly alkaline. They prevent strong chemical changes in your soil.
This protects your plants from stress. They support steady, natural acidification without shocking plants.
The Truth About Coffee Grounds
Coffee grounds have a pH near 6.5, which is slightly acidic but close to neutral. They can help gently lower pH but aren’t the strongest acidifiers. Grounds also add nitrogen, which feeds soil microbes and plants.
You can sprinkle used coffee grounds thinly over soil or add them to compost. Avoid piling thick layers because they can create a water-resistant crust and slow air flow. Blending grounds with other organic matter is best for balanced acidity and nutrition.
Though coffee grounds help with mild acidification, they’re not reliable alone to adjust pH significantly. Pair them with peat moss or acidic mulches for better results.
- Add 1-2” peat moss and till to 6-8” depth for garden beds
- Mulch around plants with 2-3” pine needles or wood chips
- Sparingly spread coffee grounds over soil or into compost
- Keep mulch a few inches from plant stems to prevent rot
- Use these methods for slow, natural acidification
- Combine amendments for stronger pH changes
Don’t rely solely on organic mulches for fast pH changes. They work slowly over time.
6. Acidifying Fertilizers and Compost Practices for Soil Health
Ammonium and urea-based fertilizers are strong natural acidifiers for soil. They lower soil pH by releasing hydrogen ions during nitrogen uptake. Using these fertilizers can boost nutrient availability for acid-loving plants like azaleas or potatoes.
Compost and organic matter affect soil pH depending on their content. Materials rich in organic acids, like oak leaves and pine needles, help acidify soil slowly. Mixing these into your compost makes it a mild acidifying amendment.
You can find organic sulfur fertilizers, such as TIGER 90CR, at most garden centers. These acidify soil more gradually than ammonium fertilizers and help maintain long-term acidity. They’re especially useful if you have clay or limestone soils that resist pH changes.
- Use acidifying fertilizers at planting time or early growth stages.
- Apply 1 to 2 pounds of ammonium sulfate per 100 square feet for light acidification.
- Add pine needle or oak leaf mulch in a 2- to 3-inch layer. This layer helps acidify soil naturally. Spread it evenly to cover the soil surface.
- Test soil pH after 4 to 6 weeks to check fertilizer effects.
- Wear gloves when applying sulfur fertilizers to avoid skin irritation.
Sandy soils change pH quickly and need less product. Clay soils or those with high limestone need more acidifier or repeated applications. Test your soil often to avoid over-acidifying, which can harm plants.
Follow package instructions carefully to apply acidifying fertilizers safely. Too much fertilizer can burn plants or disrupt soil microbes. Organic compost with acidifying materials works slowly.
It reduces risk but takes longer to change pH. Be patient for significant pH lowering.
7. Common Mistakes and Safety Tips When Acidifying Soil at Home
Acidifying soil too much can hurt your plants and soil life. Over-acidification may lock up essential nutrients, making them unavailable to roots. This leads to poor plant growth despite the soil feeling ‘more acidic.’
Signs your soil is still too alkaline include yellowing leaves and slow growth. Test the soil pH before adding acidifiers when plants show symptoms. Avoid adding acid in windy or rainy weather to prevent uneven application and runoff.
Here are some common mistakes and safety tips to keep in mind:
- Applying too much sulfur or acidifier at once.
- Not testing soil pH before and after changes.
- Ignoring plant-specific pH needs.
- Using acidifying products near sensitive plants accidentally.
- Failing to water soil after applying amendments.
- Not wearing gloves or protective gear when handling chemicals.
- Skipping label directions on store-bought acidifiers.
Apply amendments like elemental sulfur slowly, in small amounts. Use about 1 to 2 pounds per 100 square feet.
Test pH after 4 to 6 weeks. This waiting period lets the soil adjust without shocking plants.
Always water your soil lightly after treatment to activate acidifying agents. Gloves protect your hands from irritation, especially when using chemical products. Store acidifiers safely out of reach of children and pets.
8. Which Plants Need Acidic Soil and How to Match pH for Best Growth
Certain plants grow much better in acidic soil. Blueberries, for example, need a soil pH between 4.5 and 5.5 to thrive. Other acid-loving plants like raspberries and blackberries do well in slightly less acidic conditions, around 5.5 to 6.5.
Most vegetables prefer a nearly neutral pH, usually between 6.5 and 7.0. Potatoes are an exception, they do better in soil that is slightly acidic, around 5.5 to 6.5. Pumpkins grow fine in soil ranging from slightly acidic to neutral levels.
Matching pH to the plant’s needs helps them absorb nutrients easily. Soil that is too acidic or too alkaline can block nutrient uptake. That slows plant growth and lowers your yield or flower quality.
| Plant | Optimal Soil pH Range |
|---|---|
| Blueberries | 4.5 – 5.5 |
| Raspberries | 5.5 – 6.5 |
| Blackberries | 5.5 – 6.5 |
| Potatoes | 5.5 – 6.5 |
| Camellias | 5.5 – 6.5 |
| Pumpkins | 6.0 – 7.0 |
You want to keep your soil pH in the target range as closely as possible. Testing soil pH regularly makes adjustments easier. For blueberries, the soil should never rise above 5.5, or their growth may slow.
Many typical garden vegetables don’t need soil acidity below 6.5. Try not to acidify soil too much if your goal is to grow tomatoes or beans. A mildly acidic level of about 6.0 to 6.5 is usually enough to help nutrient uptake without harm.
Warning: Over-acidifying soil can hurt plants that prefer neutral pH, causing nutrient issues and stunted growth.
Sphagnum peat moss works great for container plants that love acid soil. It naturally lowers pH and holds moisture well. You can mix it into your potting soil to keep blueberries and camellias happy indoors.
Step-by-Step Action Plan to Naturally Acidify Your Soil
Follow these steps in order to adjust your soil pH safely and track your progress well.
- Before You Start: Test your soil’s current pH level first. Use a DIY kit or hire a pro service. This helps you know your soil’s exact condition.
- Week 1: Pick your natural acidifier based on soil type. Use elemental sulfur for sandy soils. Choose iron sulfate if your soil is clay.
- Week 2: Apply the acidifier evenly according to package instructions. Mix it into the top few inches of soil.
- Week 4: Put organic mulch like pine needles on your soil. You can also add oak leaves instead. This slowly makes soil more acidic and improves texture.
- Week 6: Use acidifying fertilizers such as ammonium sulfate to support plant nutrition and maintain acidity.
- Week 8: Test your soil pH again to measure the change. Adjust your plan if the desired acidity is not reached.
- Ongoing: Keep adding acidifying compost every year to your soil. Add mulch too for healthy acids in soil. This supports plants that like acidic conditions.
Frequently Asked Questions
What Household Items Can I Use to Make Soil Acidic Naturally?
Coffee grounds and sphagnum peat moss are common natural items you can use. They lower the soil’s pH slightly when mixed in or used as mulch. This change makes the soil more acidic over time.
How Often Should I Apply Natural Acidifiers to Maintain Soil Acidity?
Usually, you should check soil pH every few months and reapply acidifiers as needed. Natural methods like compost and peat moss work slowly. So steady small additions are best.
Can Rainwater Help Lower My Soil’s pH Naturally?
Yes, rainwater is slightly acidic and helps lower soil pH gradually. Using rainwater for irrigation can assist in making soil more acidic over time without harmful chemicals.
Does Adding Leaves or Pine Needles Acidify Soil Effectively?
Yes, pine needles and fallen leaves add organic acids as they decompose. They slowly lower soil pH and improve soil texture. But they work over a longer time.
Is It Safe to Use Vinegar to Acidify Soil at Home?
Vinegar can temporarily acidify soil but may harm plants if overused. It’s better for spot treatments and should be diluted carefully before applying to soil.
How Long Does It Take for Sulfur to Lower Soil pH Naturally?
Sulfur needs weeks or months to lower soil pH. Soil bacteria must first turn it into acid. Patience is key, and testing soil pH helps track progress.
The Bottom Line
Your soil’s pH affects plant health, so keep it right for your garden. Start testing your soil this weekend to know what you need. Taking that first step helps your plants grow strong and happy.